
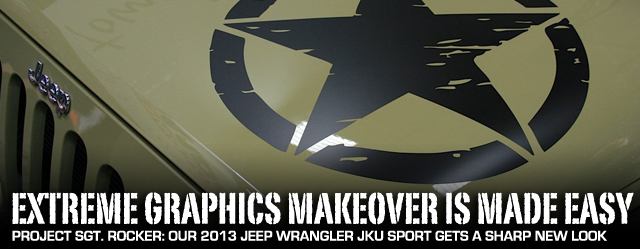
 One of the project vehicles at Off Road Xtreme is a 2013 Jeep Wrangler Unlimited (JKU). It’s coated in the factory Commando Green, and motivated by the 3.6L DOHC V6 and five-speed auto transmission. Although it has A/C and a decent sound system, it was not plushed out when ordered. The Wrangler is the Sport model, so there’s plenty of room for growth, and we have some pretty big plans for it.
These plans include a build-up done in phases, the first of which features a moderate lift suspension kit, wheels and tires that will give it enough of a boost to allow for some seriously adventurous off-road activity. With that new suspension and rolling stock will come necessary drivetrain changes such as new gearing and driveshafts to help turn the larger tires and alleviate excessive driveline angles.
 Changes such as upgraded bumpers and body armor to protect the sheet metal and undercarriage from severe dings, dents and mangles during said adventures will also be in order. An easily removable, yet durable soft top for warm-weather road trips is on the list as well.
Interior creature comforts are something we’ve been considering too, but hey, this is a Jeep and we don’t want to get carried away. However, such things as electronic communications, guidance and security equipment are also on the docket for Sgt. Rocker.


Spray the surface where the decal is to be applied with soapy water, then peel away the backing to expose the adhesive. Spray the underside of the decal to help make installation easier. Place the decal in the desired position and spray the transfer tape to help release the tape. Use the squeegee to remove any liquid and air bubbles from under the decal and the transfer tape.
Cost Effective And Attractive
We are going to take this in stages — just like you would — to show just how well a Wrangler JKU can be up-fitted without spending a fortune or going overboard. With that said, our first order of business was a graphic makeover.
We thought about paint, but that would be hard to remove if we wanted a change-up at a later date. So we looked toward vinyl graphics as an alternative to something as permanent and costly as paint.

However, what caught our eye from the very beginning was its appealing XT Graphics Kits. The company offers various kits for Wrangler YJ, TJ and JK models from ’87 to ’14; but some of the graphics could be applied to any vehicle.
The decal kits come in an assortment of colors such as Black, Matte Black, Silver and White; and include designs like the Oscar Mike star, Hood Accent, Door Accent, Rocker Panel Stripes w/Logo, Windshield Banner, and an assortment of other graphic touches such as the Flip Me Over decal.
Ryan Huck, Social Marketing Specialist at Extreme Terrain told us, “A great example is our hood decal. This (paint) could cost a few hundred dollars … you also are down a vehicle for a few days while they complete the job.” Huck continued, “For only $69.99, you can get our decal (Oscar Mike Star Kit) and over the weekend in your garage get the same look.”


After making sure all the liquid and air bubbles were squeegeed out and the decal was dry and properly adhered to the vehicle surface, the transfer tape was carefully peeled back. The final product looks sharp.
One Step At A Time
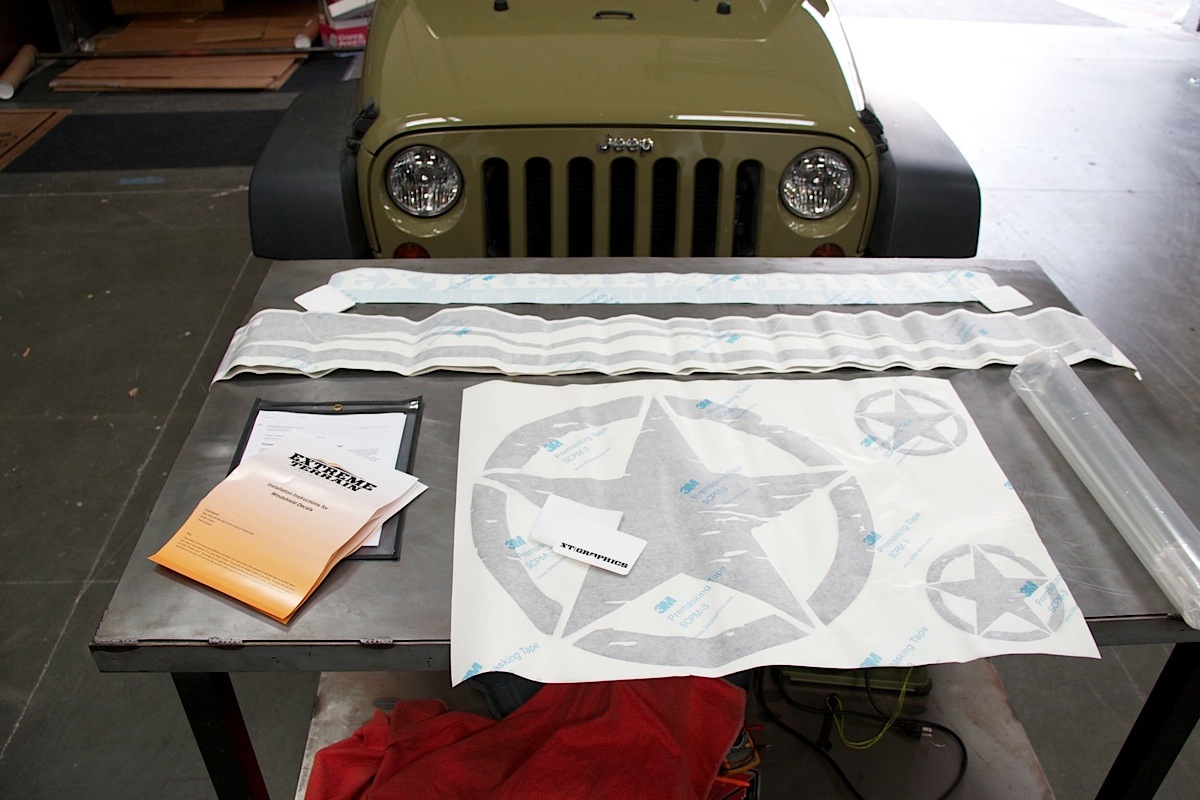
We chose the Extreme Terrain XT Graphics Oscar Mike Star Kit, Door Accents Kit, Rocker Panel, Stripe w/Logo, and Windshield Banner in Matte Black for the 2013 Wrangler JKU. We also ordered the Windshield Protection Film, which is made from clear 5 mil material and designed to protect the glass from chips created by flying debris.
Before we laid all the decals and tools out, we began prep on the Jeep. First the entire body of the Jeep was washed well to ensure proper adhesion of the decals.
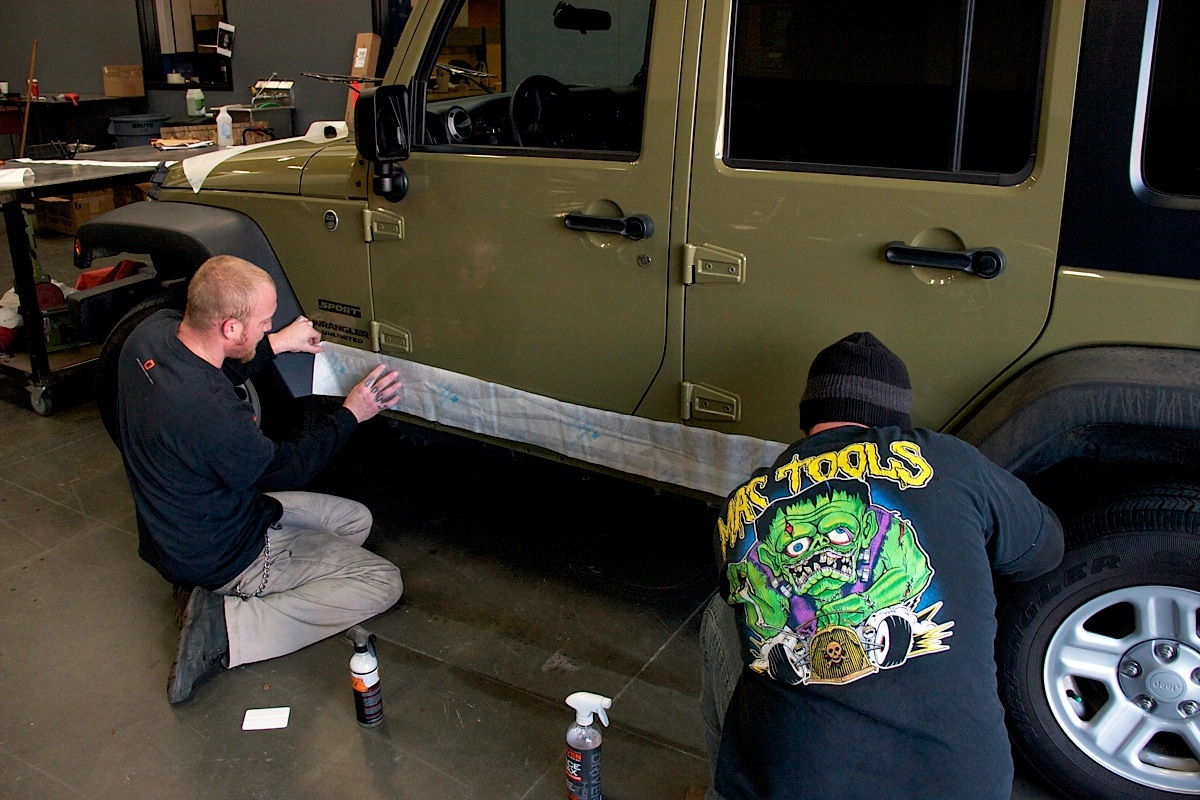
Having an assistant comes in handy during many stages of the graphics application process, especially when placing large pieces such as the rocker stripes.
Be sure to remove any wax from the vehicle’s body surfaces using a cleaner. It doesn’t hurt to give it a second wash with clean water in case anything was missed and to rinse away any chemicals left behind.
All the decals (except the Windshield Protection Film) can be applied using the same basic technique. Be sure to install the decals out of the direct sunlight, and having an assistant is very helpful.
Spray, Peel And Squeegee
We filled our spray bottle with a mixture of water and liquid dish soap (Extreme Terrain suggests baby shampoo and using about four to five large drops per 32 ounces of water). Then we sprayed the surface area of the Jeep we were working on generously with the soap and water mixture.
Our graphics are meant for harsh outdoor use for up to eight years. – Ryan Huck, Extreme Terrain.

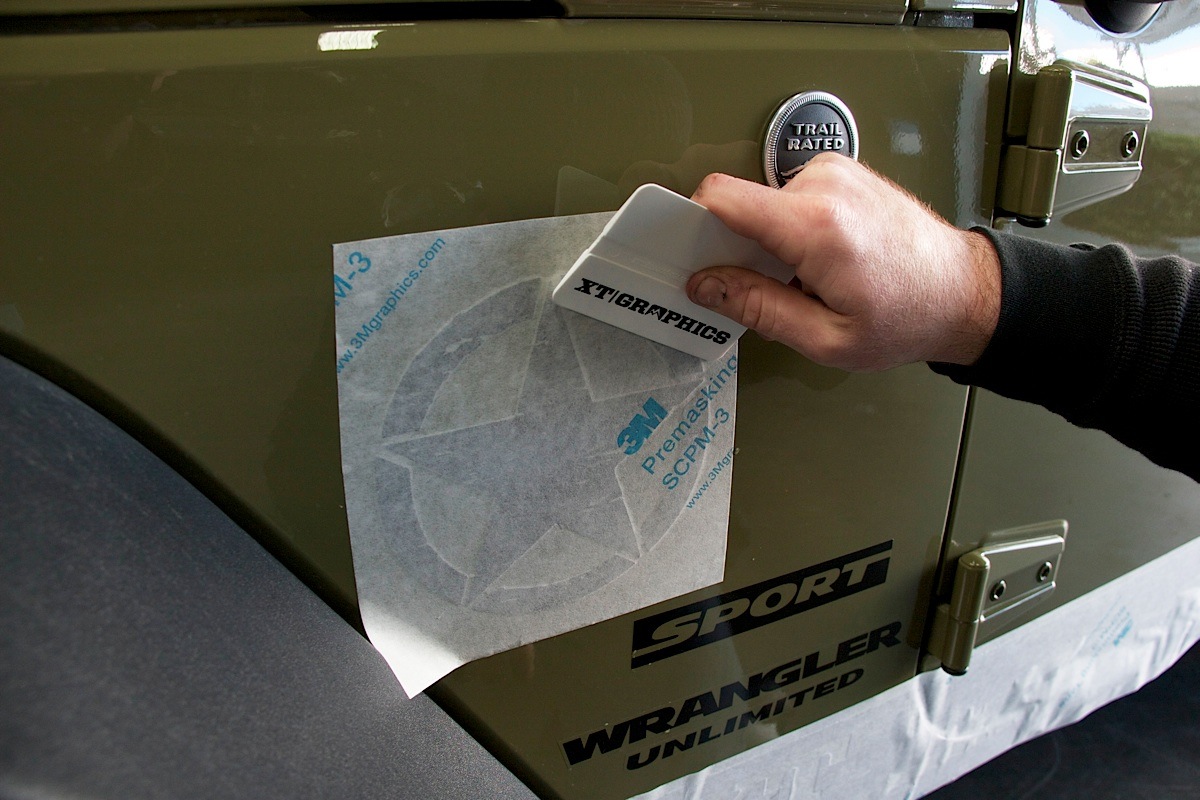
The backing was peeled from the decal, exposing the adhesive. The installation was made easier by also spraying the back of the vinyl. We did this as the backing was being removed. Once the decal was placed on Jeep, we were able to move it into exactly the right position because the soap and water solution sprayed on the sheet metal surface made the decal slippery and easily moveable.
When we had the decal just where we wanted it, we began gently using the edge of the plastic squeegee to push liquid and air bubbles toward the outer edges of the decal. We also sprayed the transfer tape (the masking tape-like film covering the vinyl) with the soap and water solution. That helps the transfer tape release from the topside of the decal once the decal has been properly applied.
Pull Ever So Gently
After the soapy water solution and air bubbles have been squeegeed out and the transfer tape has been wet for about 10 minutes, you can begin to ever so slowly and gently remove the tape. It must be pulled slowly at a sharp angle back away from the decal.
Extreme Terrain recommends placing the squeegee behind the tape, helping to apply pressure to the decal and holding it tightly against the tape to keep the decal from lifting with the tape. If the decal begins to lift with the transfer tape, the decal is probably not dry enough yet to adhere to the vehicle’s metal surface. Carefully press it down again and let it dry longer.


The identical set of steps and technique used on the Oscar Mike star decal for the hood was used to secure the Rocker Stripes above the rockers (lower left photo) and the smaller Oscar Mike stars (top photo) on the front quarter panels of the Jeep. The squeegee can be used carefully to help peel back transfer tape (lower right photo) once the decal is completely dry and properly affixed to the vehicle's surface.
When the tape was completely removed, we began to use the squeegee again, but this time we covered the squeegee in a felt-like cloth supplied in the kit that will not scratch the vinyl. At this time, you may want to use a needle to poke a small hole in the decal near the edge of any bubbles to release trapped air. Dragging even the felt-covered squeegee on the stuck-down vinyl may wrinkle it instead of moving air bubbles.
Windshield Protection
As with the vehicle’s sheet metal, the windshield must be absolutely clean and it must be kept wet. Spray the soapy water solution generously onto the windshield. The film should slide or float into place. Once in place, we gently removed the clear liner from the thicker protection film.
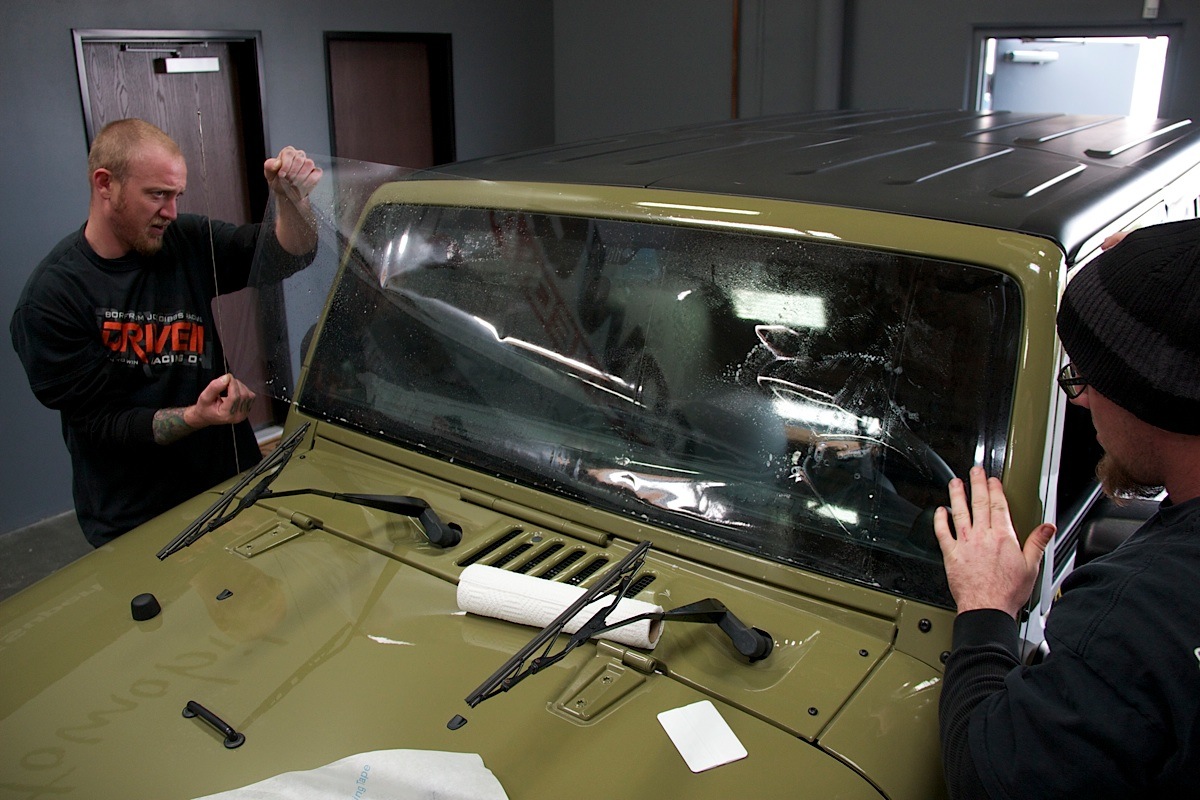
After soaking the film and the windshield in soapy solution, the film was carefully placed into position.
After the liner was removed, the protection film was properly positioned and tacked onto the windscreen. Now we soaked the outside of the film with the soapy water to provide lubrication and help the squeegee easily glide over the film.
We then used the felt-wrapped squeegee to press down the film, squeezing the water out from underneath it, and affix the film to the glass. To accomplish this, we began in the center and moved the water out toward the edges.
Use towels to absorb the fluid that collects at the edges. A blow dryer can be used to help accelerate the drying process and the removal of moisture at the edges after the film has been squeegeed and applied.
Tips And Tricks
Complete moisture evaporation times can vary with temperature and sunlight exposure. Large spots of installation solution found trapped underneath the film can either be pushed to the edge if they are close enough, or released by using a needle to puncture the edge of the bubbles. Wash the film surface weekly using non-ammonia window cleaner to keep it cleaned well.
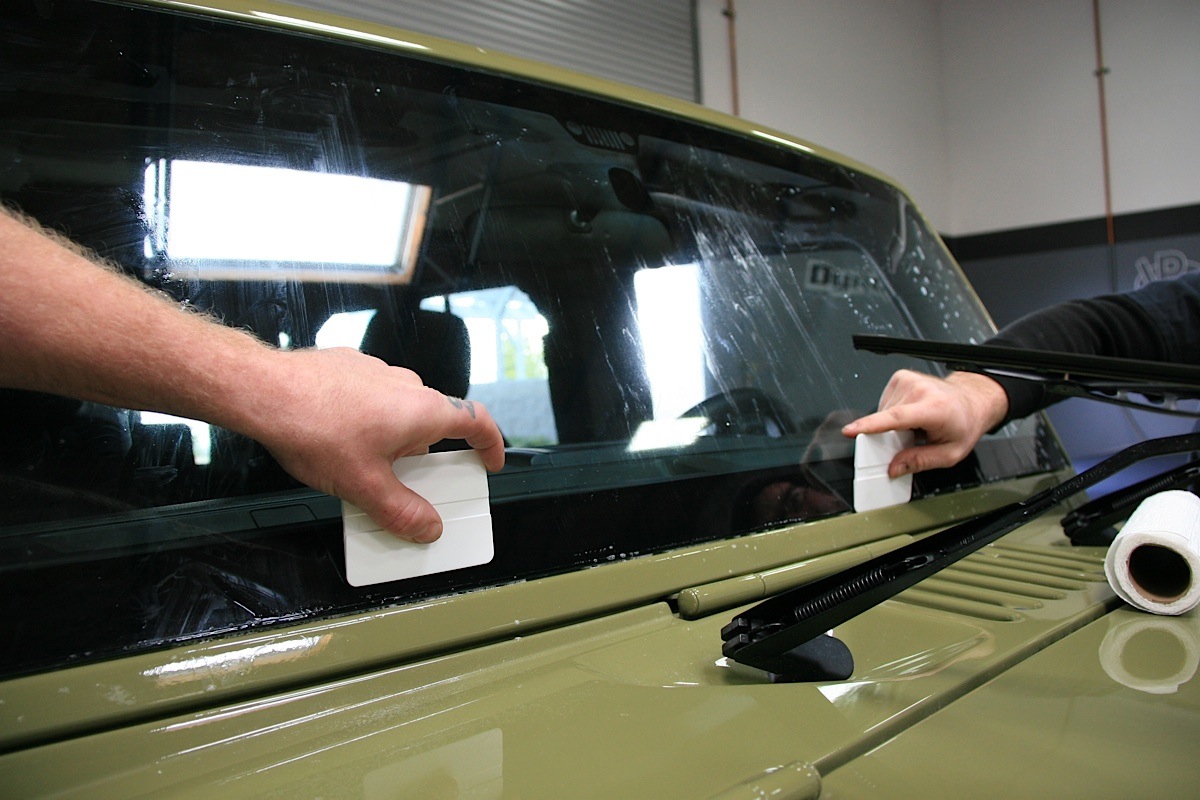
Working from the center and moving outward to the edges, the majority of the liquid and air bubbles was removed from under the protection film.
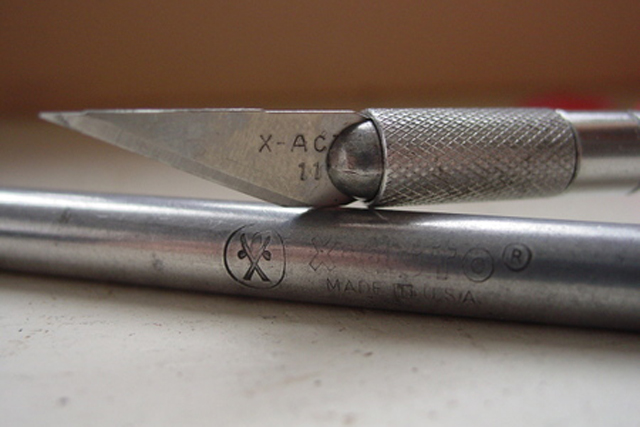
A blow dryer can be used to soften the film in order to make it fit to the curvature of some windshields and to remove fingerprints. The dryer can also be used to help conform decals to curves of body sheet metal, but take care to not overheat as it may shrivel or wrinkle vinyl. When applying rocker stripes the X-Acto knife can be used to trim the transfer tape/decal after its dry to conform to door openings.
This is an easy way to give your Jeep a unique look for less than $100 … – Ryan Huck, Extreme Terrain.
It will take several hours of drying time before cleaning the vehicle is advisable. A quick detailer can be sprayed on for the initial cleanup, then hand wash it for at least a few days after application. Do not power wash vinyl or wax vinyl. Allow at least 24 hours before driving or washing the vehicle to allow the windshield protection film to firmly set.
Sharp Looks
For a moderate price we were able to crisp up Sgt. Rocker’s uniform. Complete application of the Extreme Terrain XT Graphics took just a few hours, and the 2013 Jeep Wrangler JKU was ready to rock by lunchtime the next day.


The high-quality vinyl graphics, while easy to change at our whim, are quite durable. Ryan Huck told us, “Our premium cast vinyl is equal to and often far superior to OE vinyl. It’s meant for up to eight years of outdoor use and has no problem getting dirty, wet, or baking in the sun.”
The Oscar Mike stars fit right in with the military style we were looking for on the Commando Green JKU project vehicle, and the rocker stripes are an appealing addition to any Wrangler. Extreme Terrain’s window protection film will also offer a shield of sorts to help armor the Jeep’s front glass against damage.
Now that it’s looking sharp, we will begin the mechanical muscle build up. We still have a long way to go with Project Sgt. Rocker, but we’re looking forward to the next step. Stay tuned to Off Road Xtreme to see what surprises we have in store!


