
For the off-roader, great brakes are extremely important. When most people buy a new off-road vehicle, they have the tendency to start modifying it almost immediately to improve its off-road performance. One of the first upgrades is often a set of custom wheels and larger tires. Next might come some custom bumpers, a winch, and any number of other accessories.
That all means more weight. Bigger tires and wheels will introduce the stress of a greater rolling mass on the brakes, and that can diminish stopping effectiveness alone, but adding even more weight to the vehicle compounds the stress on a factory brake setup.
As well as more weight placing additional stress on a set of factory spec brakes, off-roaders use their vehicles in unusual situations that can be extra hard on brakes. Often, the brakes are used to hold the vehicle on a steep incline during trail driving, or feathered to keep a vehicle creeping slowly down a precipitous slope. In any case, you want the brakes to be superbly sturdy in off-road situations.
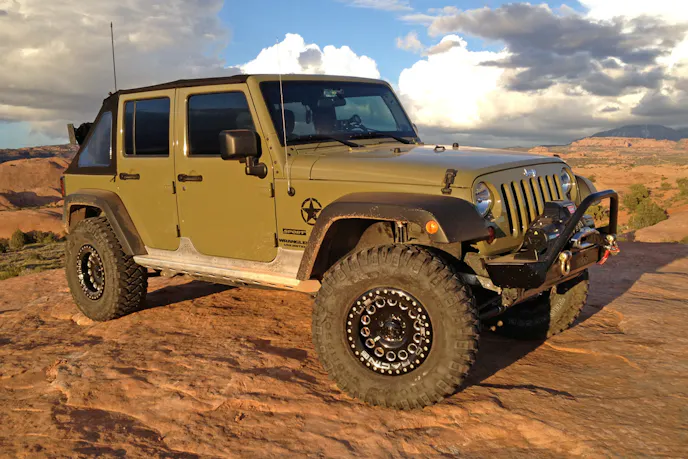
A brake system upgrade is something that many off-roaders don’t consider, even though it should be part of any accessory and equipment build up. We knew that our 2013 Jeep Wrangler JKU (dubbed Sgt. Rocker) was loaded up with hundreds of extra pounds of aftermarket weight and was in need of better brakes, so we began searching the aftermarket to fill this need.
Solution Found
Tools Needed

- 18mm socket
- 15mm wrench
- 13mm wrench
- 21mm socket
- Torque wrench
- Anti-sieze compound (or grease)
- Thread lock
Dynatrac has been working on just such an upgrade for some time, and the first release of its ProGrip Brake System is an application to fit the popular 2007 to 2015 Jeep Wrangler JK. The Dynatrac ProGrip Brake System for Wranglers will work with the 17-inch factory wheels (wheel spacers are required), and the brake upgrade kit will also work with nearly all aftermarket wheels without spacers.
The Dynatrac ProGrip Brake System kit includes larger rotors for the front and rear that move the calipers farther from the axle centerline, which alone can add some braking effectiveness. Cole Quinnell told us the system offers, “Less diving, and an overall improvement in vehicle control during braking, because of the rear brake upgrade. A big advantage to this kit is that you don’t open the hydraulics. There is no brake bleeding afterward, and not many Jeep brake upgrade kits offer that.”
Quinnell added, “The company did a lot of work toward finding special front and rear brake pads to balance out the system, and that also helped to improve stopping power.”
A big advantage to this kit is that you don’t open the hydraulics. – Cole QuinnellOur favorite feature of the Dynatrac ProGrip Brake System is that the installation process does not require opening the brake hydraulic system. Forget about bleeding the brakes after installation like some other kits. The system is a direct bolt-on for 2007-2015 Jeep Wranglers, so that makes it very simple to deal with.
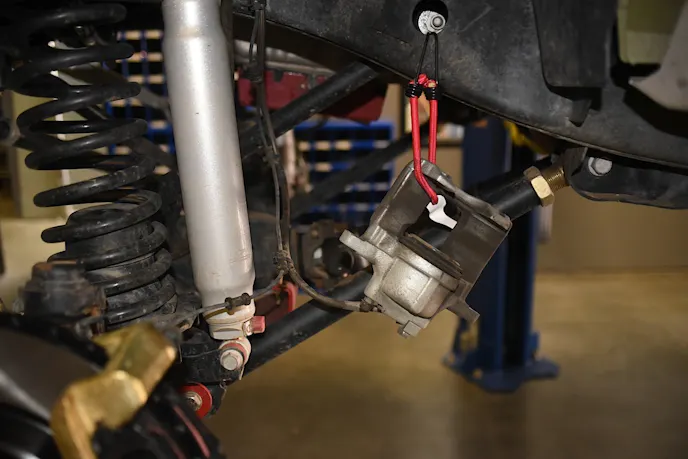
Included in the kit are 13.5-inch front rotors with a pillar-vented cooling design, 14.25-inch rear rotors with an integral parking brake surface, stronger caliper brackets, and upgraded front and rear brake pads.
Front First
Once we had the 2013 Jeep Wrangler JKU on the lift we began working. Starting at the front, the factory calipers were removed from their brackets, and then we hung the calipers carefully from the frame so that the brake lines would not be stretched. The caliper bracket removal was next. We found this best done with an impact wrench because the factory bolts are secured with thread lock.
The job was made somewhat easier by removing the ABS line–this provided direct access to the bolt heads. The rotors were removed at this point, and we performed any cleaning of the brake and axle while all these factory parts were out of the way.

Now that the front axle ends were bare, we slid the Dynatrac ProGrip front rotors over the wheel studs and onto the hubs. Before inserting the Dynatrac caliper brackets with the ProGrip pads, we applied a thin layer of grease where the pads will ride in the clips, as well as where the caliper pistons will contact the pads, because this can help reduce brake noise. The clips that hold the pads in place in the brackets are directional, so we paid special attention to the installation instructions to be sure they were placed in the caliper brackets correctly.
The assembled Dynatrac caliper brackets were then placed over the rotors, and bolted up to the steering knuckles using the factory hardware. The bolts were torqued to 120 ft-lbs per installation instructions, and we used thread lock on them for extra security.

While prepping the pads with grease, we did the same for the caliper sliding pins from the factory caliper brackets. The pins were cleaned well and greased (the inside of the boot was greased too), and then the prepped pins were installed in the Dynatrac caliper brackets.
We used a C-clamp to compress the caliper pistons so they would fit over the new rotors and brake pads, and then attached the factory calipers to their new brackets. Again using a bit of thread lock for a secure hold, we installed and tightened the re-used factory caliper mounting bolts to 26 ft-lbs of torque.

Bring Up The Rear
We began the removal of the factory rear brakes next. After removing the wheels, the rear calipers were unbolted from the rear caliper brackets, and then the calipers were hung on the frame in locations that were out of our way, yet did not stretch the brake lines.
The lower anti-sway bar links were unbolted from the rear lower shock mount brackets, and then we removed the rear factory caliper brackets. As with the front brackets, the hardware for the rear brackets was to be reused, so we saved the bolts and washers. Also, just like with the front end, this was a good time to clean things up. We then placed the new Dynatrac rotors on the rear hubs.
We had already installed the new clips and pads in the rear caliper brackets while doing the job on the front caliper brackets, so with the rear brackets loaded, they were installed on the rear brake backing plates. A C-clamp was again employed to compress the pistons so that the factory calipers could be slipped into place in the ProGrip brackets and over the the new brake pads and rotors. The reused factory caliper bolts were lightly coated with thread lock, and then installed and torqued to 77 ft-lbs.
The lower anti-sway bar link were reconnected, and the cleaned and re-greased factory caliper sliding pins were placed into the new rear Dynatrac caliper brackets. Using the factory caliper bracket bolts with a coating of thread lock, the rear Dynatrac calipers were attached and the bolts tightened to 25 ft-lbs.
Wrap-Up
Now that the installation of the Dynatrac ProGrip brake system was finished, it was time to button up the wheels and check for clearance. All four wheel and tire sets were installed and then spun to make sure there was no contact or rubbing on the calipers. Then we tightened the lug nuts back to the recommended 110 ft-lbs of torque. After checking to make sure the brake fluid level was correct, we pumped the brake pedal to feel for firm pressure, and made sure there were no leaks or loose bolts.
There is also a certain amount of break-in, or “brake bed-in procedure” as Dynatrac refers to it, that is strongly suggested for 200 miles before the new vehicle is taken out for anything other than “urban use.” This period of driving during which a number of braking stages are to be accomplished is meant to familiarize the driver with how the Dynatrac ProGrip brake system is performing, as well as to properly bed-in the brake pad friction surface to the brake rotor.
We waited until the bed-in procedure was accomplished before doing our final testing of the new Dynatrac ProGrip brakes on Sgt. Rocker. Dynatrac touts its fully instrumented testing of the system, and its results showing lowered brake pedal pressure and reduction in stopping distances of up to 30 percent compared to the Jeep JK’s factory brakes.
According to Dynatrac, it measured G-force during moderate braking (1,000-psi brake fluid pressure) that went from 0.48 Gs (stock brakes) to 0.63 Gs (Dynatrac ProGrip system), and its test mule was a Wrangler JK with a four-inch lift and 37-inch-tall tires. Sgt. Rocker sports a four-inch suspension lift, and a set of 17×9 forged wheels with LT315/70R17 tires (approximately 35 inches in static height) wrapped around them. It also has an abundance of other aftermarket equipment that add weight–that’s why we thought the installation of a brake upgrade was such a good idea.

We didn’t measure G-forces or brake fluid pressure, but we did measure braking distances using a Racelogic PerformanceBox. And although there is surely a bit of human influence to our testing procedure, as no two stomps on the brake pedal can possibly be performed with exactly the same pressure or speed of actuation, our test driver did his level best to hit it as hard and fast as he could every time to bring the Jeep Wrangler to a stop. Prior to the brake upgrade, we recorded an average stopping distance of 172.31 feet. With the Dynatrac ProGrip system installed, we recorded an average braking distance of 140.47 feet, shortening up the length by 31.84 feet.
With a few hours work, and some sweat and elbow grease thrown in, we had the entire job done in just less than three hours. Of course without the use of a Bendpak hydraulic car lift, it will likely take the average home mechanic a bit more time, but it’s a fairly simple and straight forward installation. The instructions were clear, and full of photographs to illustrate the major points. Best yet, we saw real-world results for Sgt. Rocker in a reduction of braking distance, as well as an improvement in braking stability.
You might also like
Richard Hammond Begins Rebuilding The Famous Top Gear Land Rover's Engine
Richard Hammond started an extensive rebuild on his Top Gear Land Rover. He completely overhauled the original four-cylinder engine.

