 Settling into the lineage that the Wagoneer had once commanded, the Grand Cherokee nameplate has taken the torch from its predecessor and carried it high for more than 20 years. While Off Road Xtreme has not been ecstatically happy with all of the vehicle’s we’ve seen in Jeep’s lineup over the last couple of decades, the Grand Cherokee has managed to maintain a steady pedigree of off-road performance since 1992.
 Over time, Jeep has kept the full-size SUV relevant and enhanced with steady upgrades to the drivetrain and interior, but never given the platform much attention when it came to purpose-built off-roading.
Beyond offering a solid four-wheel-drive drivetrain and stout V8 powerplants, the Grand Cherokee was intended as more of a luxury, third-row seating option when compared to the more trail-worthy Cherokees or Wranglers.
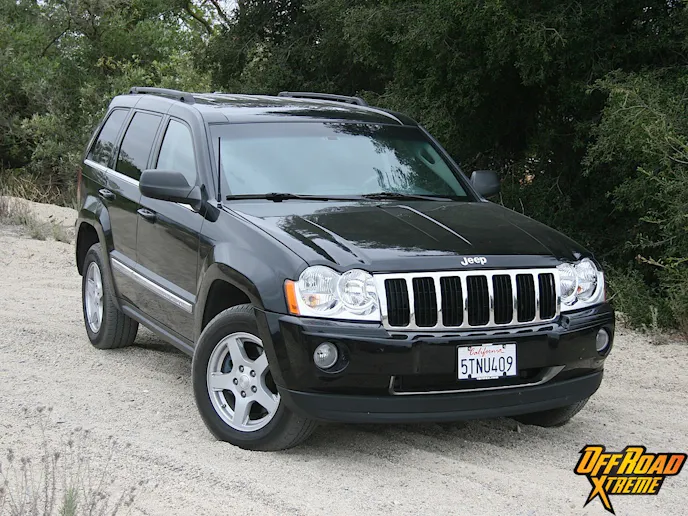
That’s where companies like Rough Country, Rugged Ridge, General Tire, and Summit Racing come into play. We were able to get our hands on some of their top-of-the-line products to turn our 2006 5.7L HEMI Grand Cherokee into something new, and something more capable when the asphalt turns to gravel and dirt.
Now sporting greater ground clearance, better tires, and upgraded wheels that can handle more punishment, this WK as it stands today can deal with more situations without having to call AAA. Let’s explore the parts and their installations to learn how much things have changed for our Jeep.
Getting Warmed Up
Our goal with this mini-project was to keep the Grand Cherokee friendly to its paved-road routine, but also beef up its aptitude for things that aren’t so black and dry. Dirt, gravel, and sand are de rigeur terrain when it comes to off-road options here in southern California, so having a rig that can handle loose rocks and other dry debris is a big plus.

Near our office, a stretch of sand wash, scrub, and mild inclines and declines has been explored many a time on a random lunch break. We can’t say for sure how far the path extends, but suffice it to say, for a close-by and accessible “proving ground” (if you will), you would be hard-pressed to find something better. In our book, it’s the ideal place to get a feel for the “before” and “after” of an off-road upgrade.
Taking our Grand Cherokee through the wash on an initial pass, we couldn’t help but feel a little let down by the vehicle’s stock configuration. The standard road tires just couldn’t cut it when it came to gaining traction on an incline, owing to their relatively poor width and diamond-shaped tread pattern. A decent contact patch was a foreign concept to these tires when it came to off-roading, and it had to change post-haste.
The Grand Cherokee Stands Tall
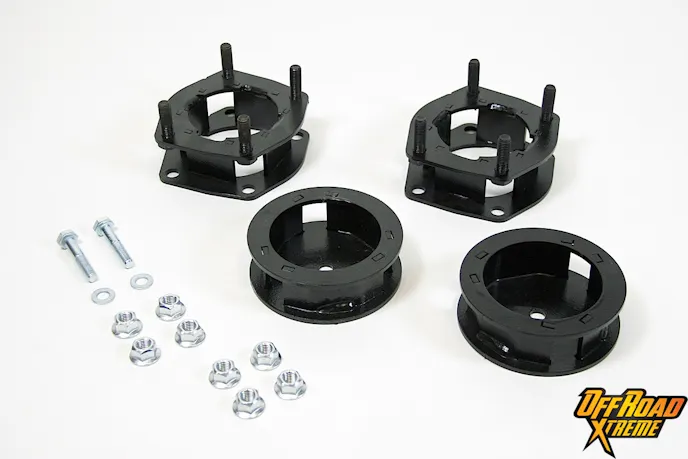
To get to the good, you’ve got to toss out the bad. Easy enough in the case of our little upgrade plan for the WK, which would include parts from the following companies: a two-inch body lift kit (p/n 664) from Rough Country; a set of five 17-inch XHD wheels (p/n 15301.30), 20 1/2-20 black lug nuts (p/n 16715.07), and five 1/2 -20 locking lug nits (p/n 16715.21) all from Rugged Ridge; five Summit Racing-supplied Dorman Tire Pressure Monitoring System units (p/n 974-001); and last but not least, five 265/70R17 General GRABBER AT 2 tires (p/n 04569480000).

“Where the demand is, our company is there with the right product,” said Rough Country’s Ryan Chase. “Lifting a Grand Cherokee is a popular modification to get these SUVs ready for off-pavement adventure, and our two-inch lift kit can get them better prepared by allowing them to use larger wheels and tires without having to reroute or extend wiring or hoses.”
“One thing to keep in mind is that a lift kit will alter your vehicle’s center of gravity,” cautioned Chase. “As a rule of thumb, it’s always a good idea to go as wide as you go tall, whether you decide to go for bigger wheels and tires, or use wheel spacers.” This was good advice in the case of our mini-project, as the wheels and tires we received from Rugged Ridge and General Tire, respectively, would tie in with the mods done to the Grand Cherokee’s chassis.
From Rugged Ridge, we spoke with Engineering Manager Alain Eboli, who explained how the XHD wheels would stay well-suited to adventure, no matter what future plans we had for the Grand Cherokee: “Weight becomes a major issue for any off-road project, as items like full-steel bumpers, LED lighting, and more start to pack on the pounds.”

“Our XHD line is rated well past OE load rating specs, and comes in a variety of sizes to accommodate our customers’ needs,” continued Eboli. “In addition, the wheels can withstand the harshness of off-roading thanks to quality construction and rim protectors that prevent damage to the wheels when the going gets rough.”
Last but not least, the tires we selected were a prime choice for exploring the local wilderness while not instigating a great deal of NVH on the way home from the trail. As Barry Terzaken, Light Truck Product Manager from General Tire stated: “Our GRABBER AT 2 tire strike the perfect balance between off-road and on-road performance. Off-road, the five-row, double-v tread pattern acts as a wedge with lots of biting surfaces to give traction where and when it counts.”
“On-road, the tire keeps its voice down with angled tread that rolls into and out of the footprint smoothly, as opposed to hitting all at once,” continued Terzaken, “And then the different lengths of each block serve to break up droning noises too.”
Elbow Grease Gets The Parts On The WK
Beginning with electrical accessory components on the driver’s side of the SUV, we began unbolting all of the fasteners that held down both fuse boxes, which rested on top of the strut tower’s top mount. A socket drive extender was a must for some of these hard-to-reach bolts.

After lifting the fuse box out of the way, we were able to get at the four nuts holding the strut in place on top. Over on the passenger side of the engine bay, we had to contend with the intake and windshield wiper fluid tank, both of which were unbolted and swung out of the way to tackle the remaining four bolts of the passenger-side strut.
Now ready for addressing the undercarriage, we unbolted the sway bar end link and tie rod on the driver’s side and loosened the upper ball joint nut with a hammer. The knuckle was shifted to allow us to remove the strut, which we did after unbolting the lower nut from the mount on the A-arm. The A-arm now hung loose at a 45-degree angle toward the ground.
With the strut now free and clear of the vehicle, we grabbed our hand grinder and went about shaving off the tips of the strut’s upper studs. This would give us clearance to add the spacer, which we did using an 18mm wrench.

Now prepped for reinstallation, we inserted the strut back into place using a spring compressor, slowly releasing tension after we had ensured that the strut was correctly positioned. All the mounts were now reattached in reverse order: lower strut mount, upper strut mount, ball joint knuckle, tie rod, and sway bar end links. The same was done for the engine bay components–wiper fluid container, air box, and both fuse boxes–and the driver’s side upgrade was finished. After doing the same thing on the passenger side, it was time to shift to the rear.
Out back, we began by removing the driver’s side wheel, then the shock absorber’s lower mount, then the sway bar end link mount. With the axle now free to let down on the driver’s side, we went after the spring, bump stop, and bump stop cup.
The bump stop bracket was inserted into the new spacer and tightened before reinstalling the bump stop cup and bump stop. Nearing the end, all that was left to do was reattach the sway bar drag link and shock absorber, and presto, our lift kit was finished.
For the wheels and tires, we made quick work of mounting and balancing the GRABBER AT 2s to the XHDs. The Dorman tire pressure sensors went in perfectly, attaching to the wheel with a simple screw through the bottom of the sensor. Now it was time to put the wheels on and head out to see how well the Grand Cherokee could handle itself in the local off-road terrain.

The Grand Cherokee Makes Tracks
 Now complete, the renewed Grand Cherokee stood tall and ready for the nearby wash. We gave the SUV plenty of time in bumpy, dry earth, and in return, we were given a lot more fun as we took the vehicle up and down the trail.

Improved traction was the most tangible result felt from all of the modifications. The GRABBER AT 2s performed as the engineers at General intended, offering up plenty of bite whether operating with forward momentum or from a complete stop. A wider track, thanks to the hefty offset of the XHD wheel, was in good balance with the slightly lifted body of the WK, and made for better control and stability while out and about in the backroads.
Meanwhile, the Dorman TPMS system was doing its job impeccably, displaying the same PSI that we tested after airing down the tires to head out into the wash. Our quest to give this black beauty better gear for the unknown had been a success, and one that didn’t break the bank to do so.
Find out more about products from the companies who helped us make our Grand Cherokee a little grander by viewing the contact information below.

You might also like
Return Of A Legend: Jeep Revives The Wrangler Laredo For 2027
Jeep revives the iconic Wrangler Laredo name for 2027, blending heritage-inspired styling, premium features, and Trail Rated capability.

