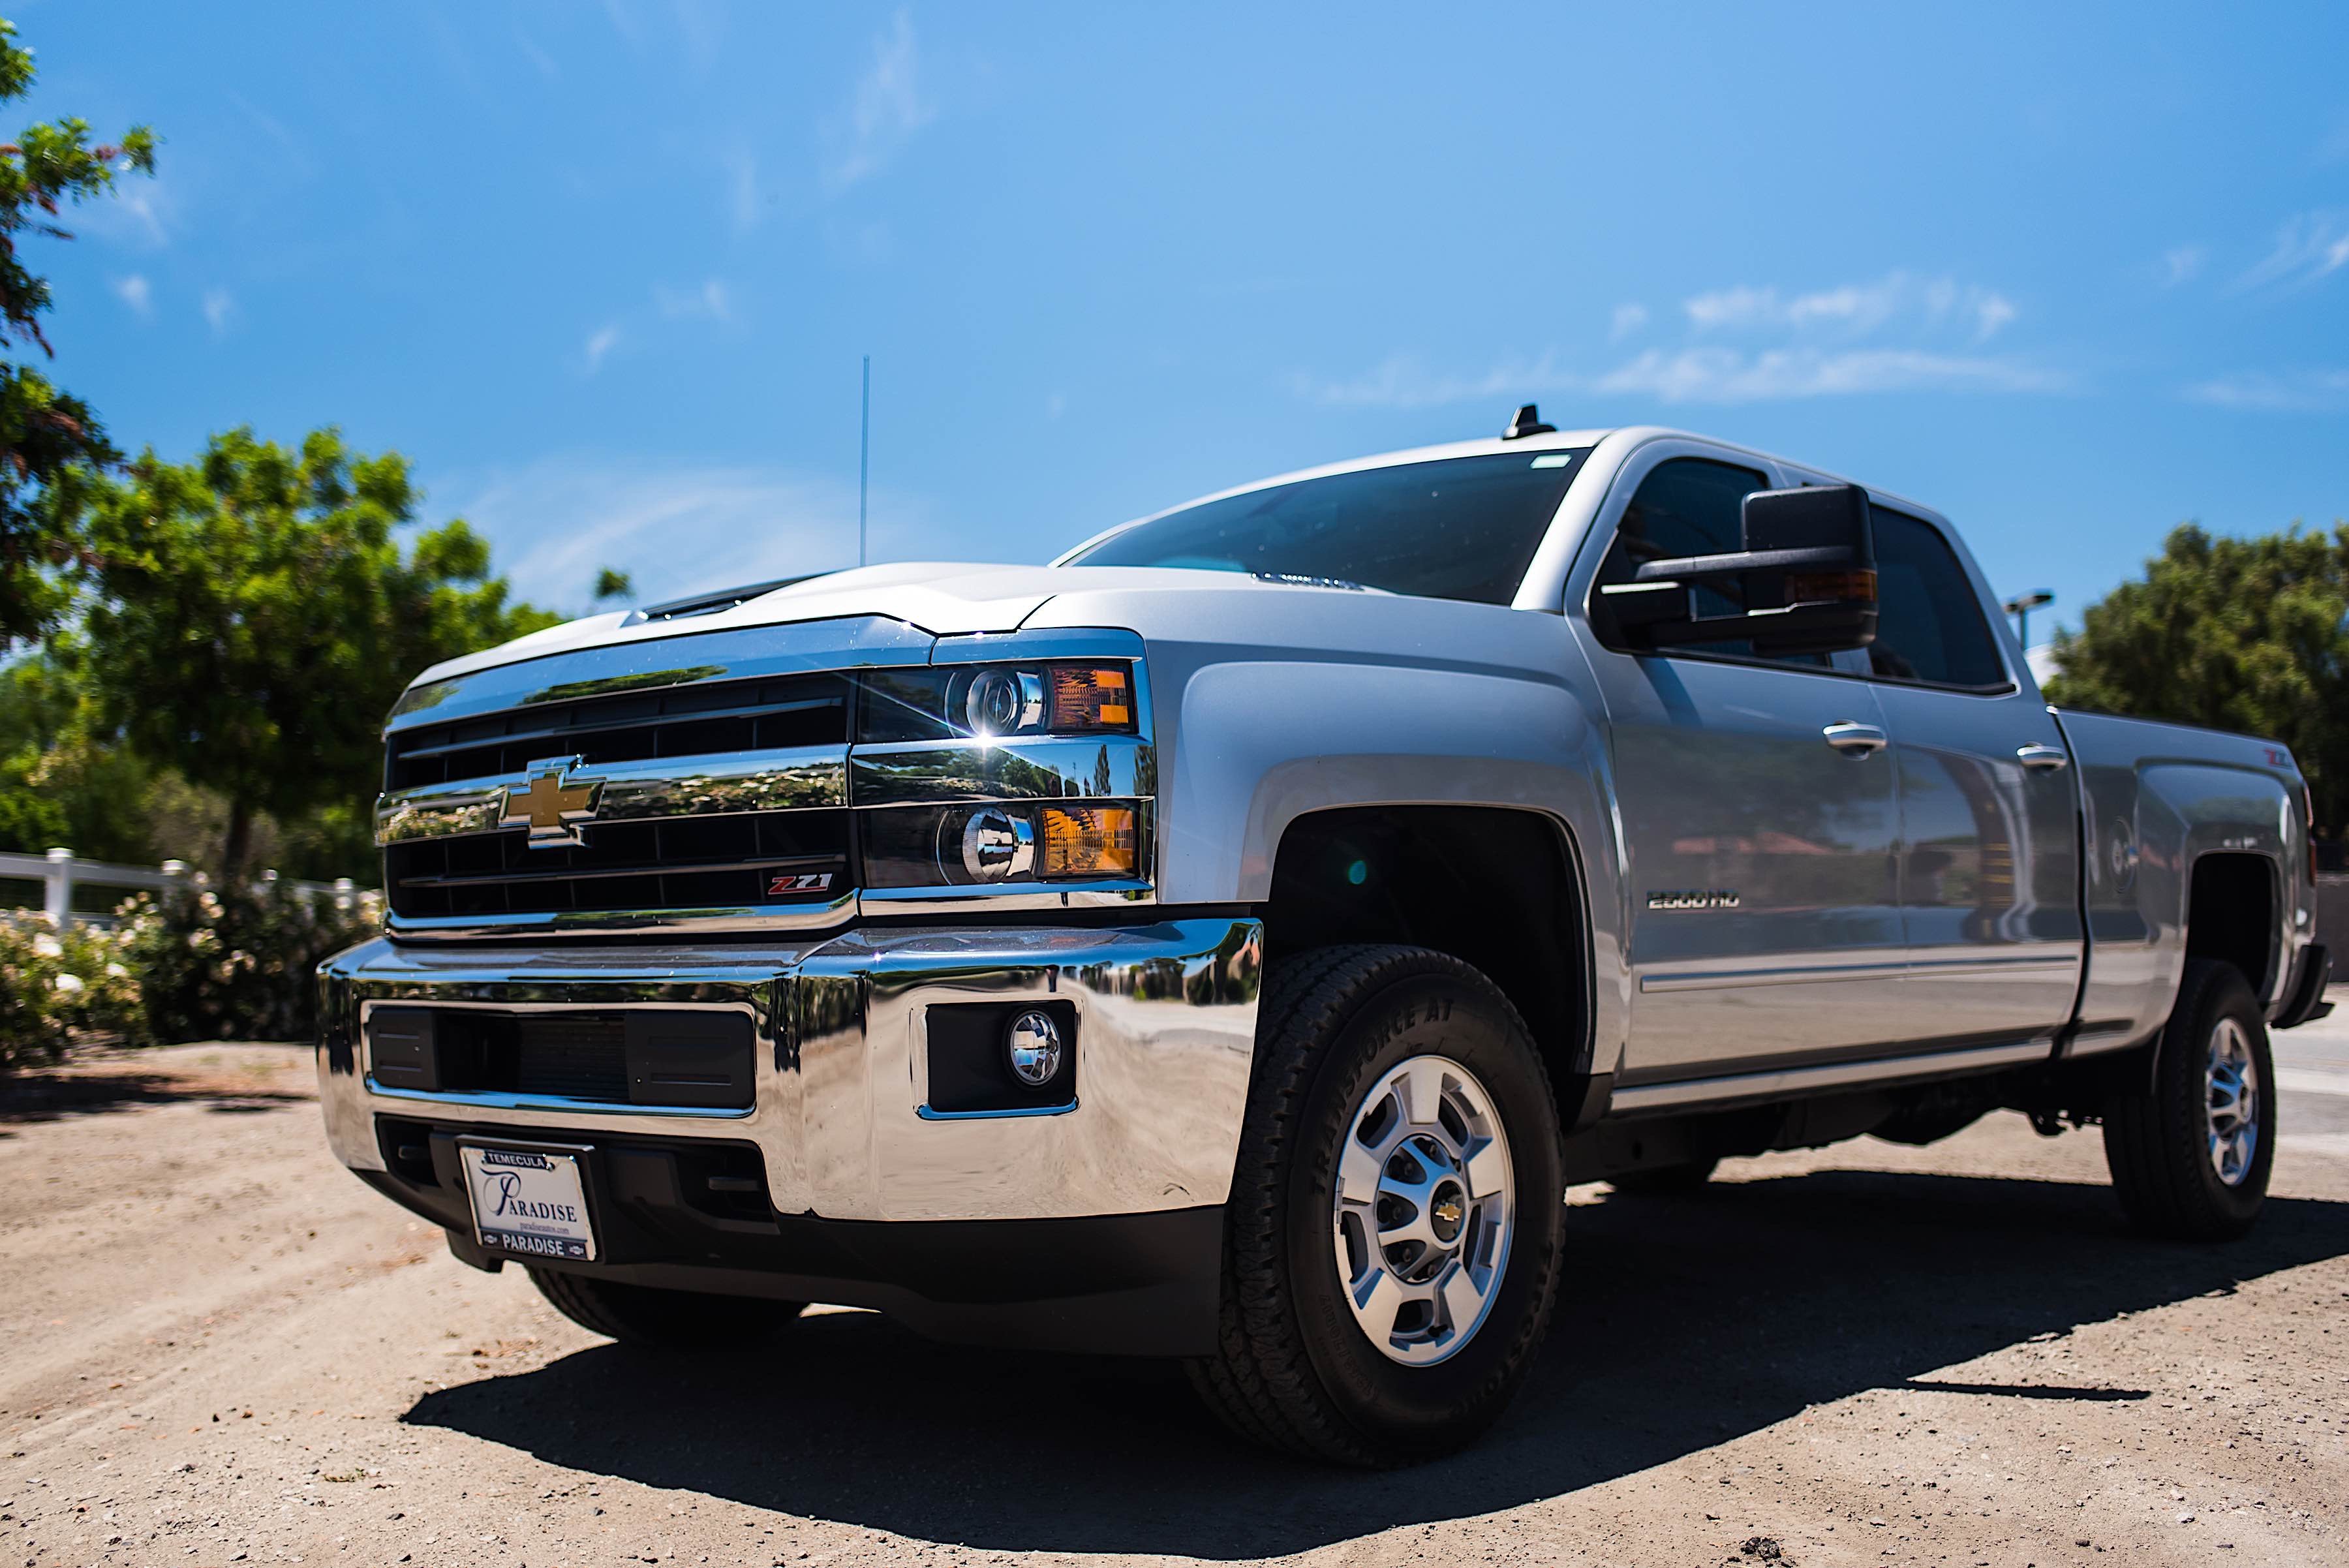
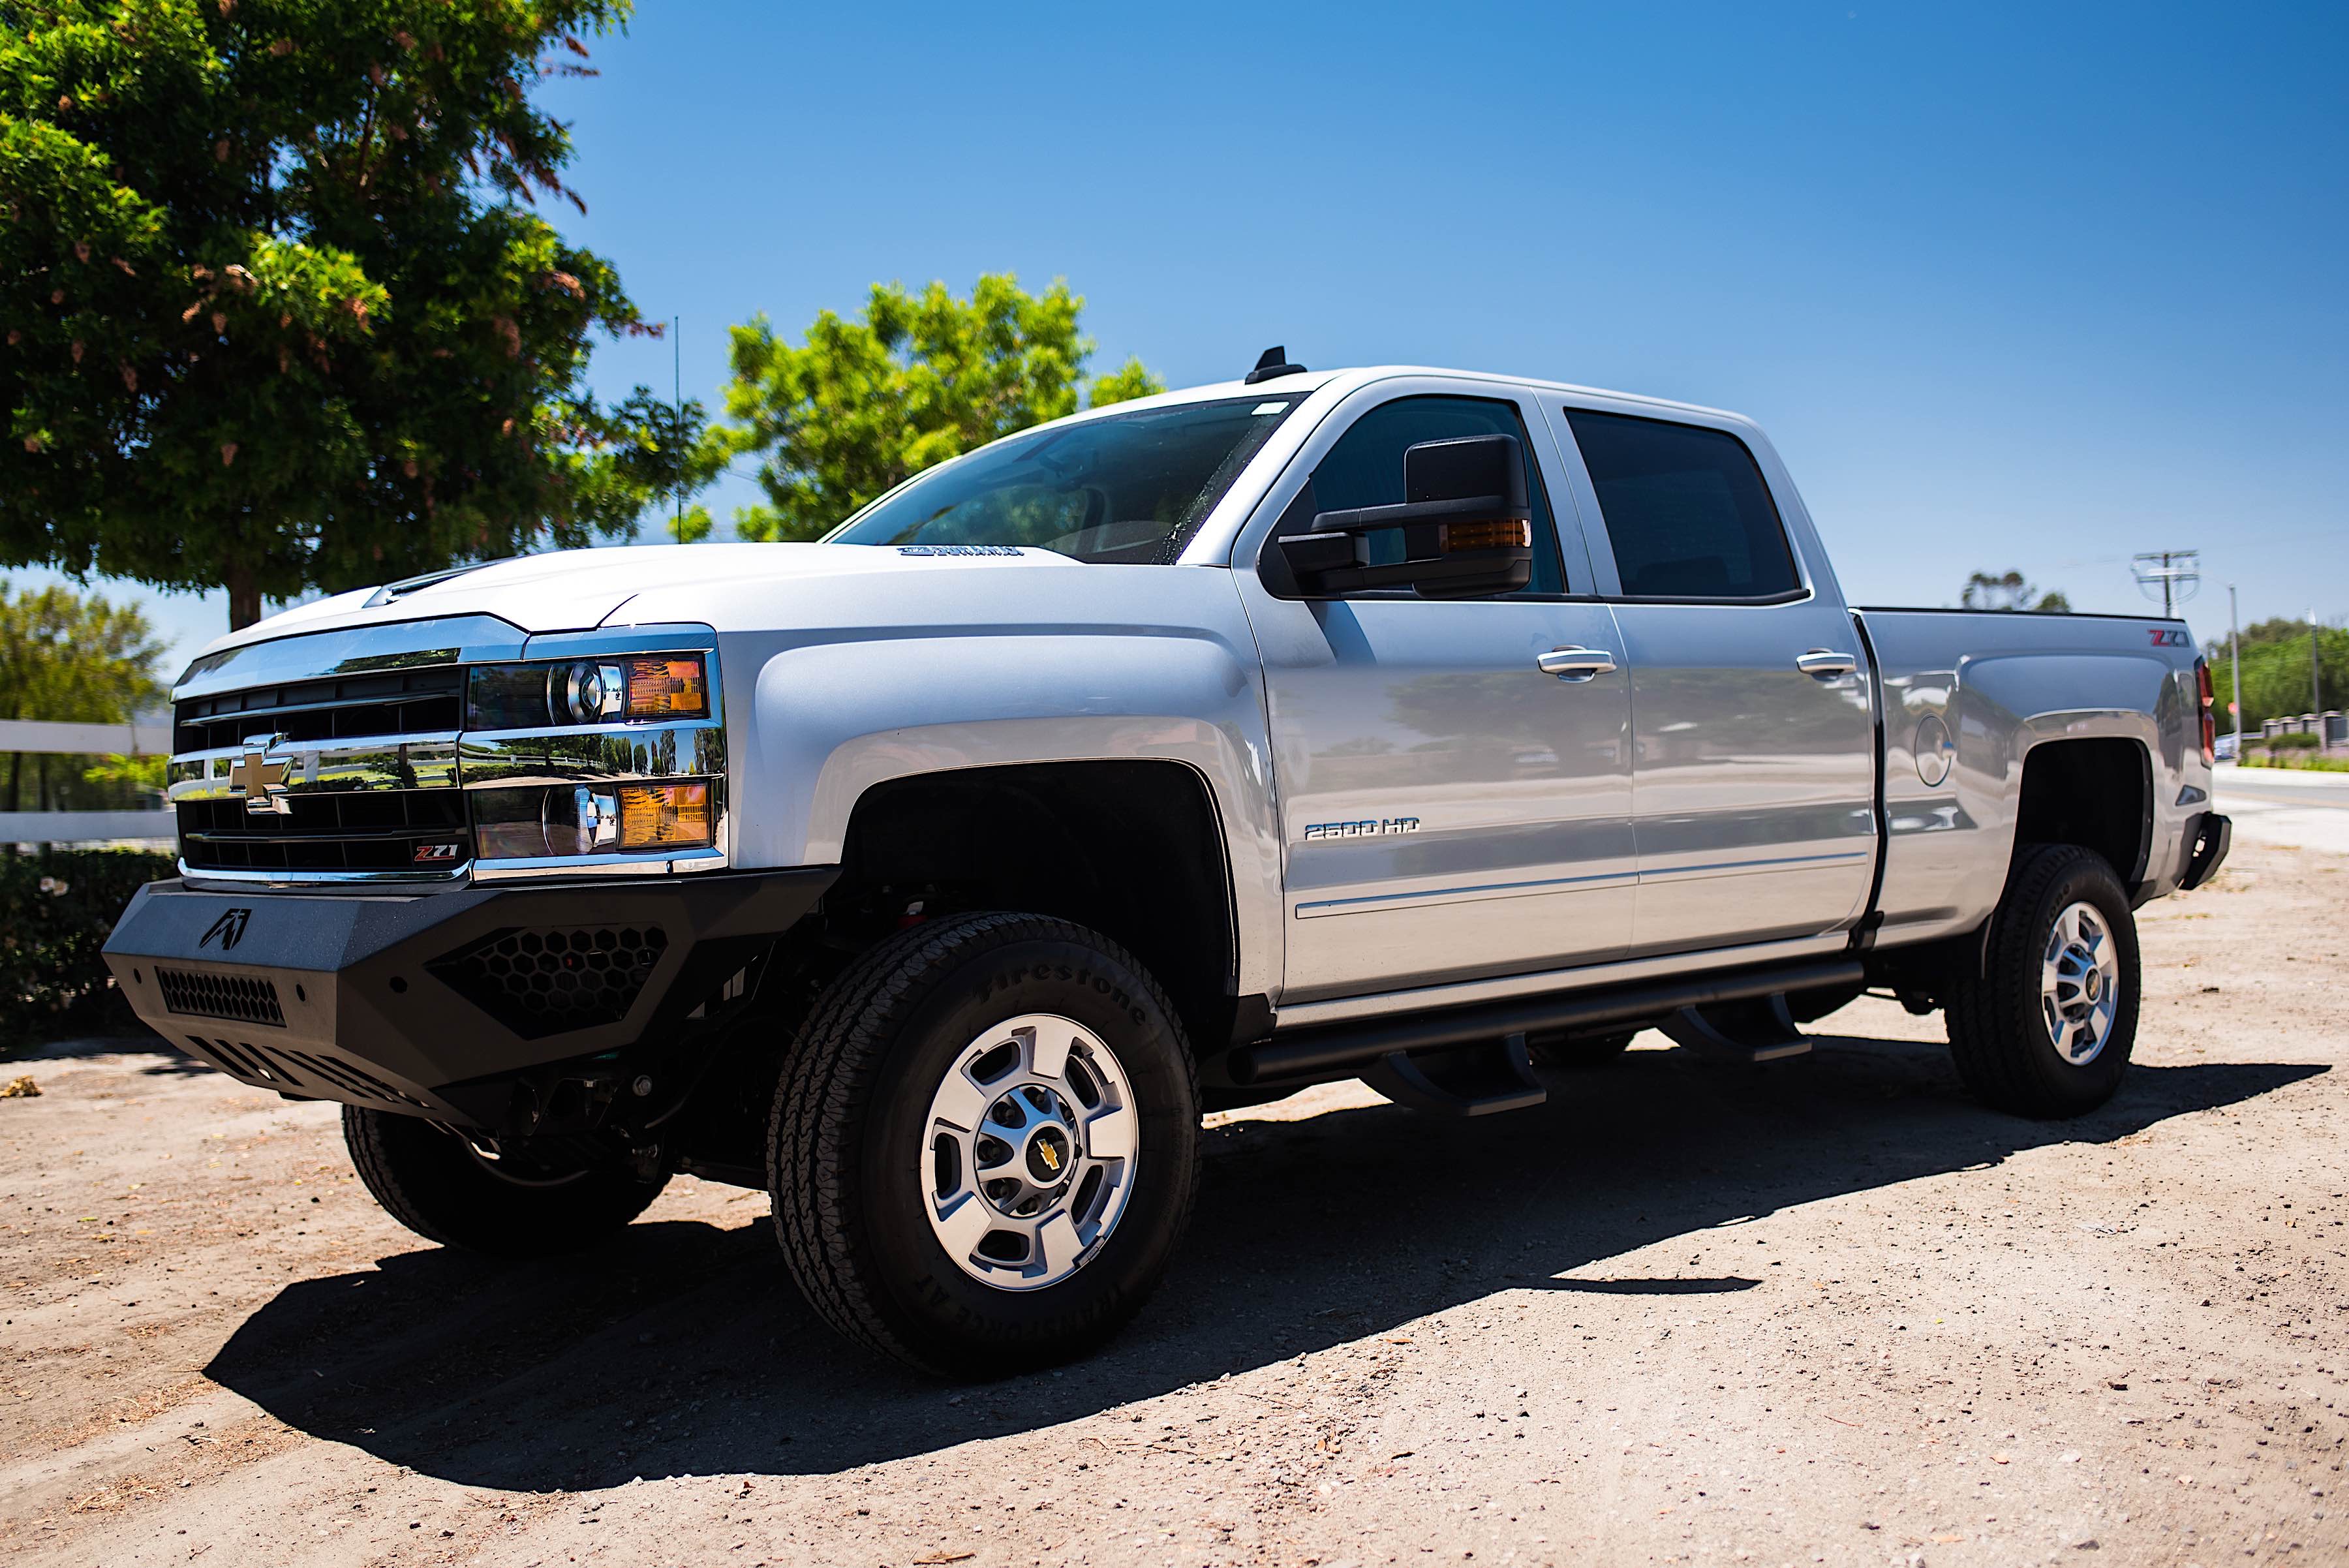
Every diesel truck is different. Thousands of them are made every month to satisfy the American want, but ours is destined to be its own beast. It’s a 2018 Duramax crew cab, equipped with the L5P, and just like any good project, there’s a world of possibilities ahead.
One direction could have been a diesel drag racer, blazing down the blacktop like our own Project Deadspool and picking up trophies left and right. Another direction could have been as a pavement princess, schlepping the kids home from school and getting taken to the dealership every time an idiot light pops up. But that wasn’t in the cards for this truck.
The Vision
What we have in mind for this Duramax is a total workhorse – a tow pig, if you will. Hauling our precious drag racer all over the country will require a few things: chiefly, durability.
The truck will be subjected to long periods of driving and as such, it needs to be ready to deal with wear and tear. After durability, we want the truck to have versatility. If we get sick of driving on pavement all the time, we want to take the truck off-road and have some fun. And lastly, the truck should be useful. A truck’s utility is tantamount to its lifespan; when it’s no longer useful, it might as well be a fuel-guzzling coupe. So we will be giving the Duramax upgrades that make it useful for the long run.

To that end, we teamed up with several companies, the first three of which are Firestone Ride-Rite, MaxTrac Suspension, and Fab Fours. Together, they will give the truck better ride quality for towing, a higher front end, and a tougher exterior to deal with whatever lies ahead.
The Parts
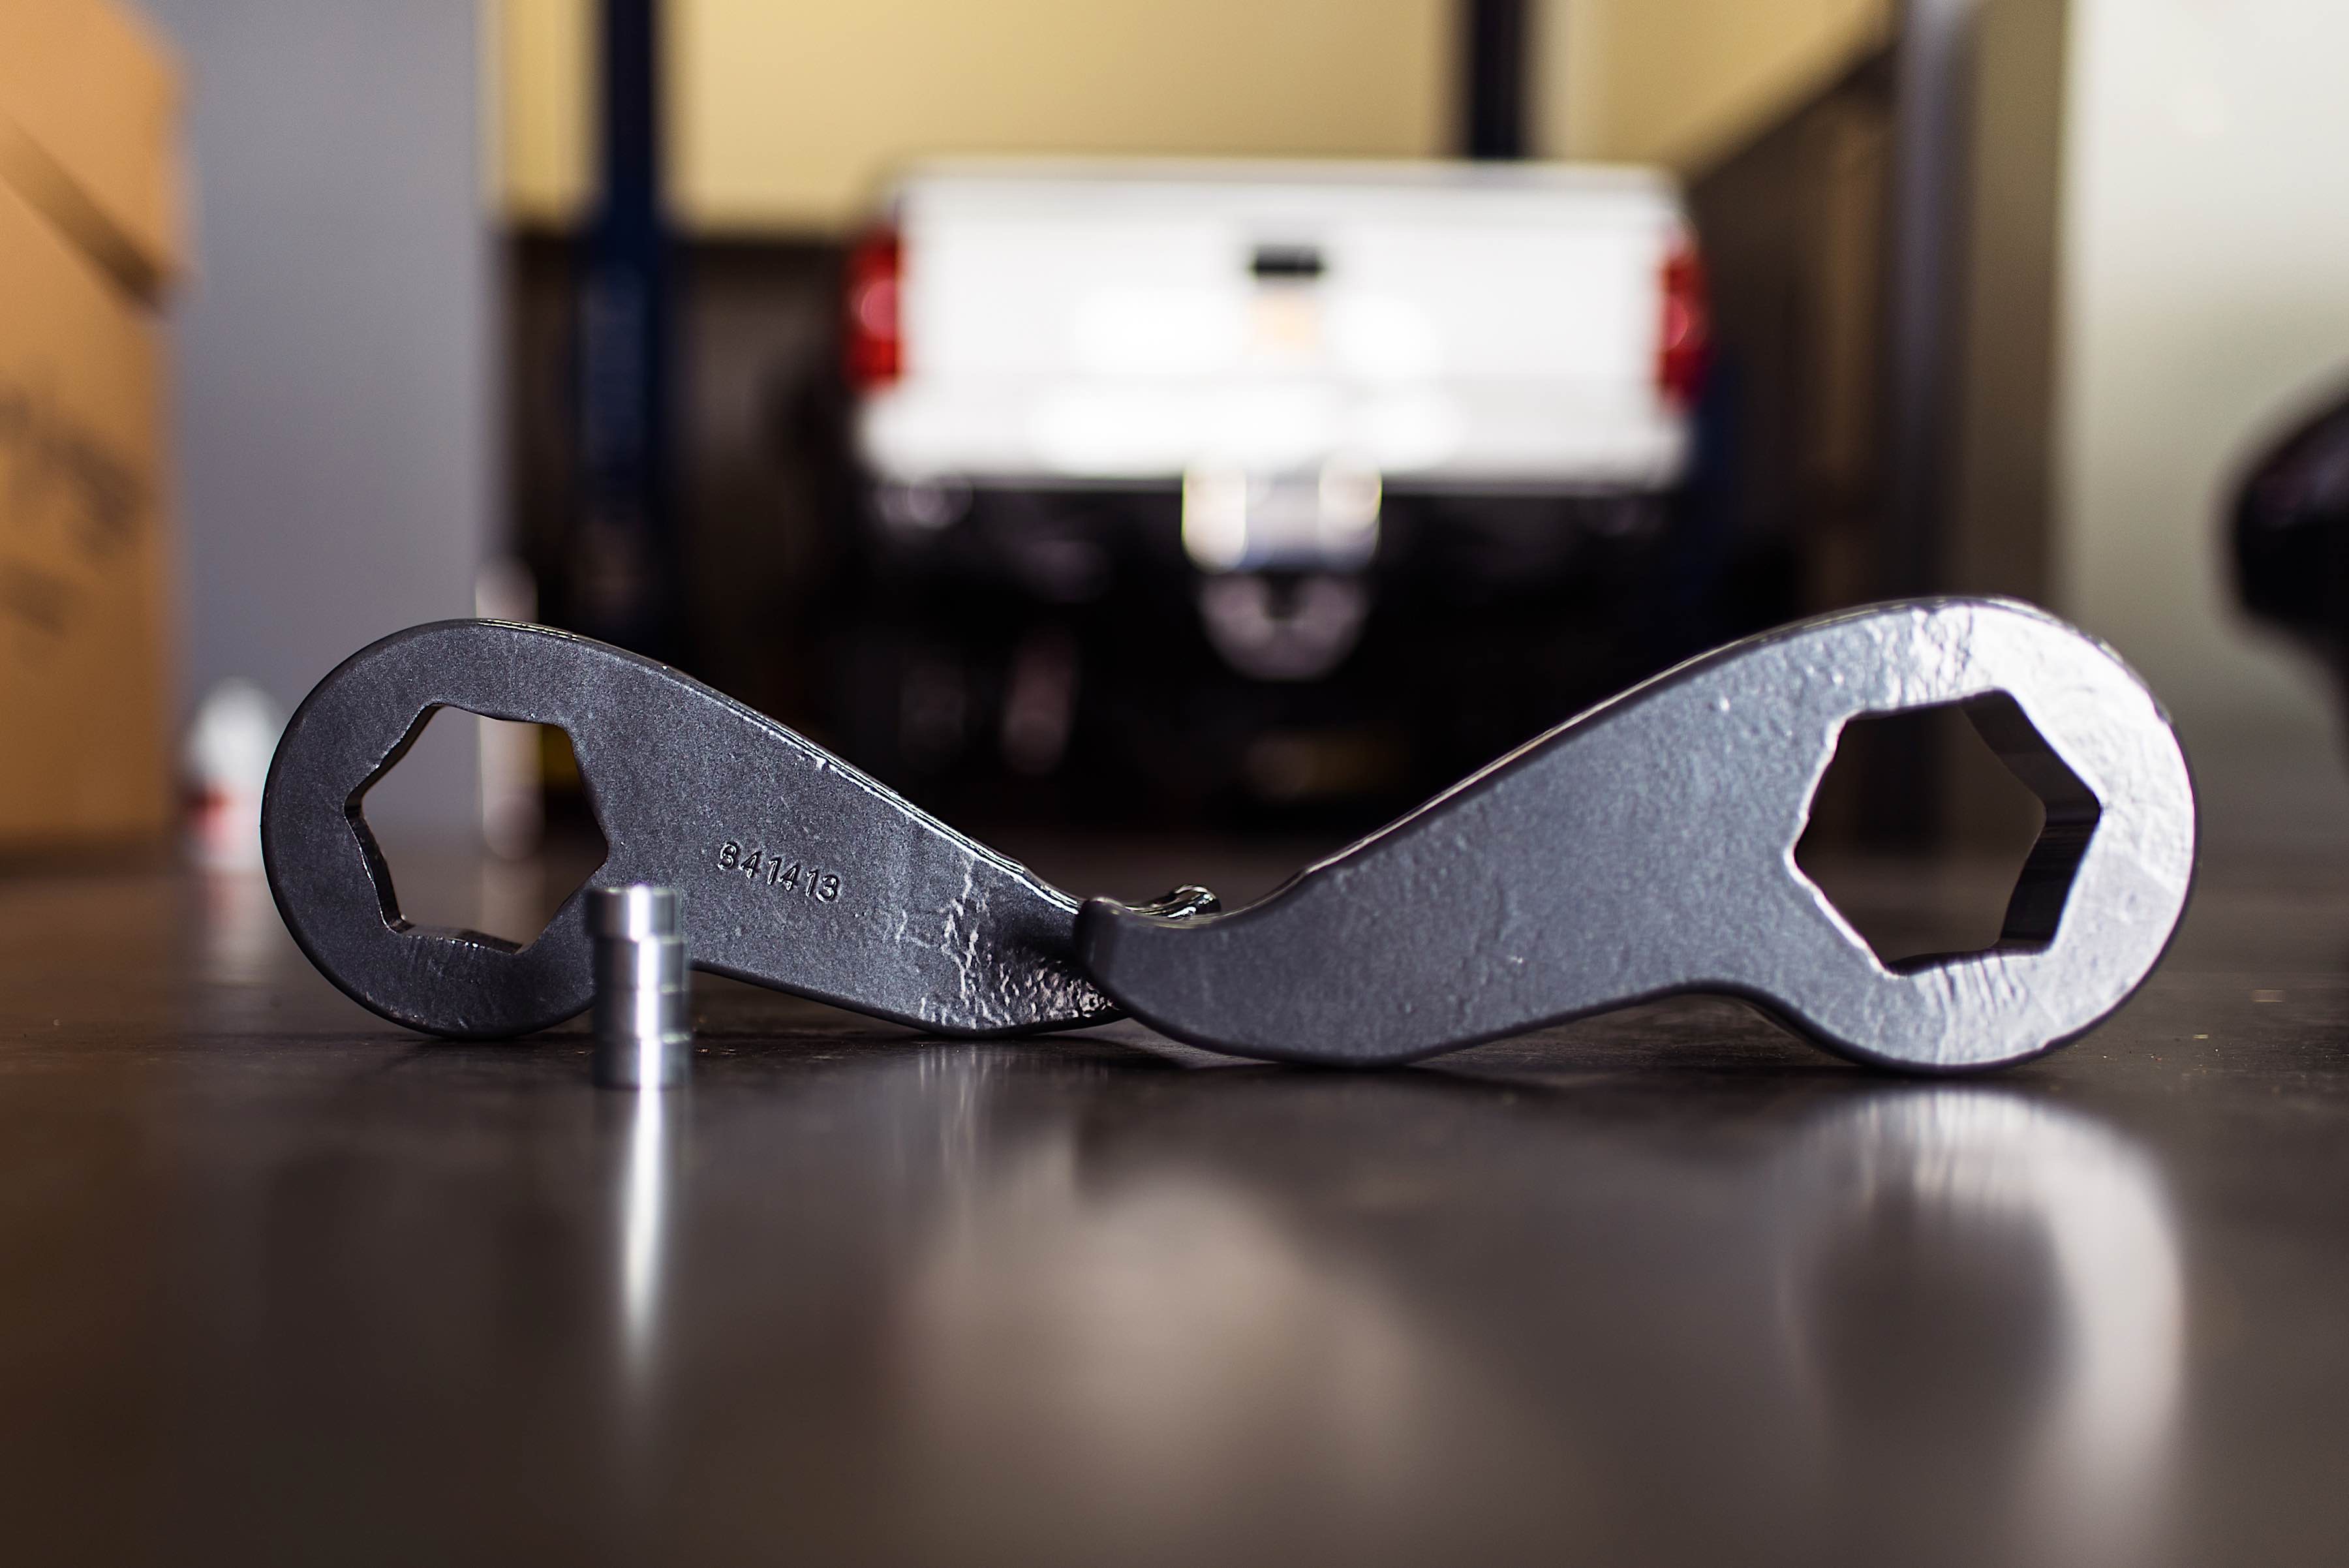
MaxTrac’s contribution to the build was a set of torsion keys (PN 841413). To better understand their purpose, we have to look at how trucks come from the factory.
All trucks come standard with what is known as suspension rake. It is a deliberate slanting of the vehicle from back to front, in such a way that when hauling a trailer or with the bed loaded down, the truck’s slant will become neutral, ideally. This helps the driver still see what is in front of him, and keeps the rear from sagging.
Our leveling kit from MaxTrac will take care of the truck when it is unloaded and just driving around town. And pairing it with the Firestone kit will make for a good combo, as the Firestone springs will mitigate sagging even when loaded.
MaxTrac’s torsion keys are forged and E-coated, making them highly durable.
We spoke with Adam Montiel at MaxTrac to find out more about the construction of their torsion keys. “Our forged keys are designed to give the right amount of lift without compromising ride control,” he said. “Since our keys are forged, you never have to worry about them snapping in half under a heavy load, unlike some of our competitors’ keys.”
In addition to being forged, the keys also come ready to withstand years of exposure to the elements. “We give all of our keys an E-coating,” said Montiel. “This protects them from rust, and give the keys their lifetime warranty.”

Since towing will be the primary purpose of this truck, we wanted to get the right setup, and that will be helped in large part thanks to Firestone’s Ride-Rite system. The company has been producing air springs for the better part of 80 years, so it definitely knows a thing or two about suspension add-ons.
Two things that Firestone’s springs bring to the table are improved handling and braking. The robust design of the spring makes it able to deal with heavy loads very well, and that translates to better leveling, which means less tire wear, as well as reduced stress on components like shocks and leaf springs. It also helps with nighttime driving, as the level stance of the truck means its headlights are aiming where they need to.
Another thing that makes Firestone’s springs a much-needed addition to our truck is its ride quality improvement. By acting as one more suspension component that absorbs road shock, the passengers in the vehicle are more comfortable than before, meaning those long drives to and from the lake or campground are less tiresome on the body.

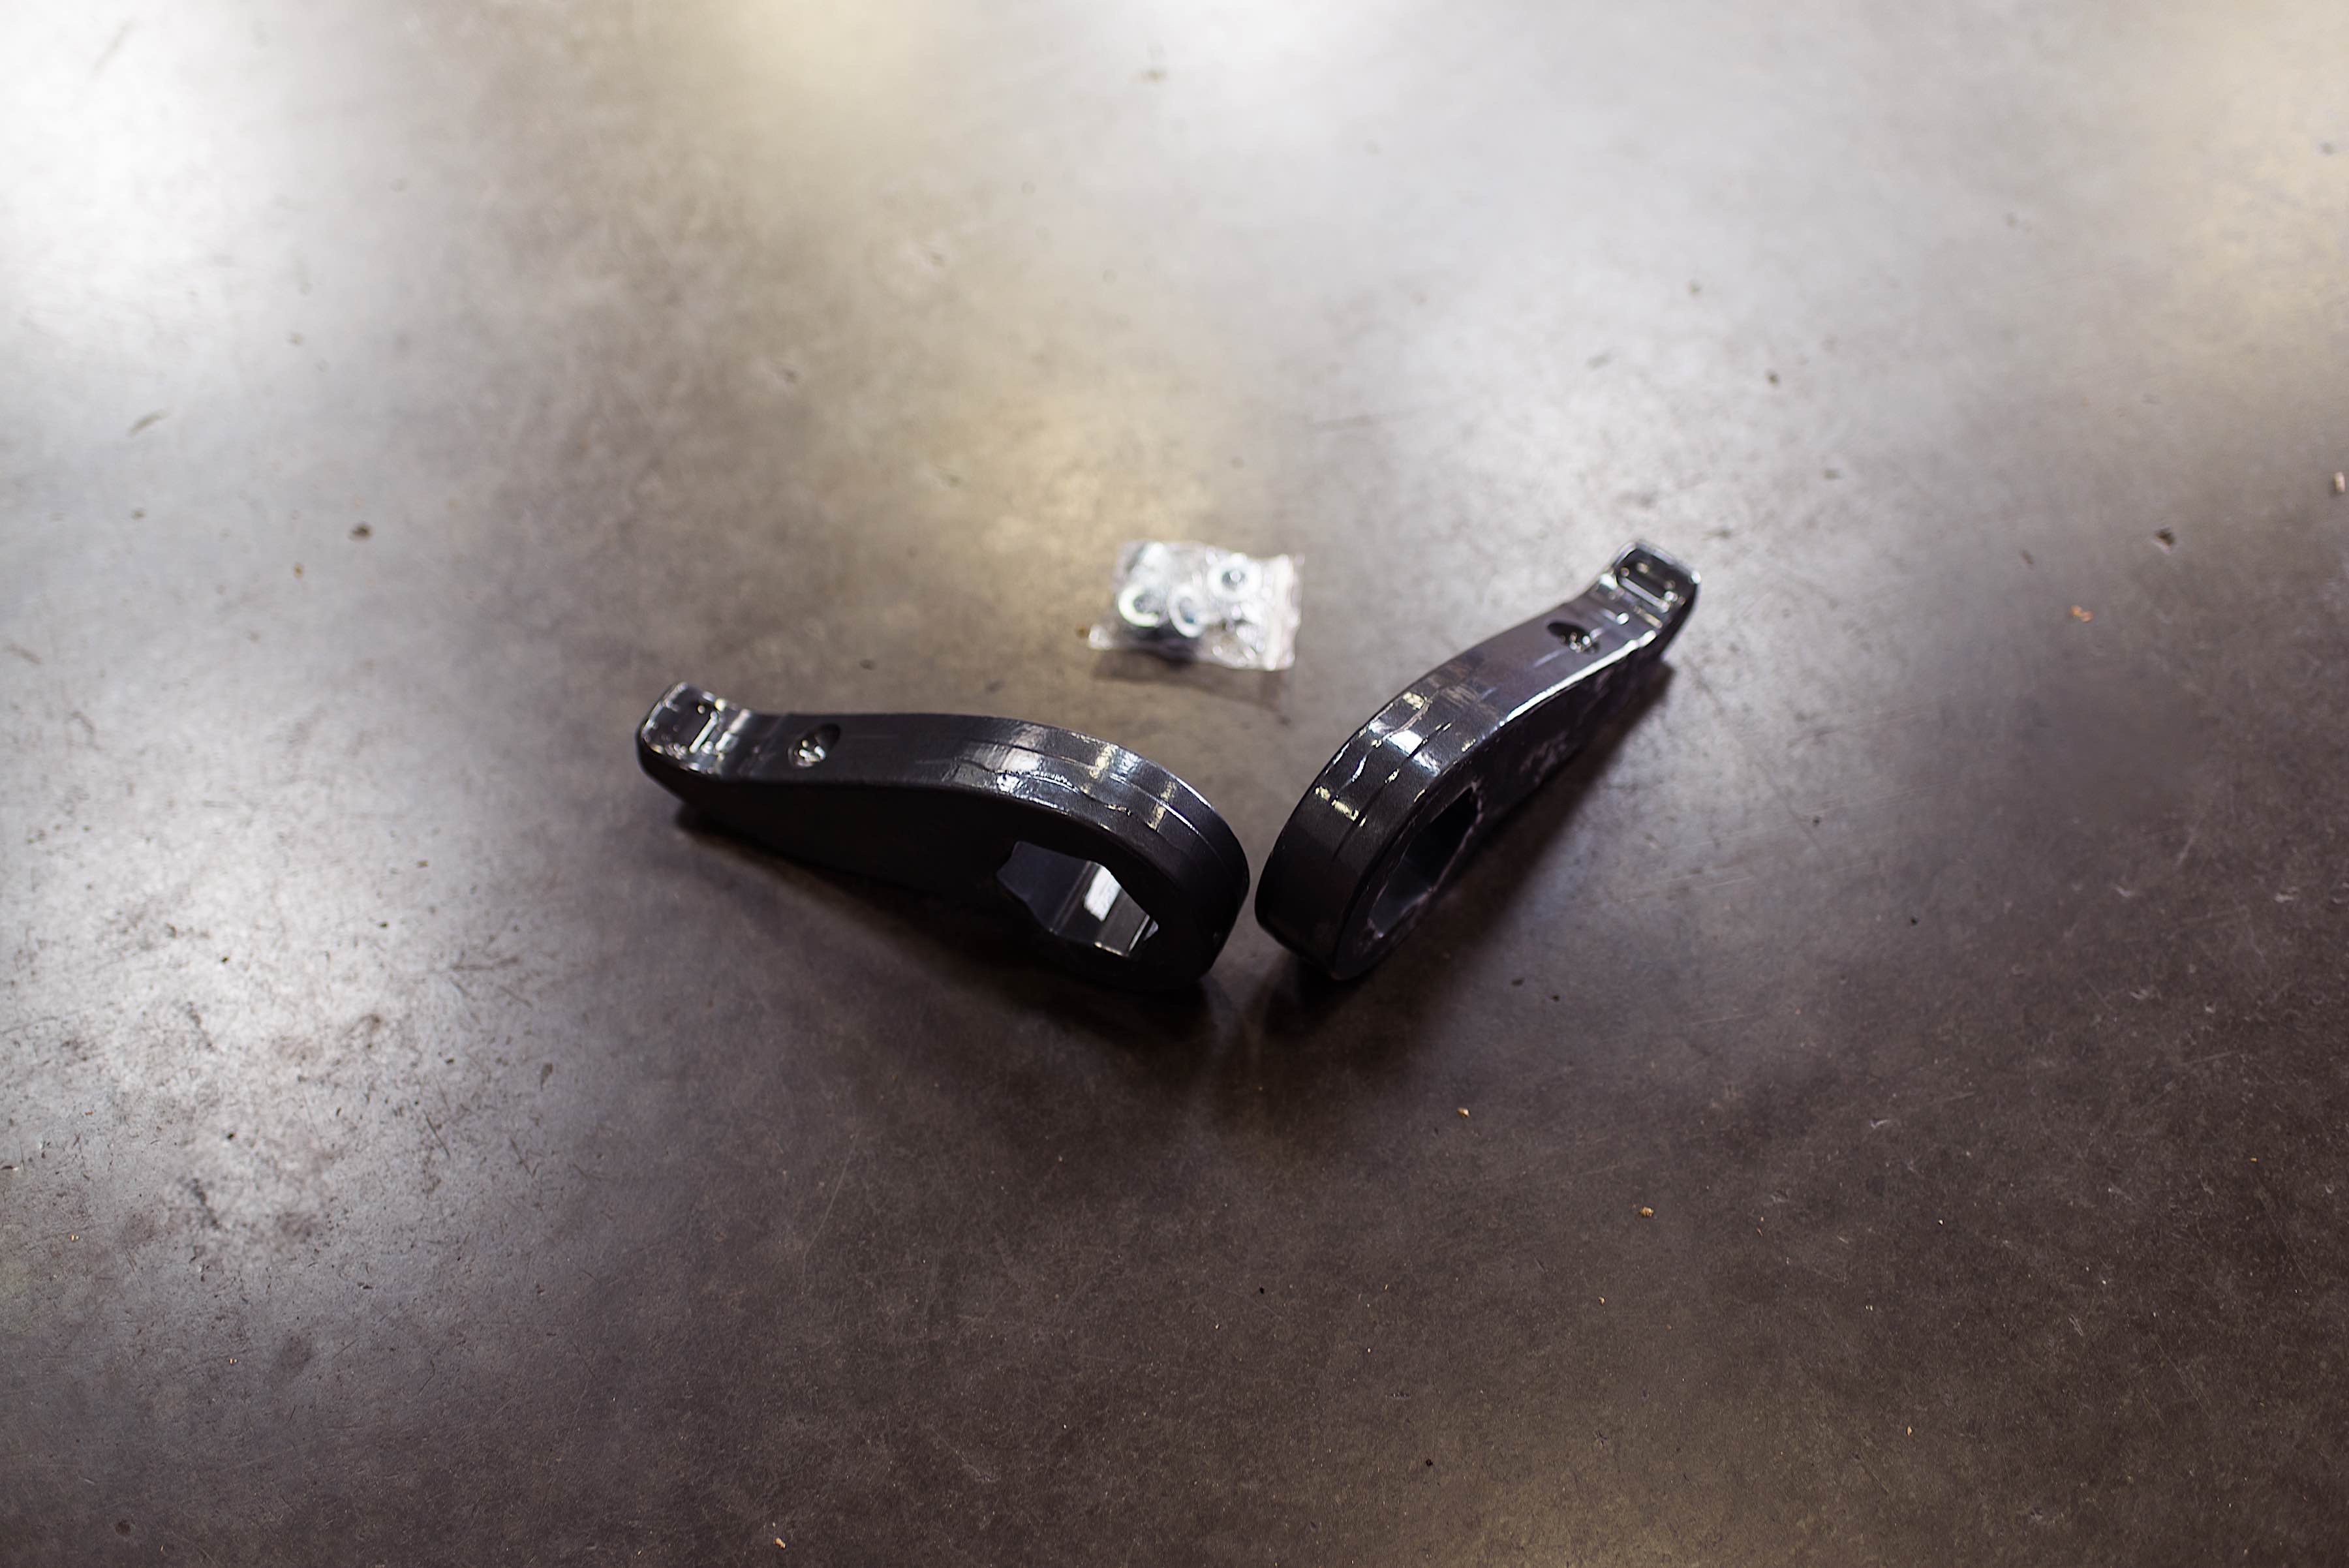
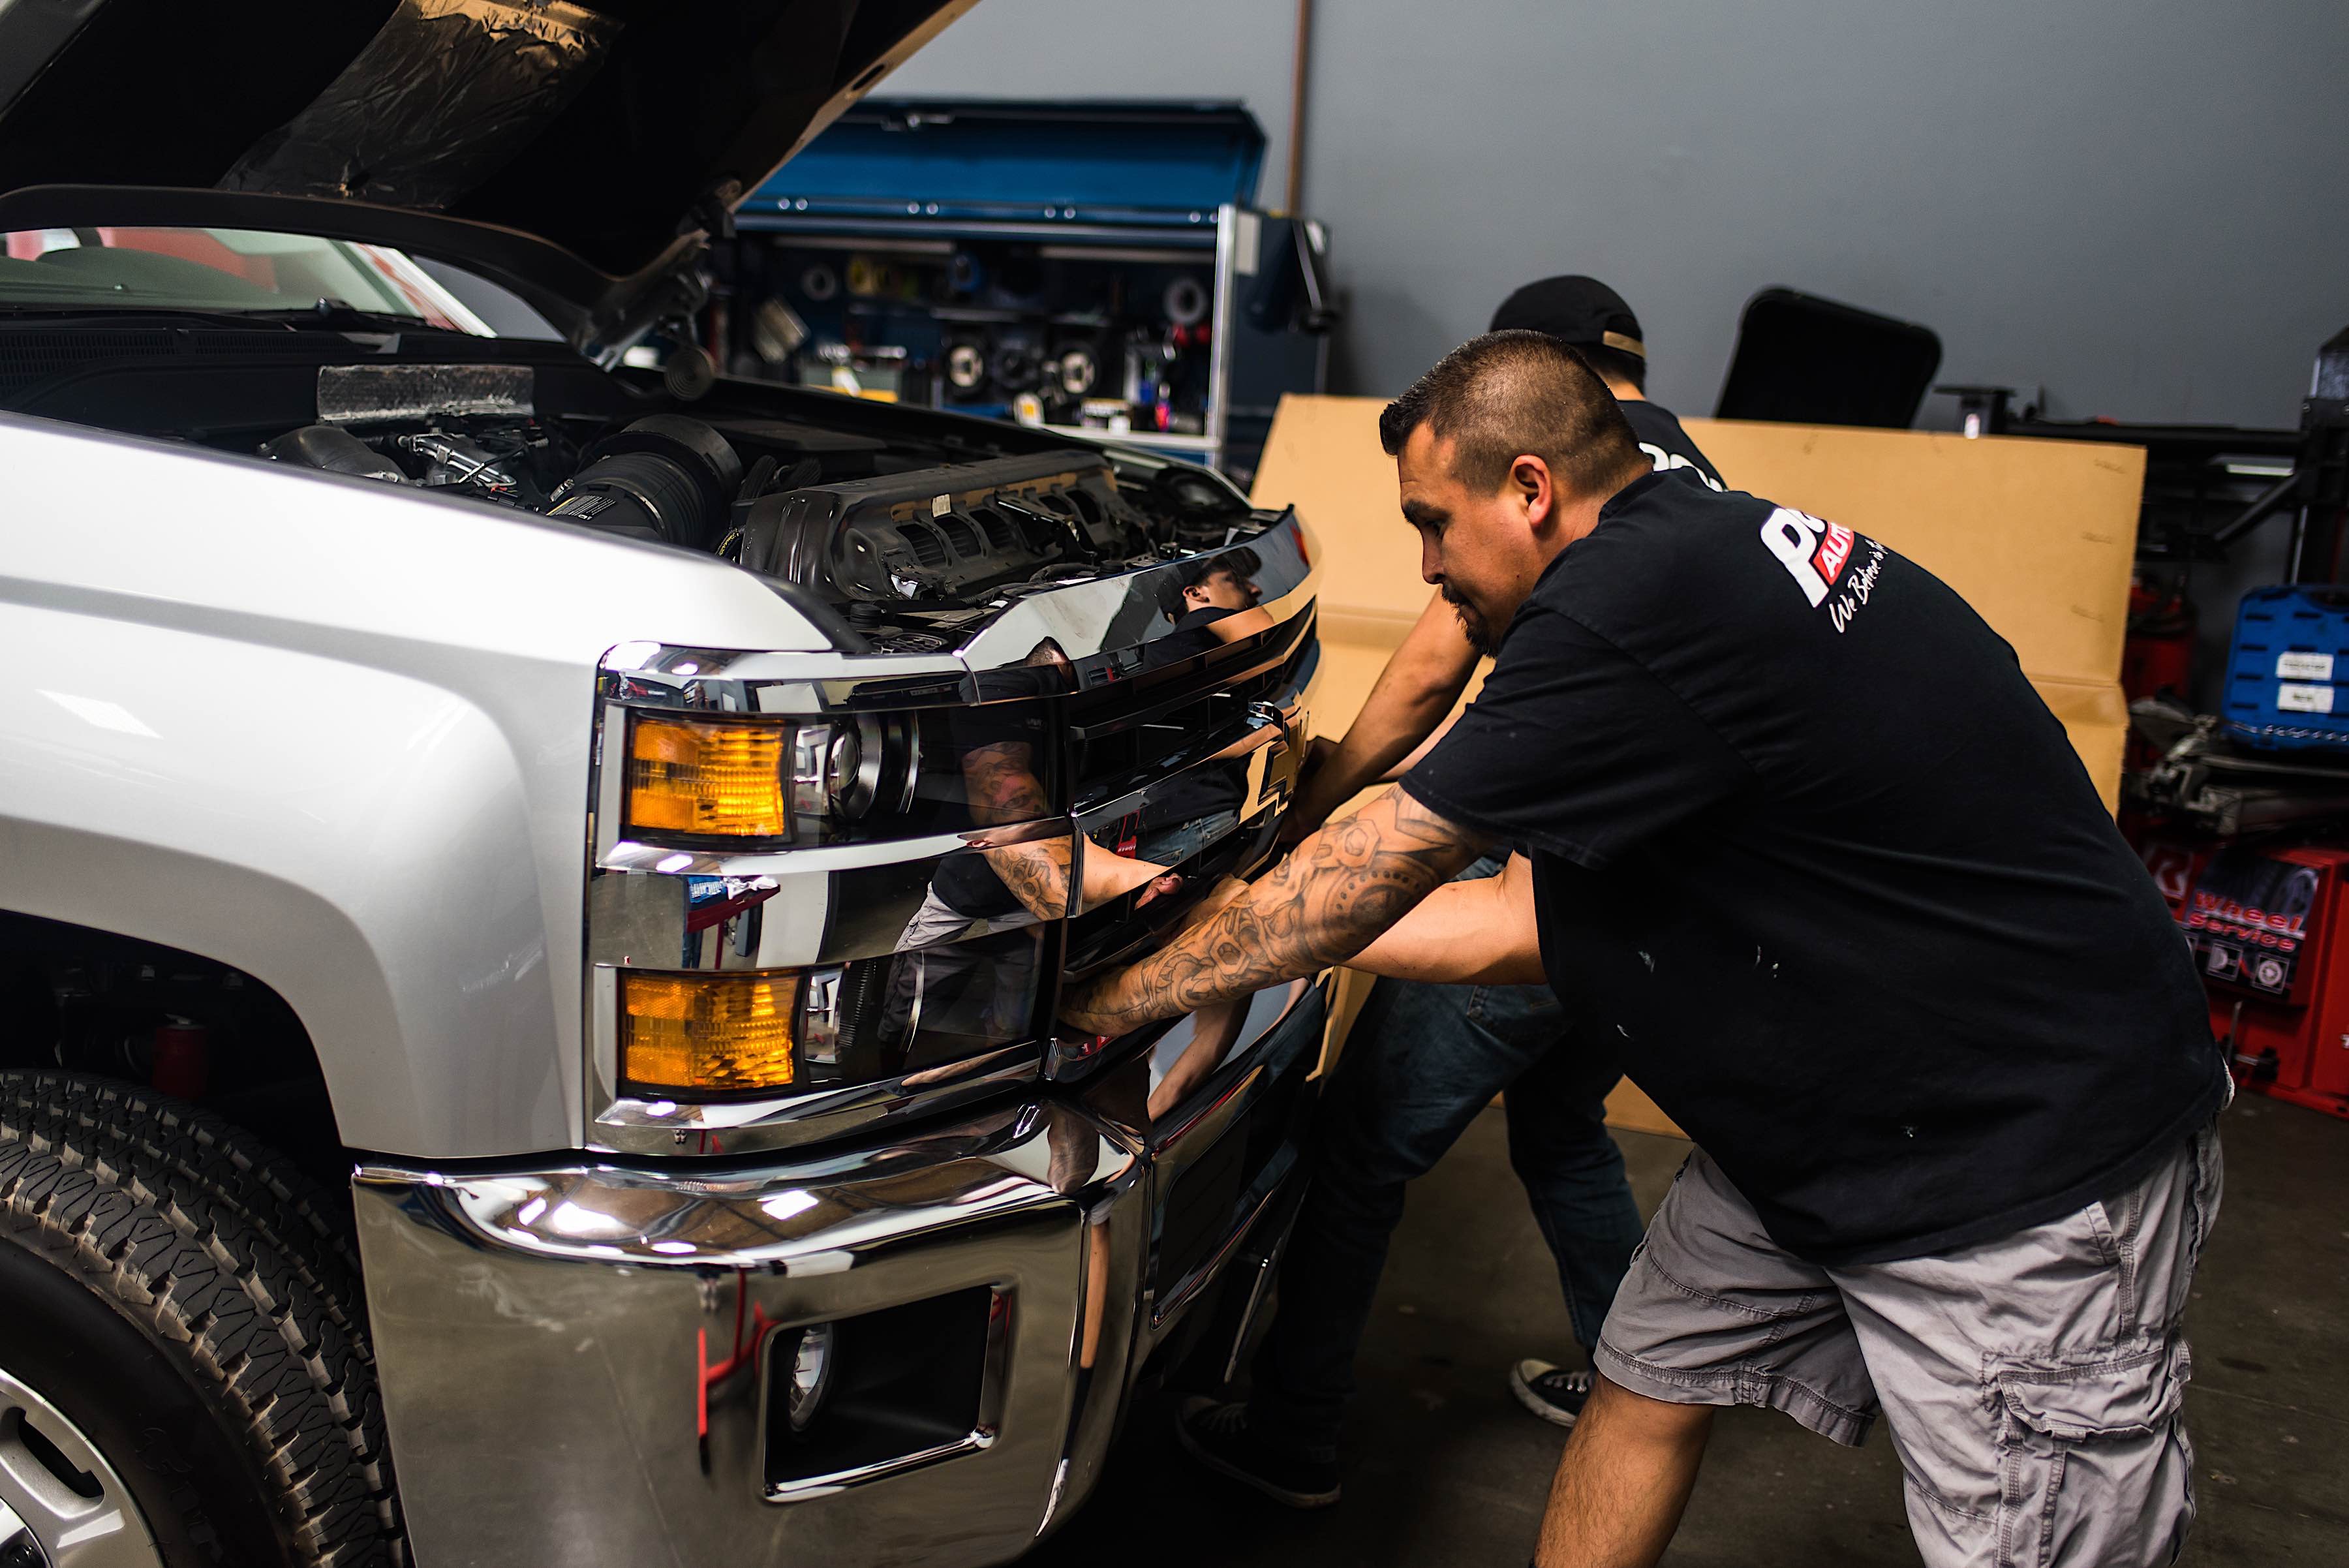
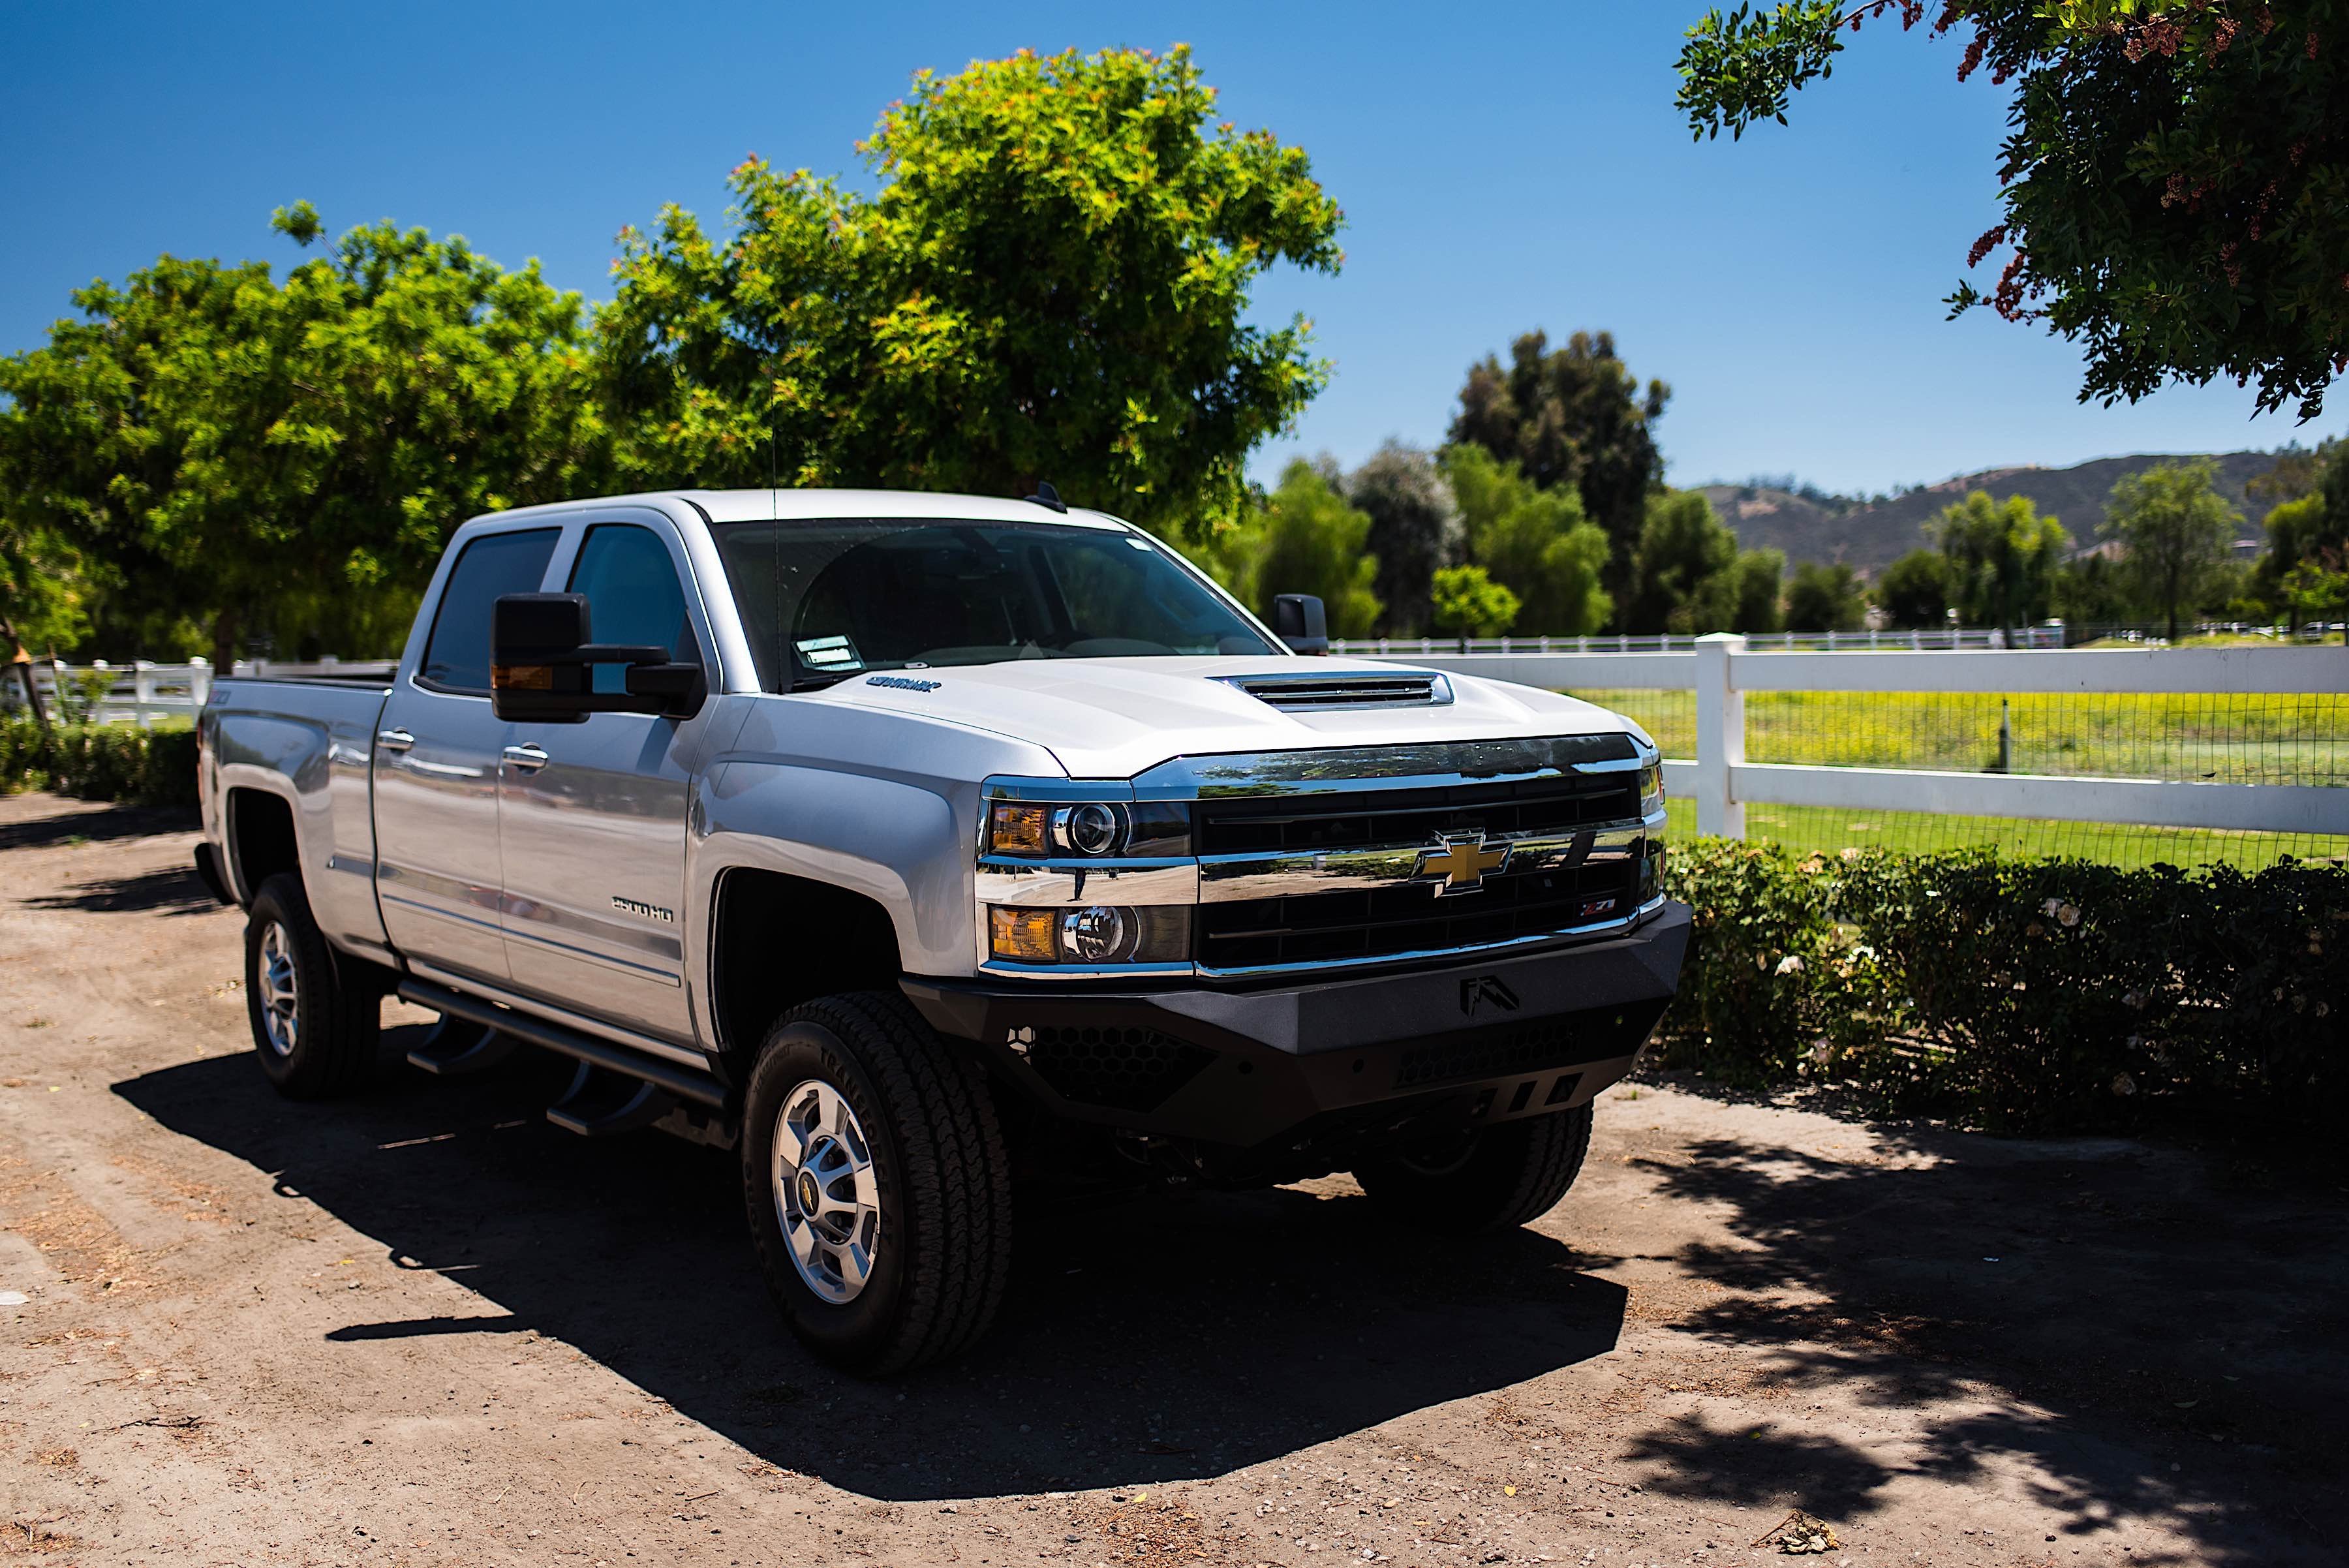
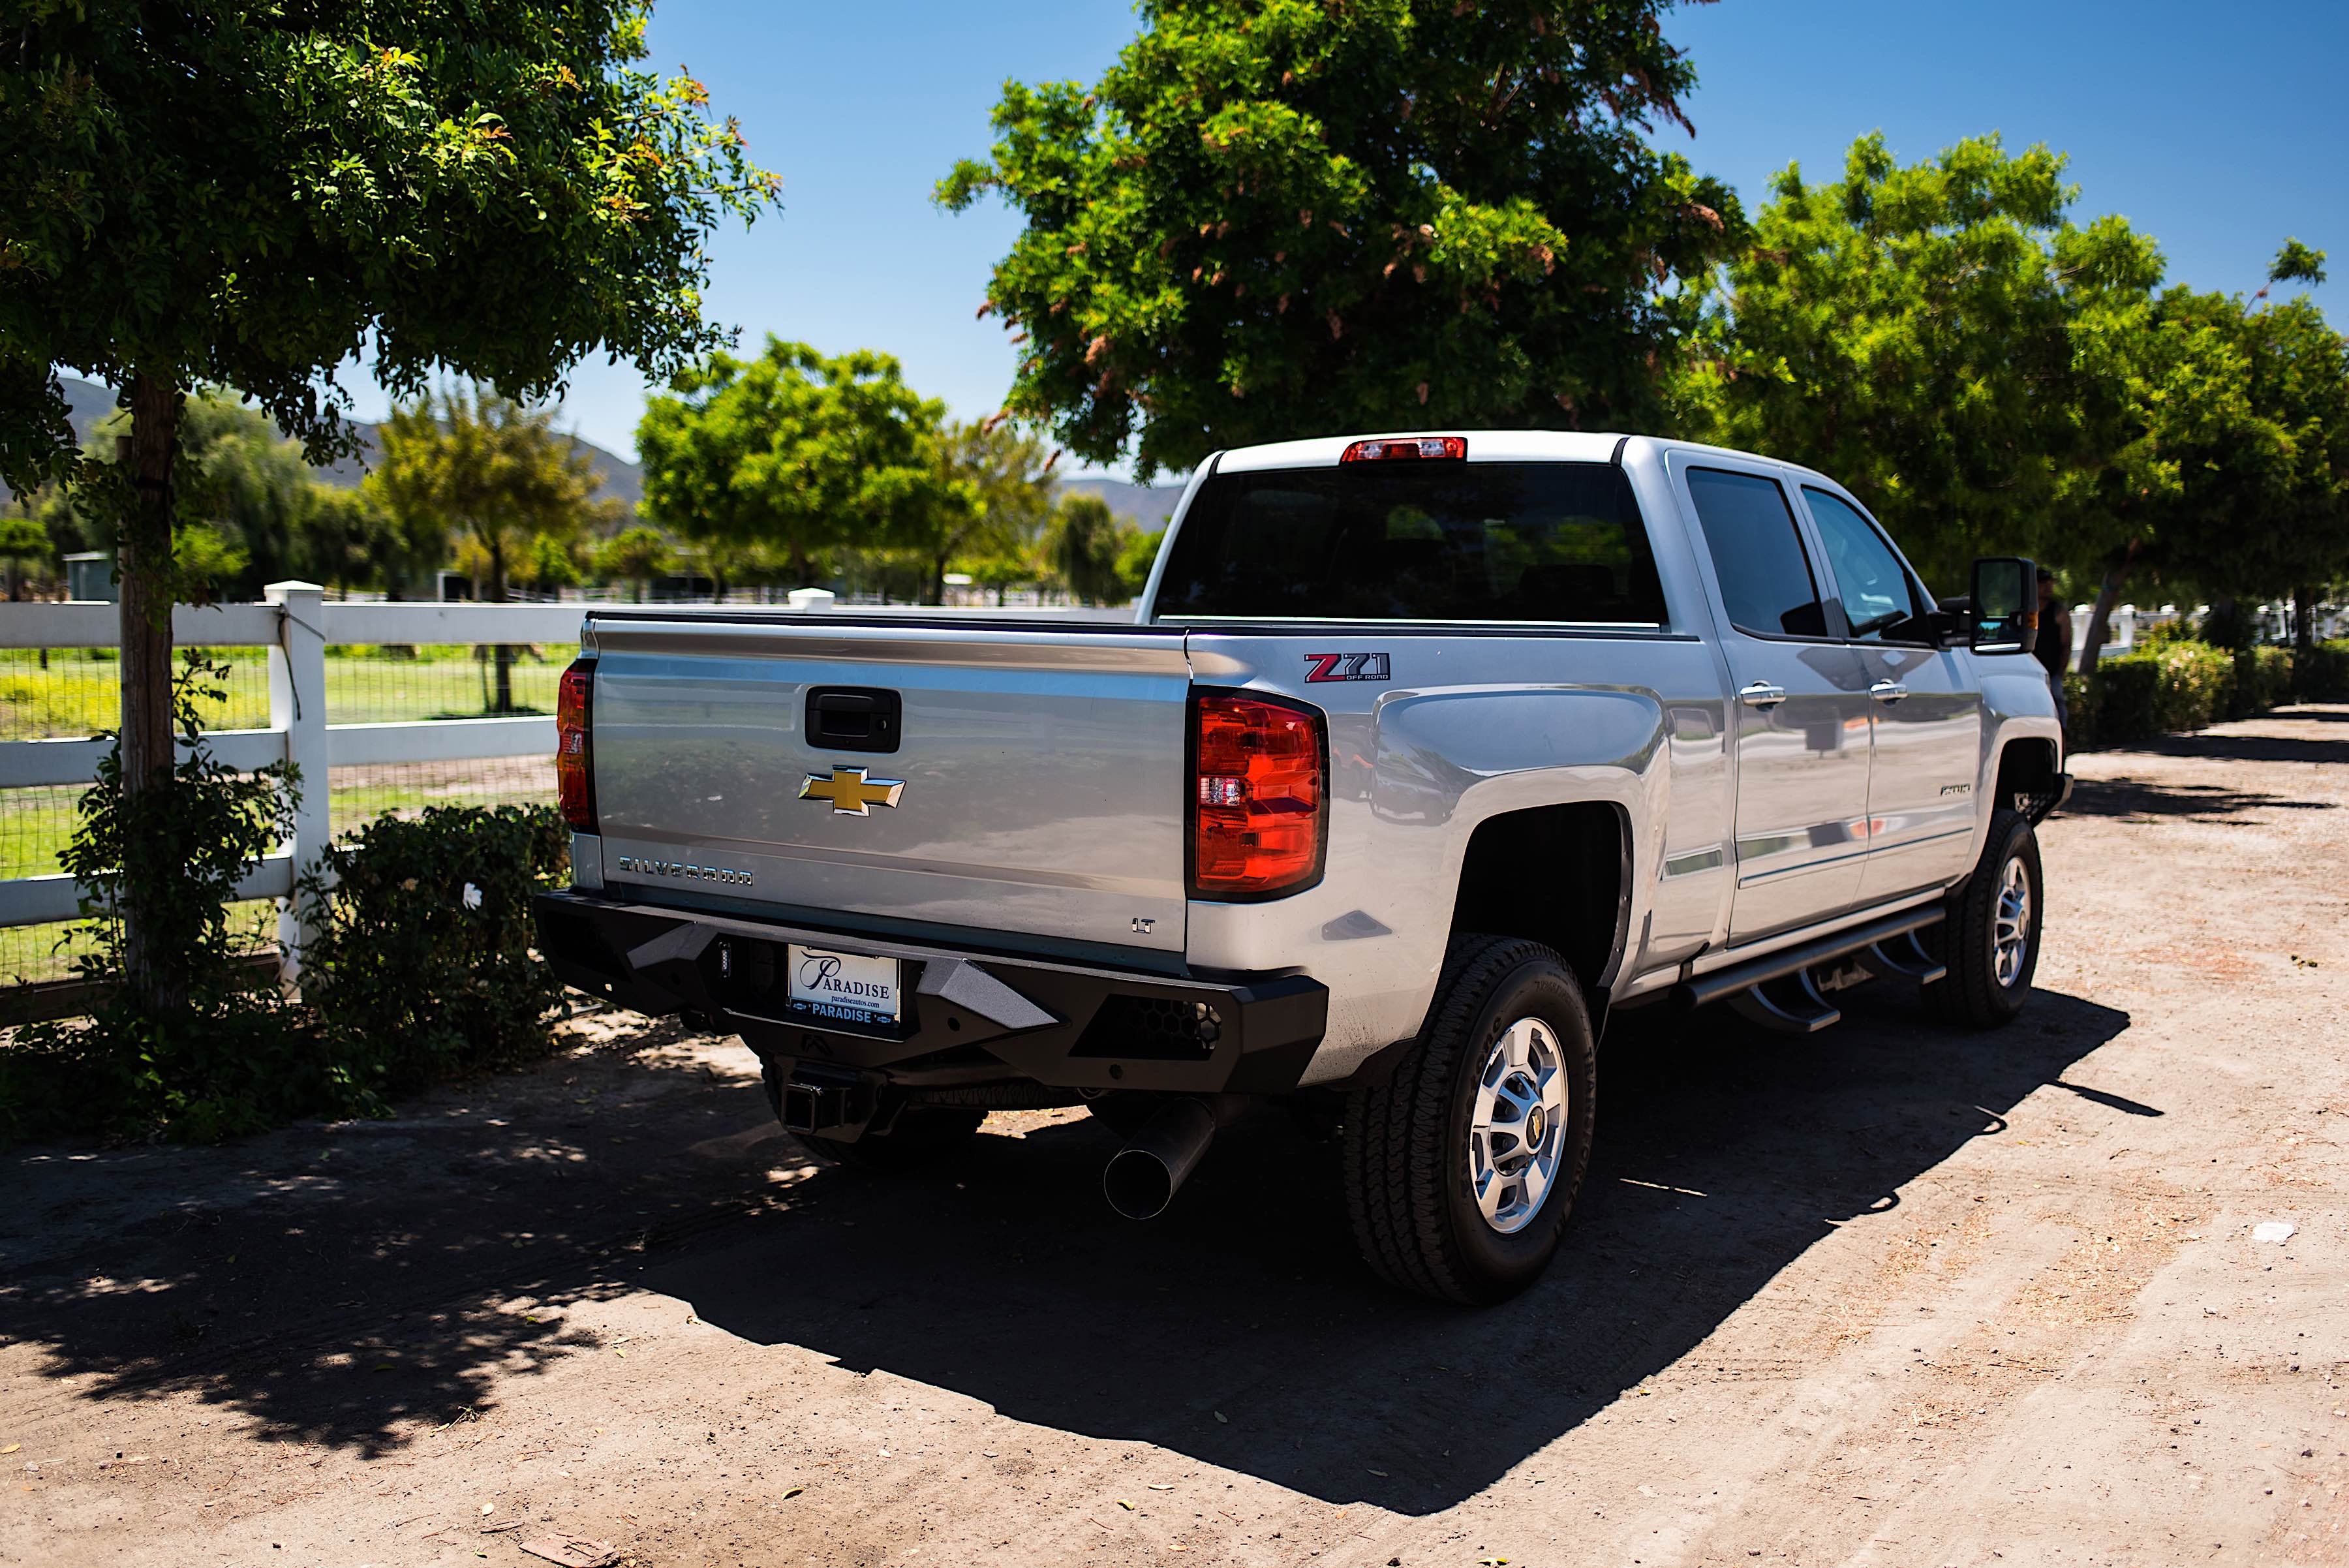
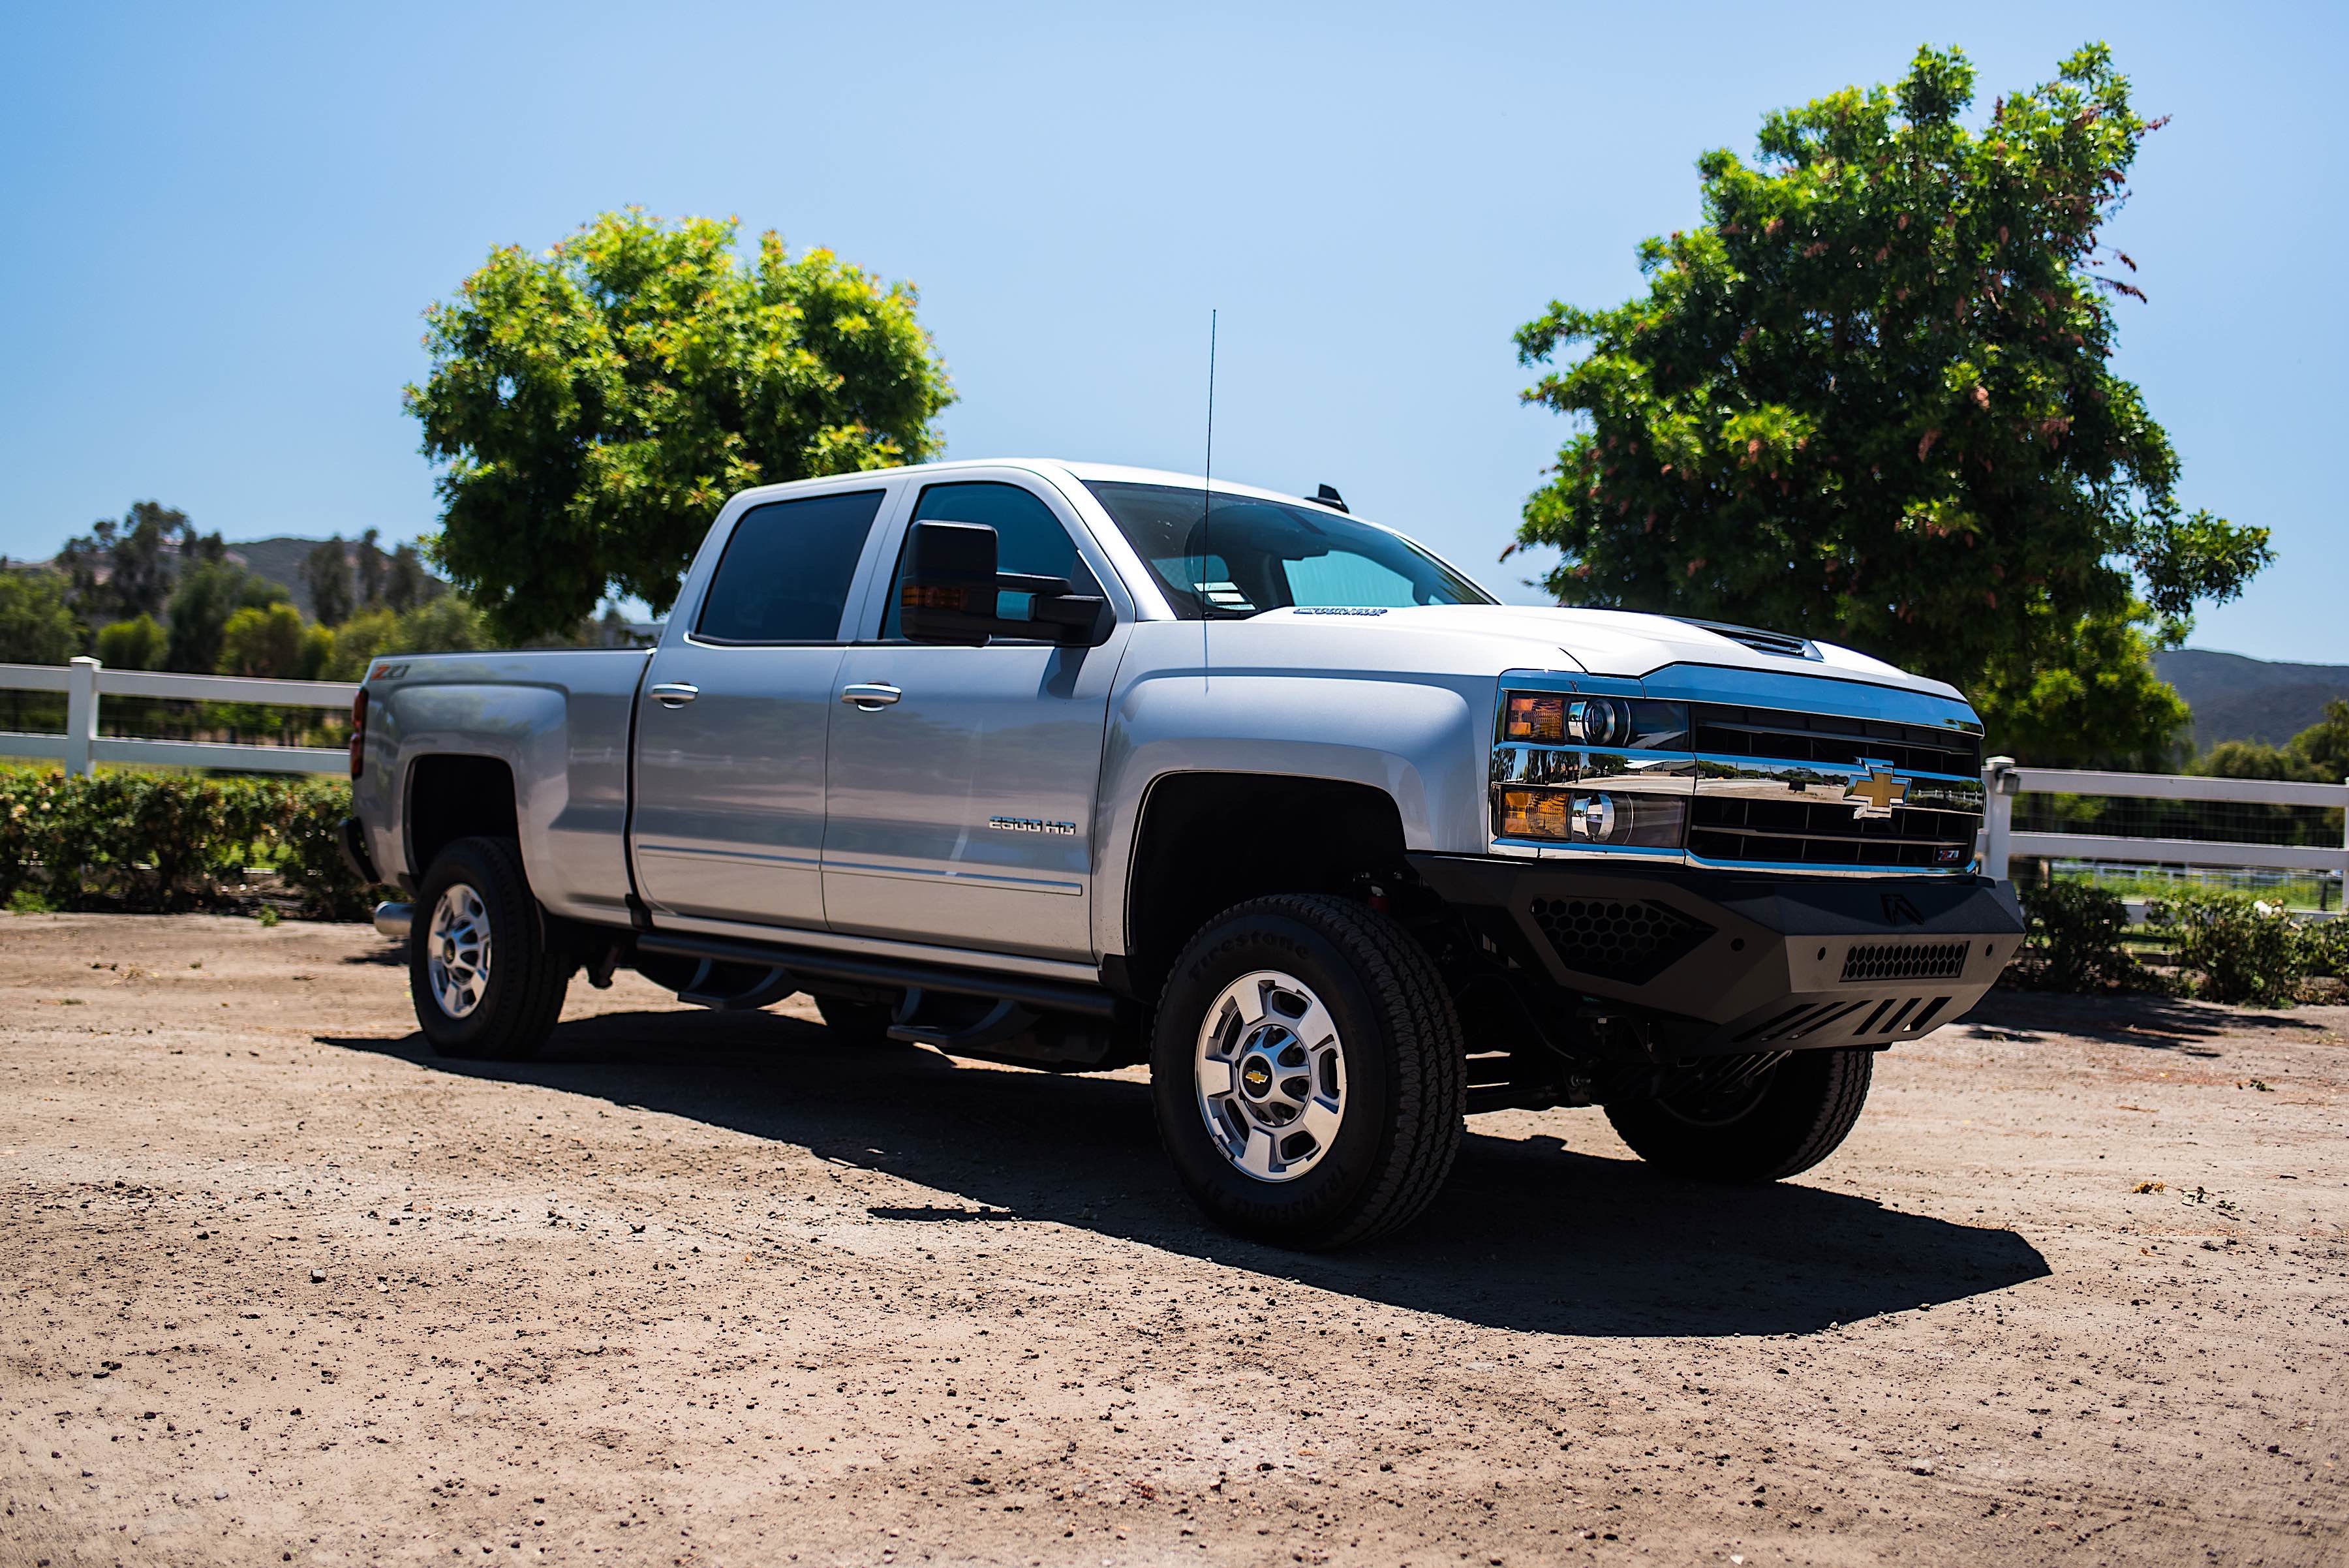
Last but not least, the products from Fab Fours will lend the truck some outward aggression, better protection, and easier accessibility once lifted. To that end, we went with the Vengeance front (PN CH15-V3051-1) and rear (PN CH15-E3051-1) bumpers, as well as side steps (PN J1014). These pieces, combined, will give our Duramax a makeover for the ages.
But there was more to these parts than met the eye. To get a better understanding, we spoke with Fab Fours’ Jason Bukolt, asking him about the vision behind the Vengeance bumper series. “Lightweight, a sleek look, and increased airflow are all things that our bumpers bring to the table,” he said.
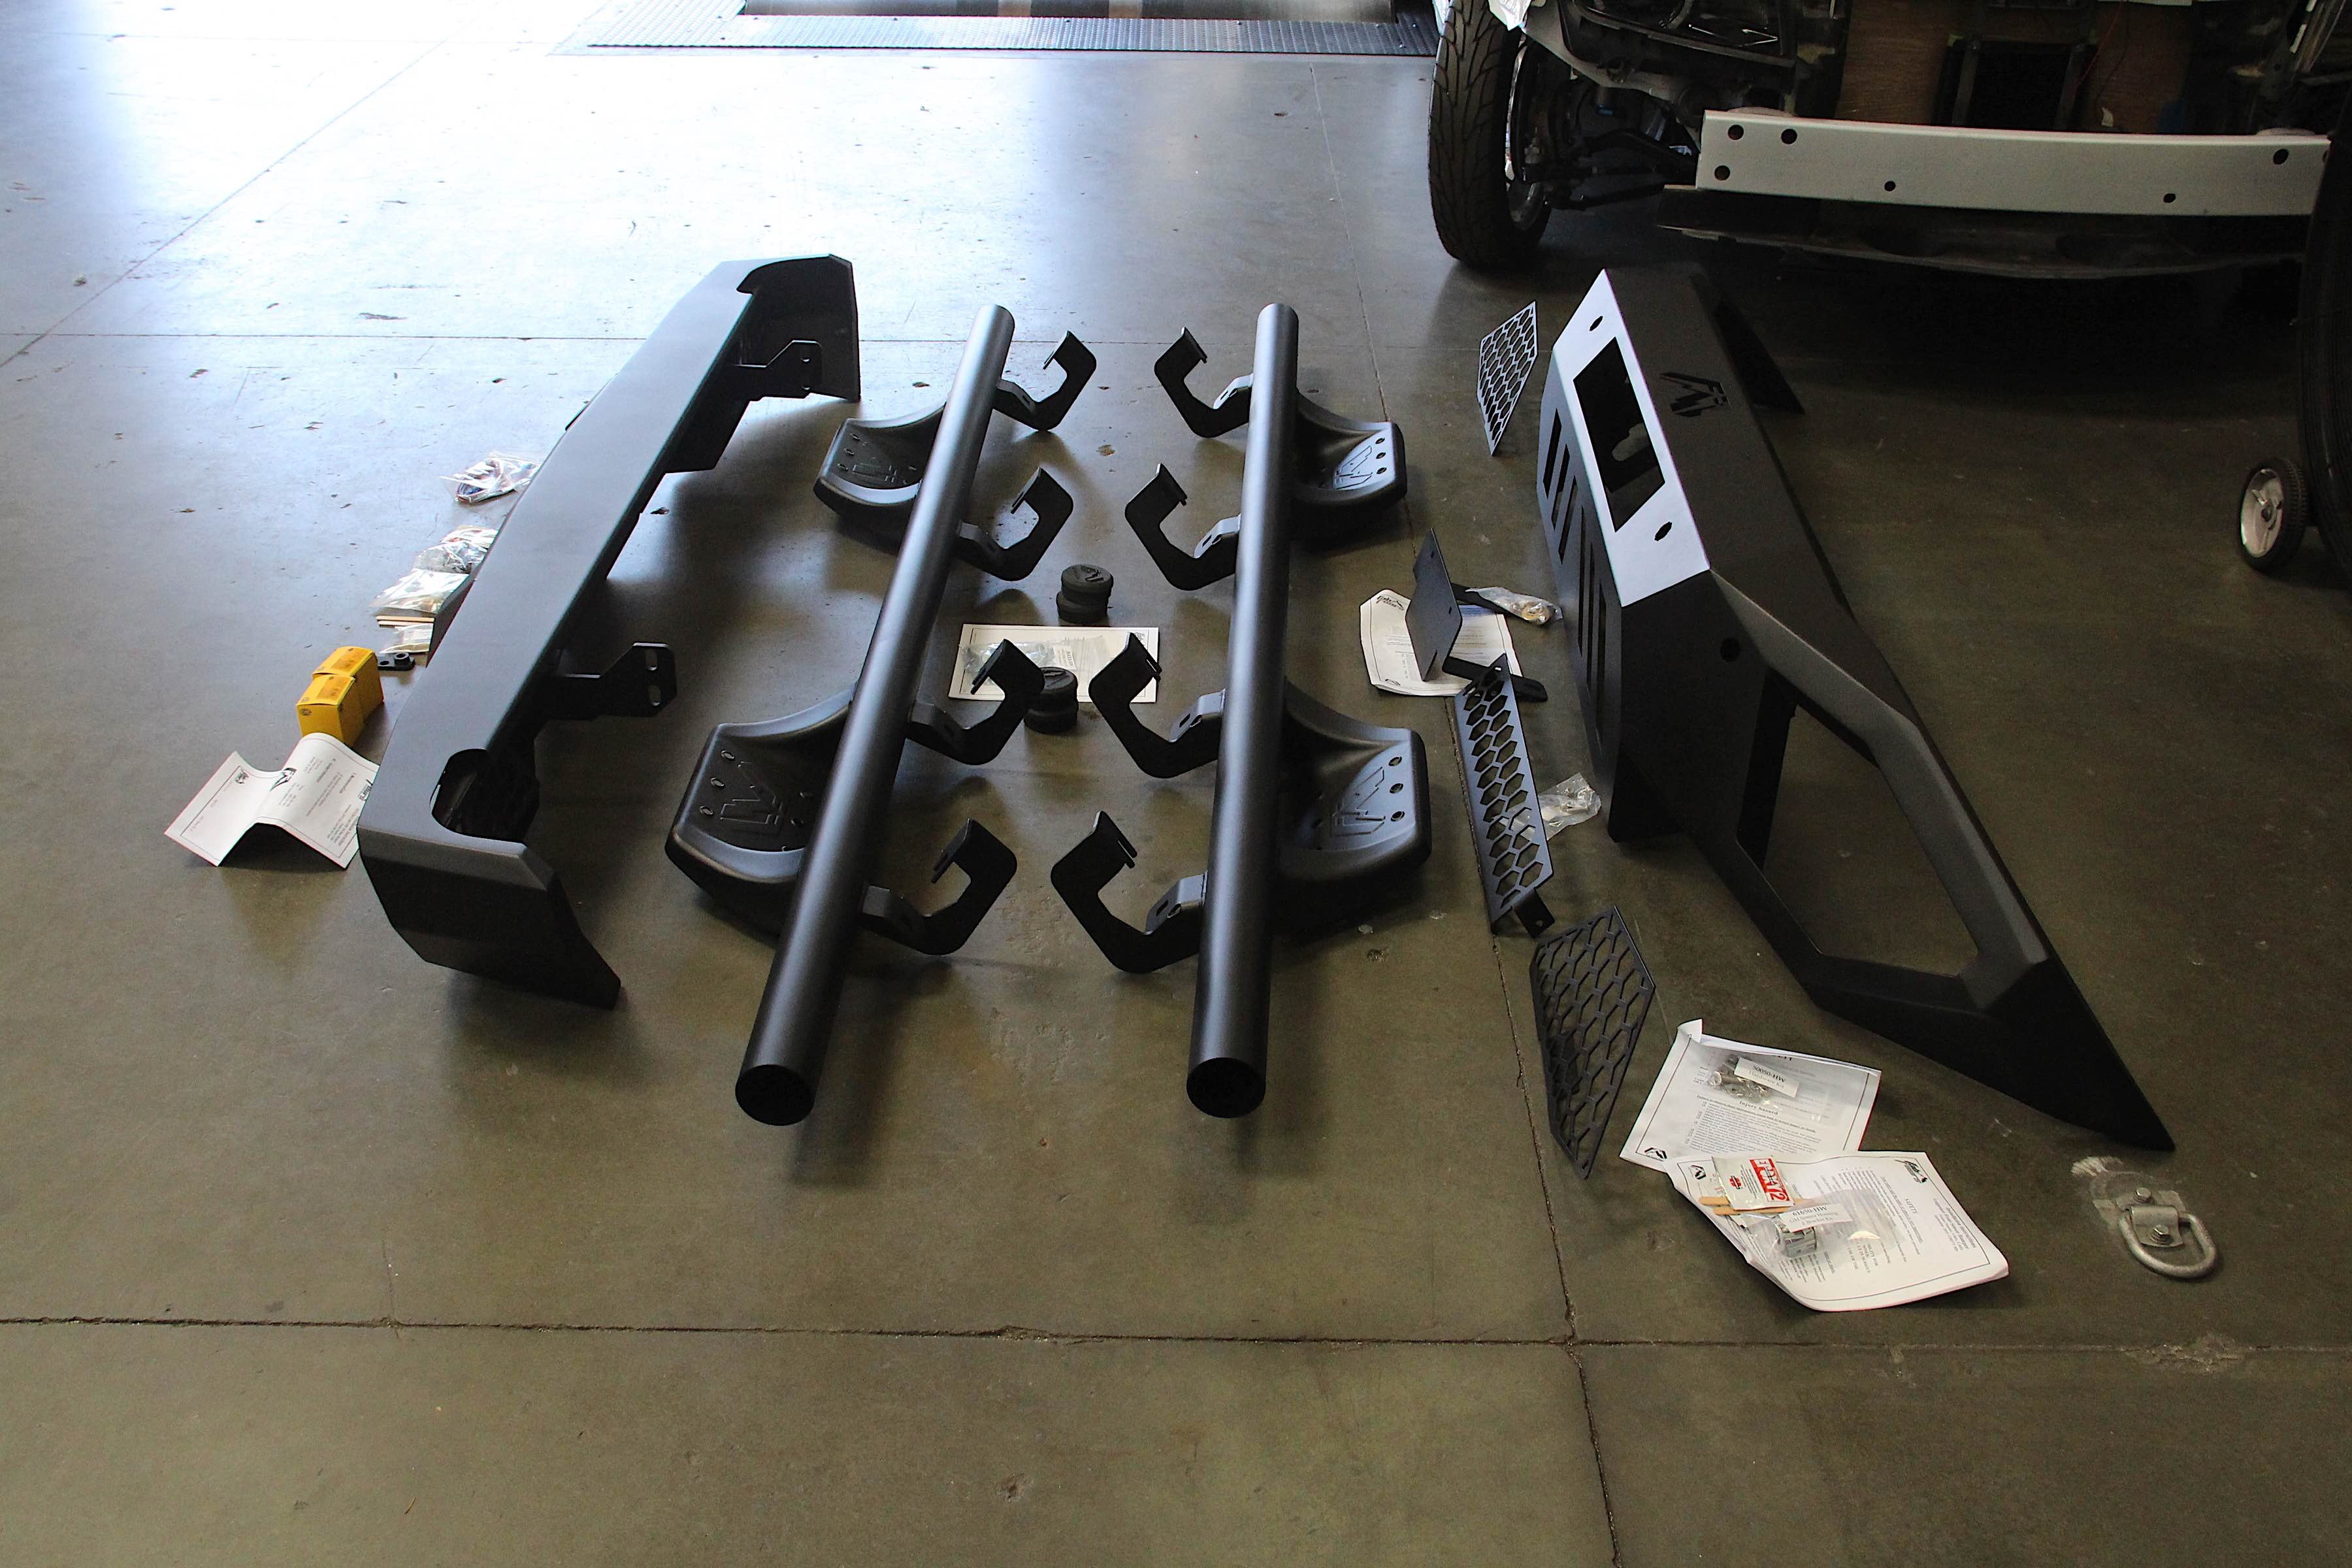
Customization was also a big focus for the Vengeance series. “We’ve seen builders go as far as customizing the bumper to fit a small winch,” said Bukolt. “When it comes to customizing, you can paint-match it, and the sides can easily fit two 2×2-inch dually lights or a six-inch light bar. The center of the bumper is also spacious and can hold a 20-inch light bar.”
As for the side steps, these units had the goods to stay protected. “We use 11-gauge, three-inch-diameter steel tube on the steps and use a 10-foot fully formed enclosed stomp pad,” said Bukolt.
The Install
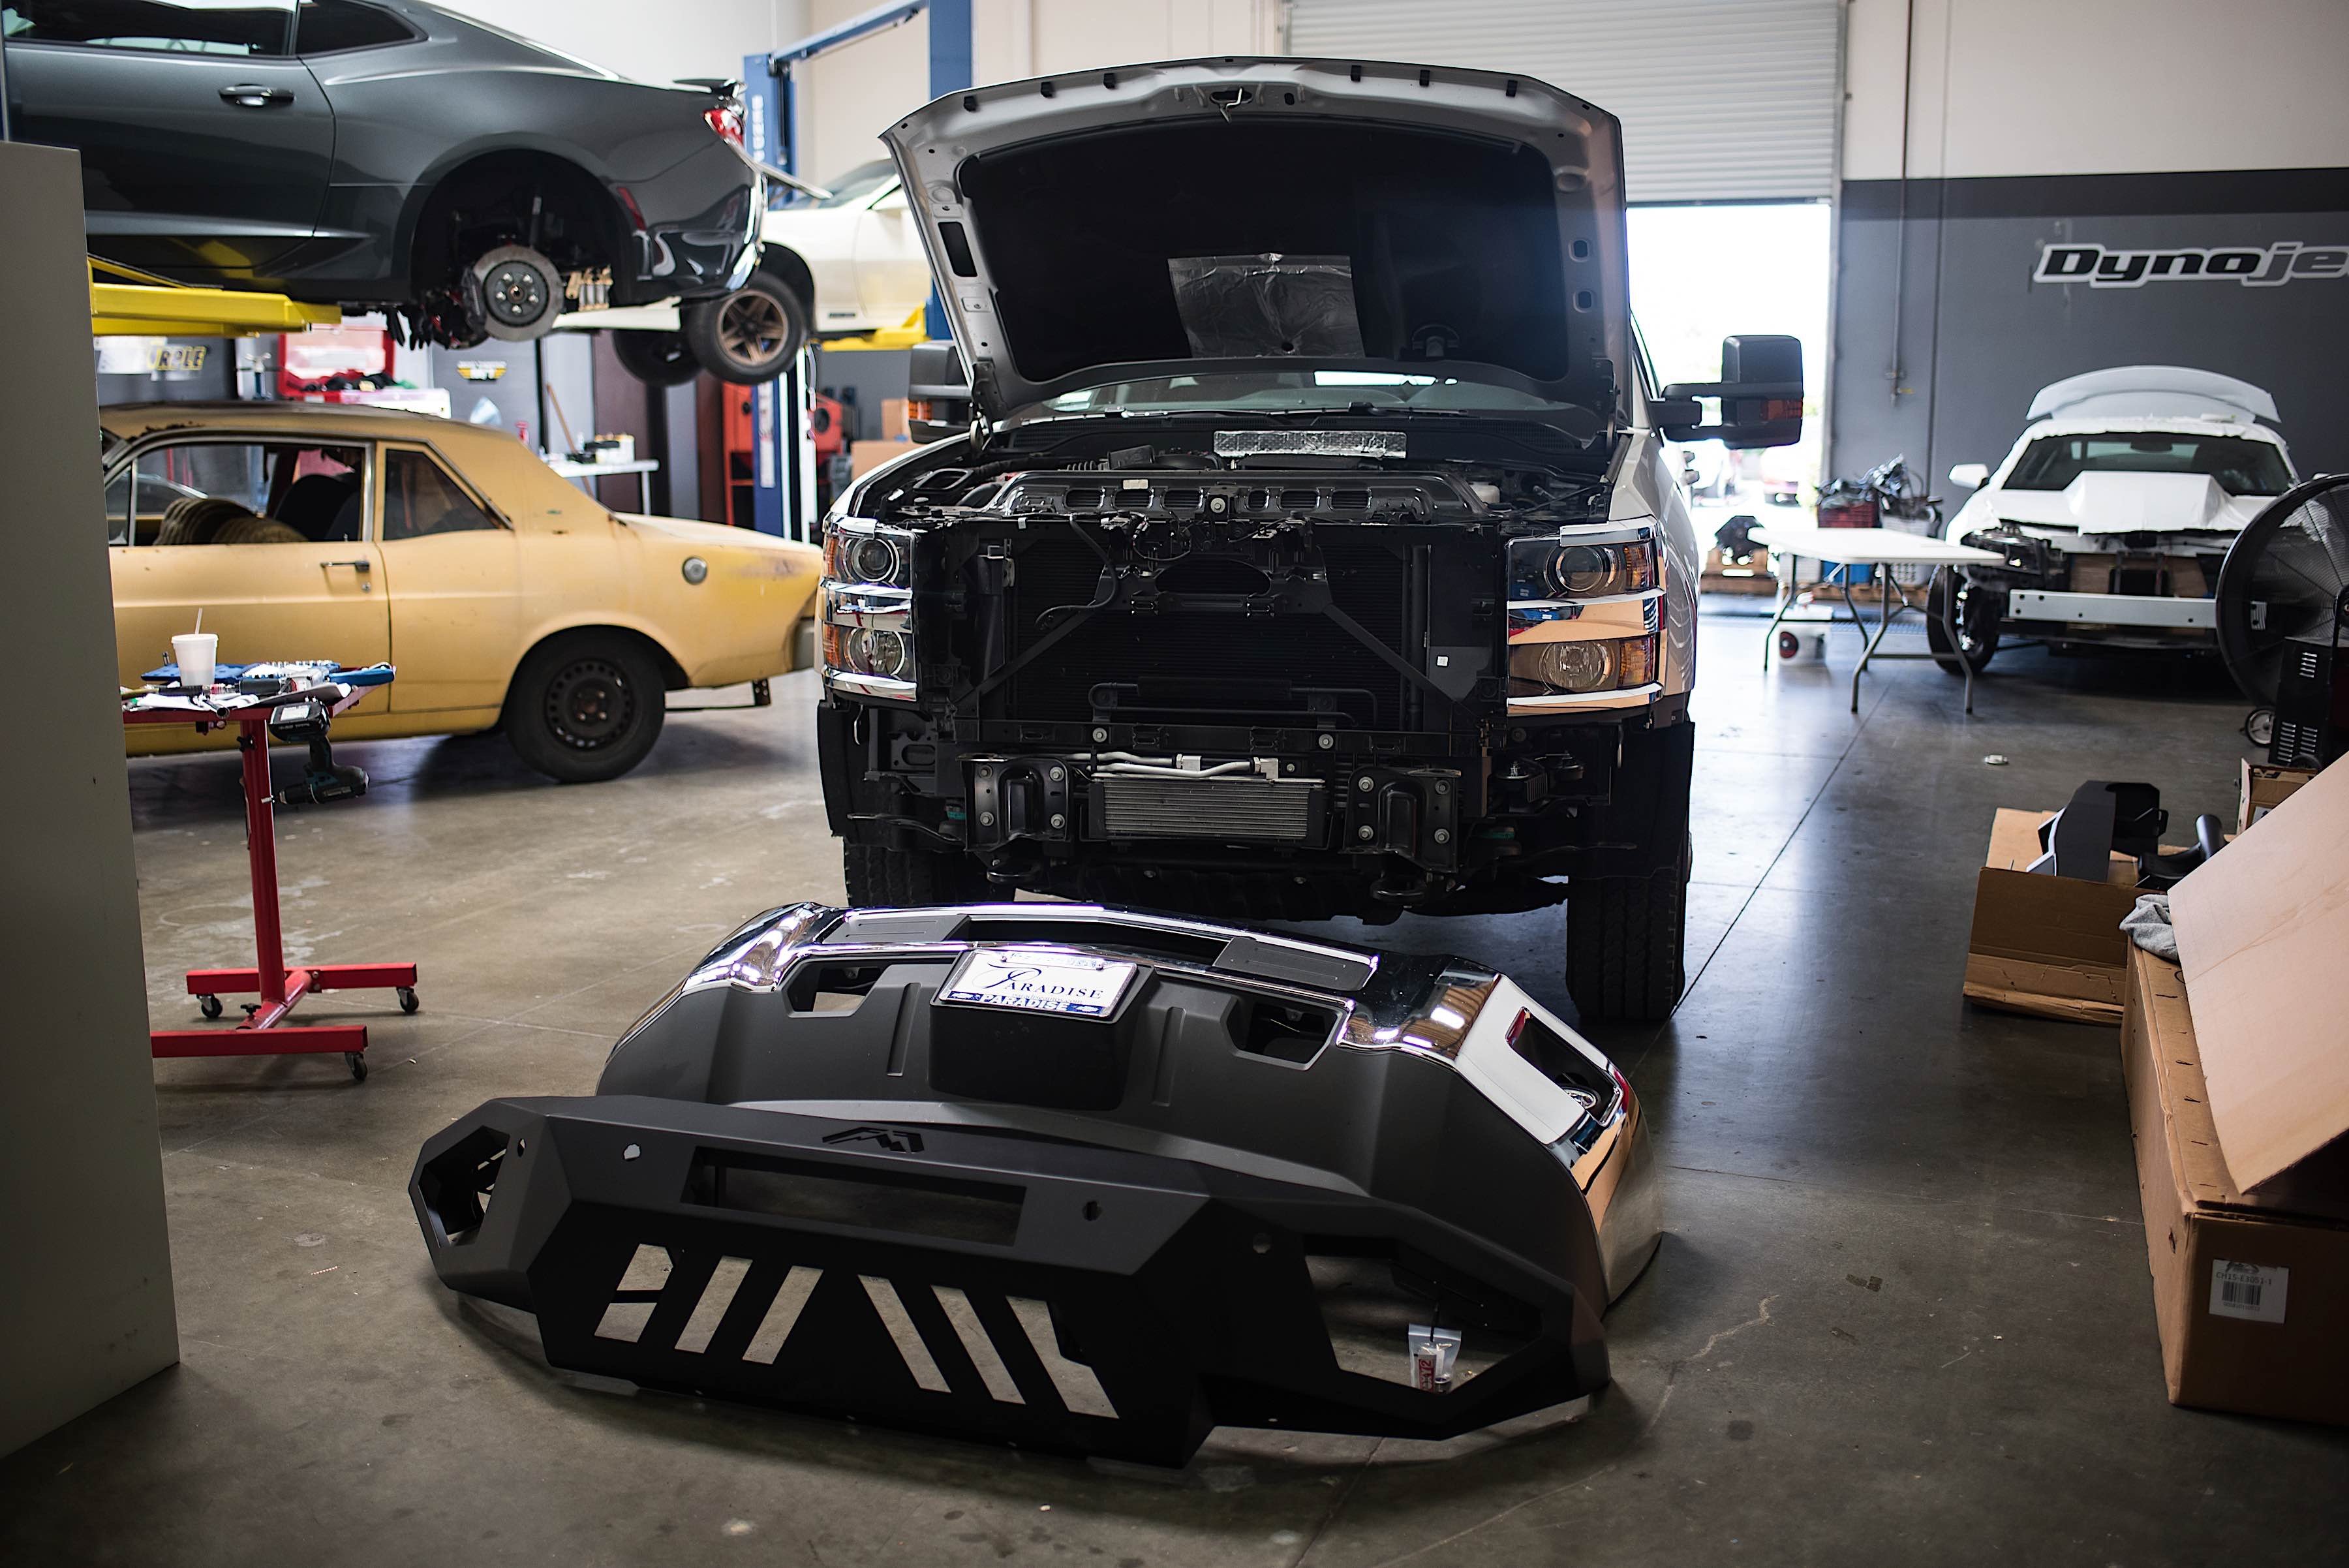
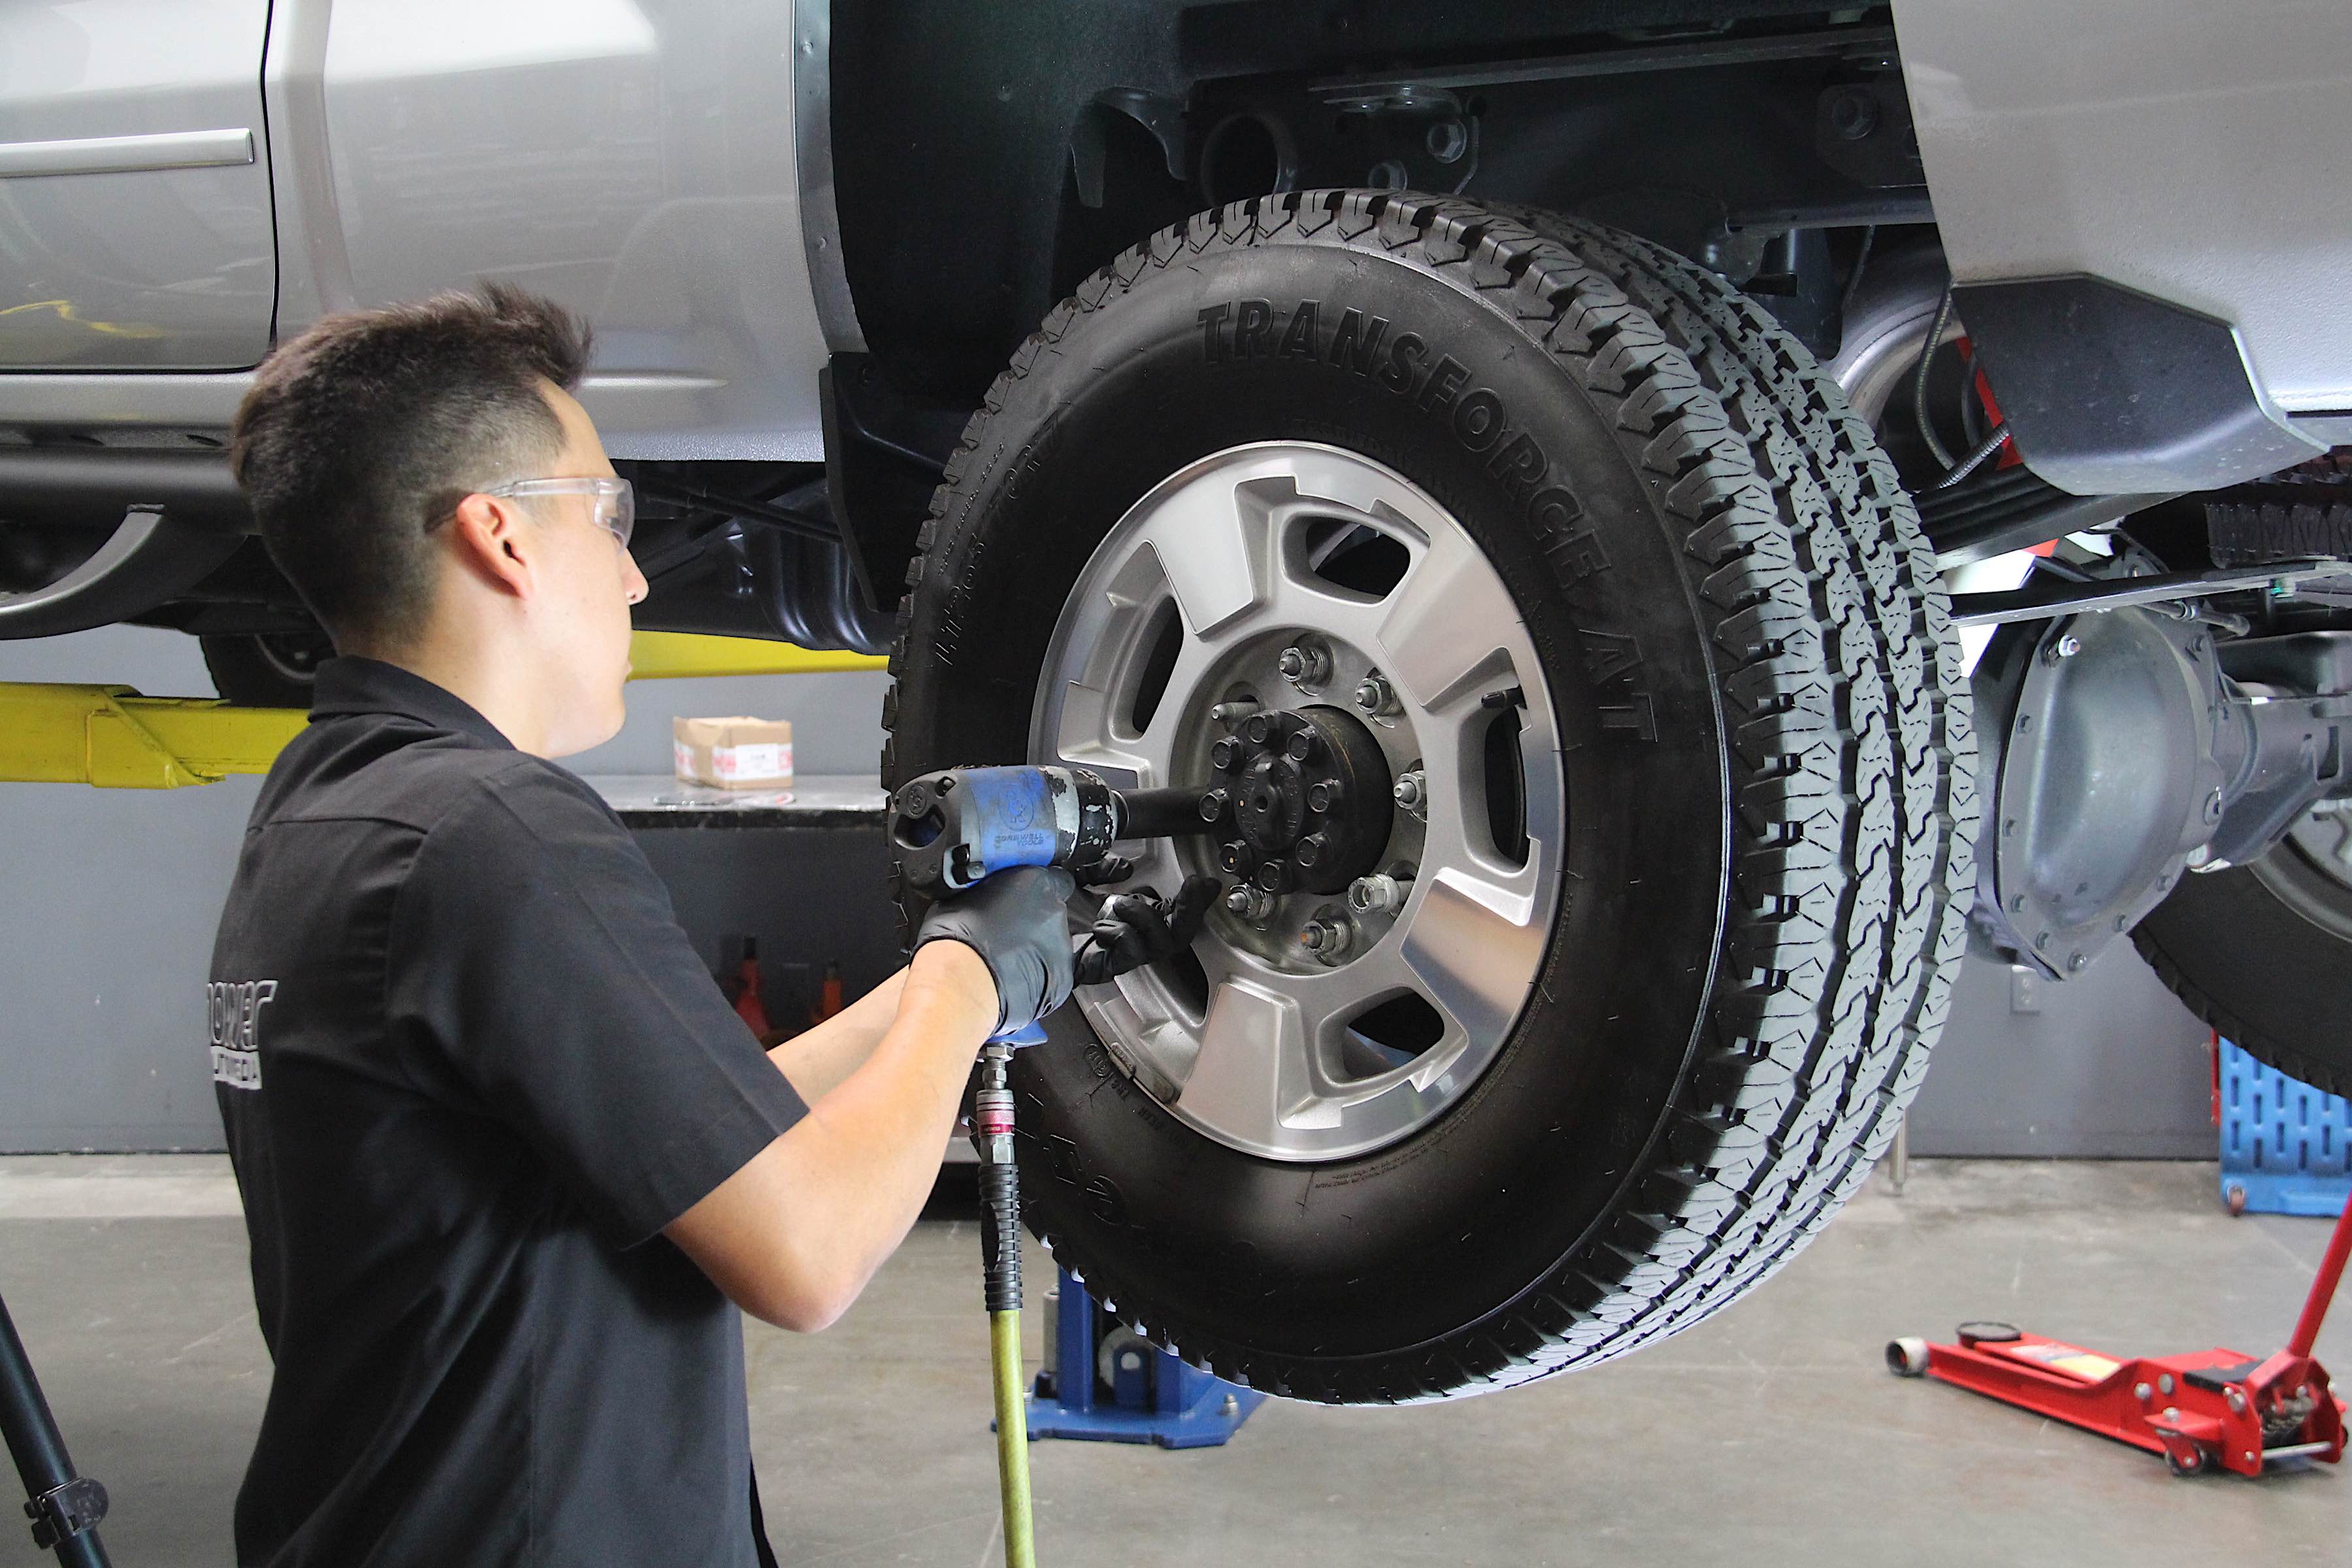
Our install started at the front. With the radiator cover out of the way, we took out the bolts and push pins holding the grille to the truck. Next, we removed the tow hooks and went after the bolts holding the bumper to its mounting bracket, along with the electrical harness for the fog lights. Since our truck did not have parking sensors from the factory, we were done with this phase.
We could now move to the Fab Fours bumper. We lifted the bumper onto the frame and used the same hardware that held in the stock bumper on this new one.

On the rear, we removed the license plate (still fresh from the dealership) and its lights. Two bolts holding the bumper to the trailer hitch were undone, as were the six bolts holding the bumper to the chassis.
We lifted the stock bumper off of the truck and set it on the ground. We took the spare tire access cover and trailer plug off and set them aside for the new bumper. Underneath the truck, we reattached the hitch to the frame but left it somewhat loose while we centered up the bumper. The bumper was properly situated, and then we tightened up all of the hardware. After carefully lowering the tailgate, we determined that it did not make contact with the bumper, which left us satisfied with a job well done. To wrap it up, we reinstalled the spare tire access cover and trailer plug.


Taking care of the rear bumper.
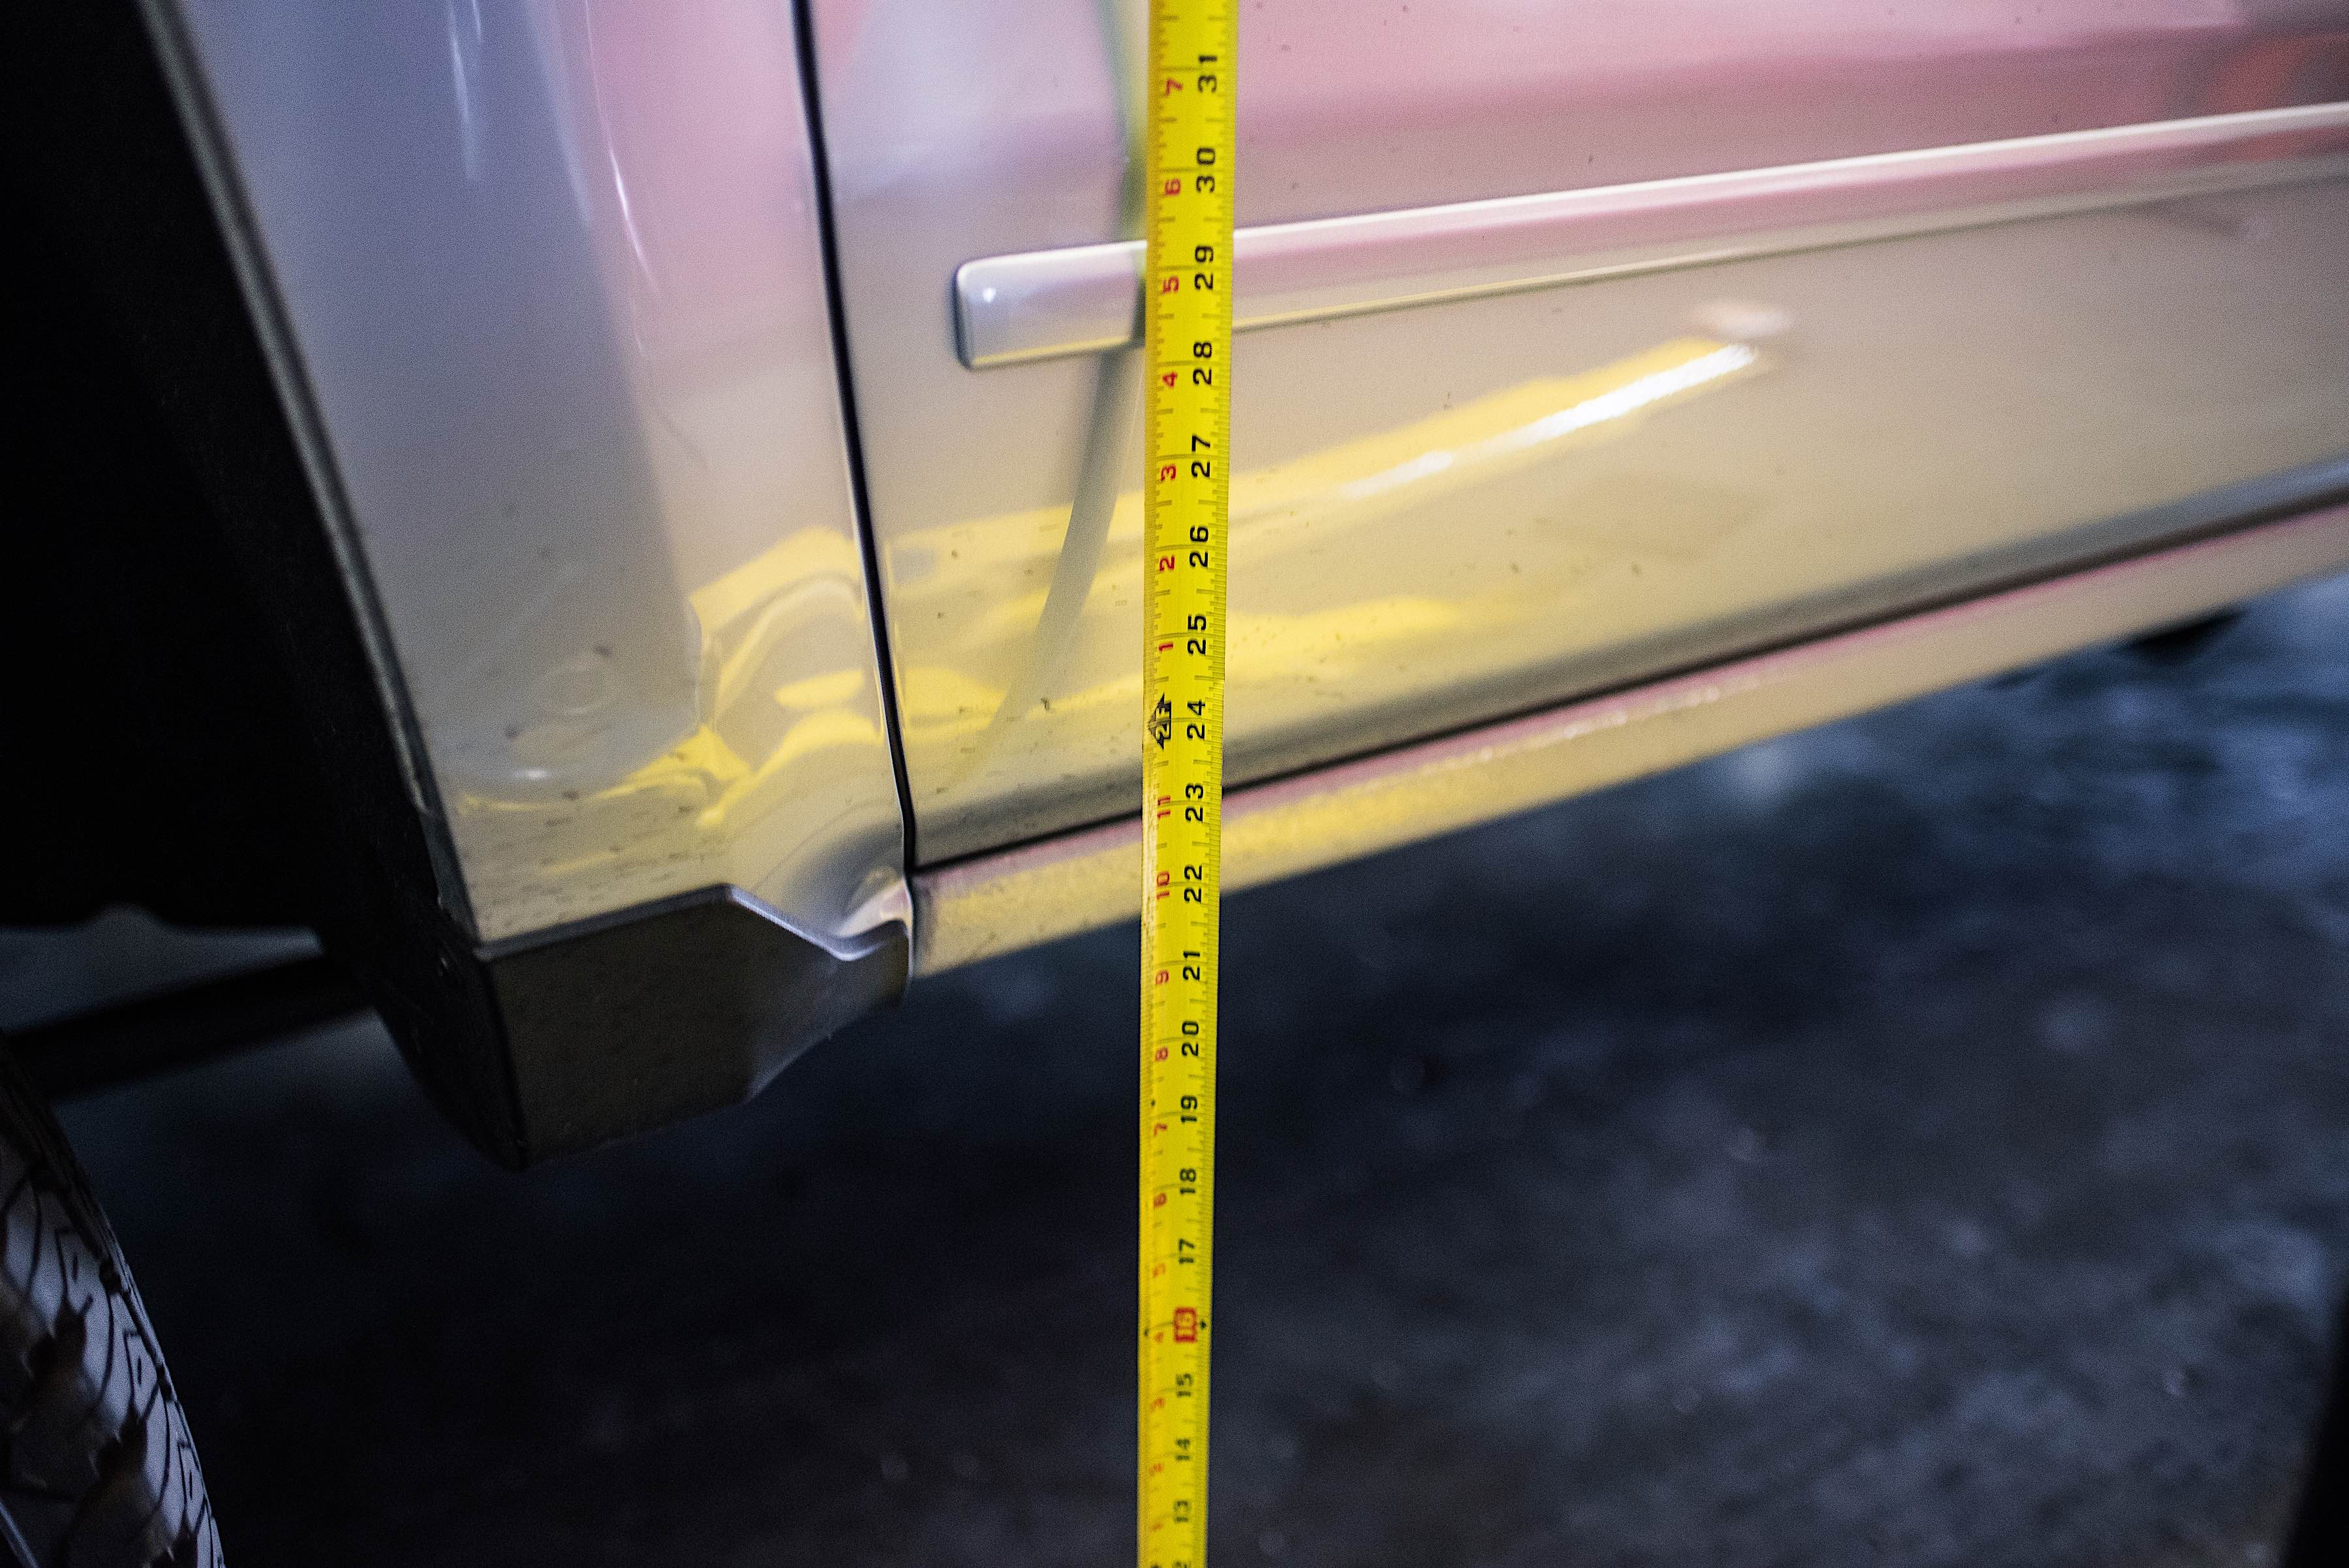
Now it was onto the leveling kit. MaxTrac’s kit was a simple affair, including new torsion keys and spacers for the shock absorbers. We started by measuring how much rake the front had versus the rear, and then got underneath to get a look at the factory torsion key.
Using an air tool, we undid the adjustable bolt. We then removed the keeper and hit the torsion bar from behind, knocking it out of the stock torsion key. The old torsion key now dropped out of its housing, and we could move on.

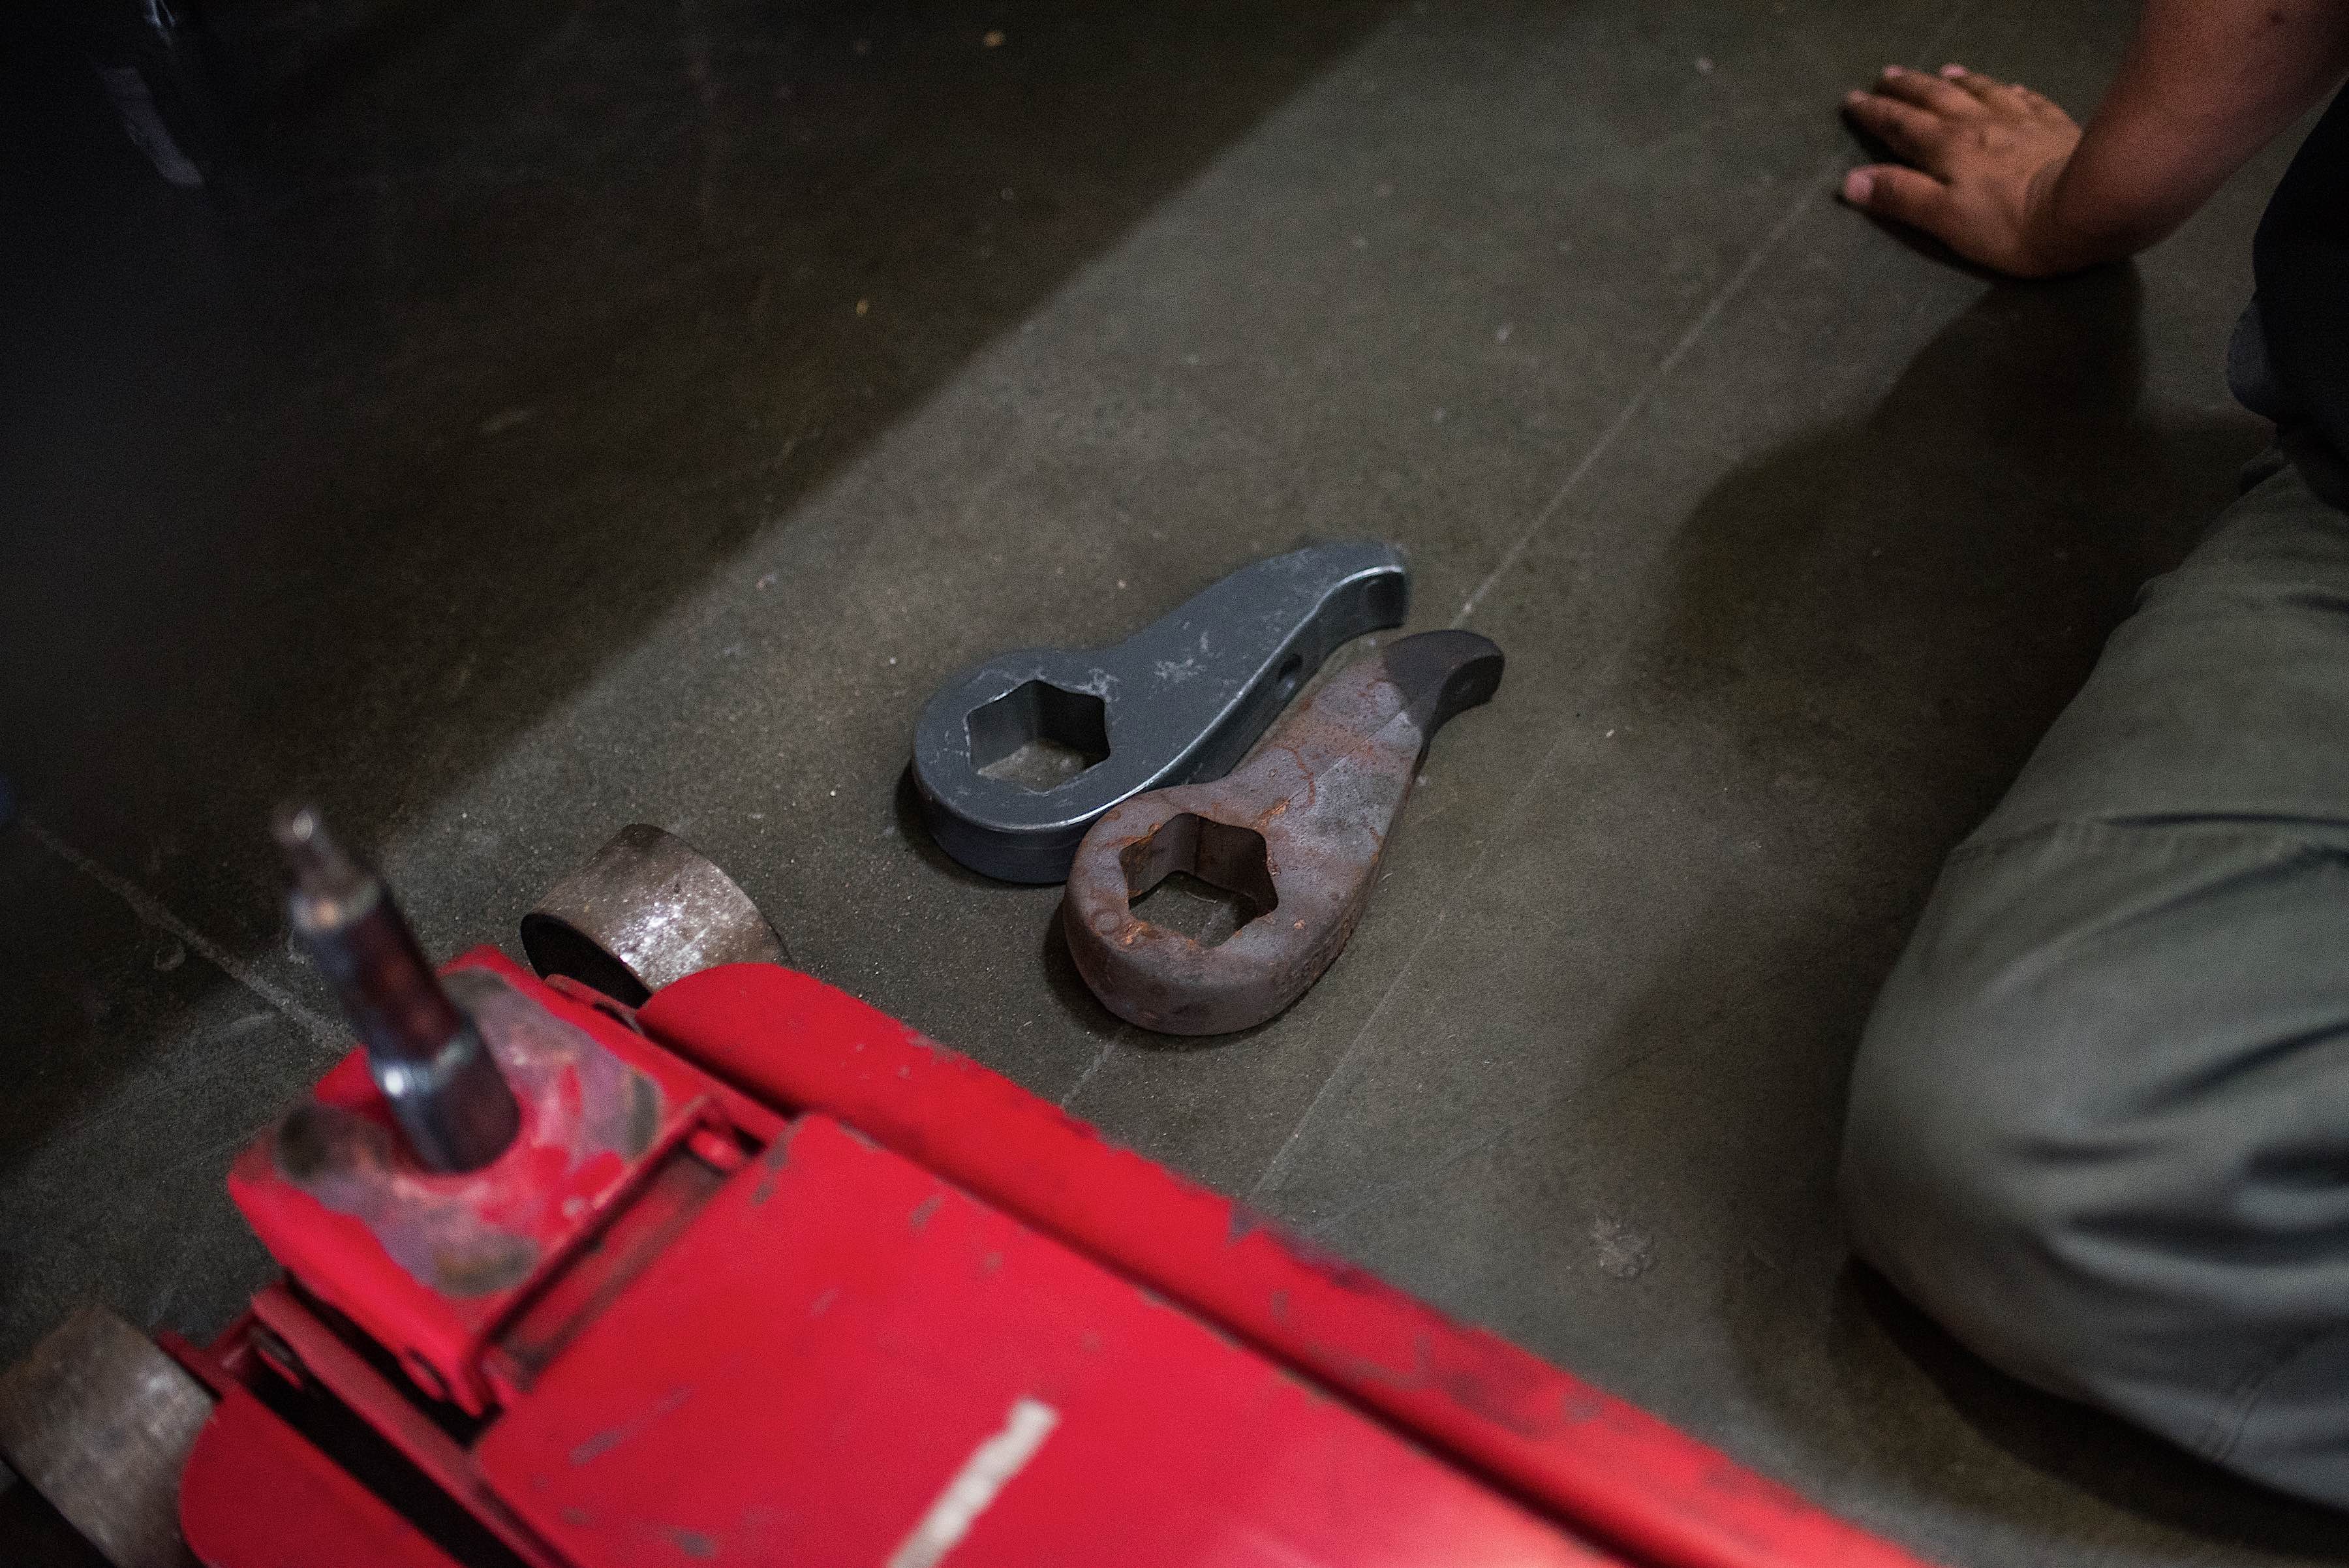
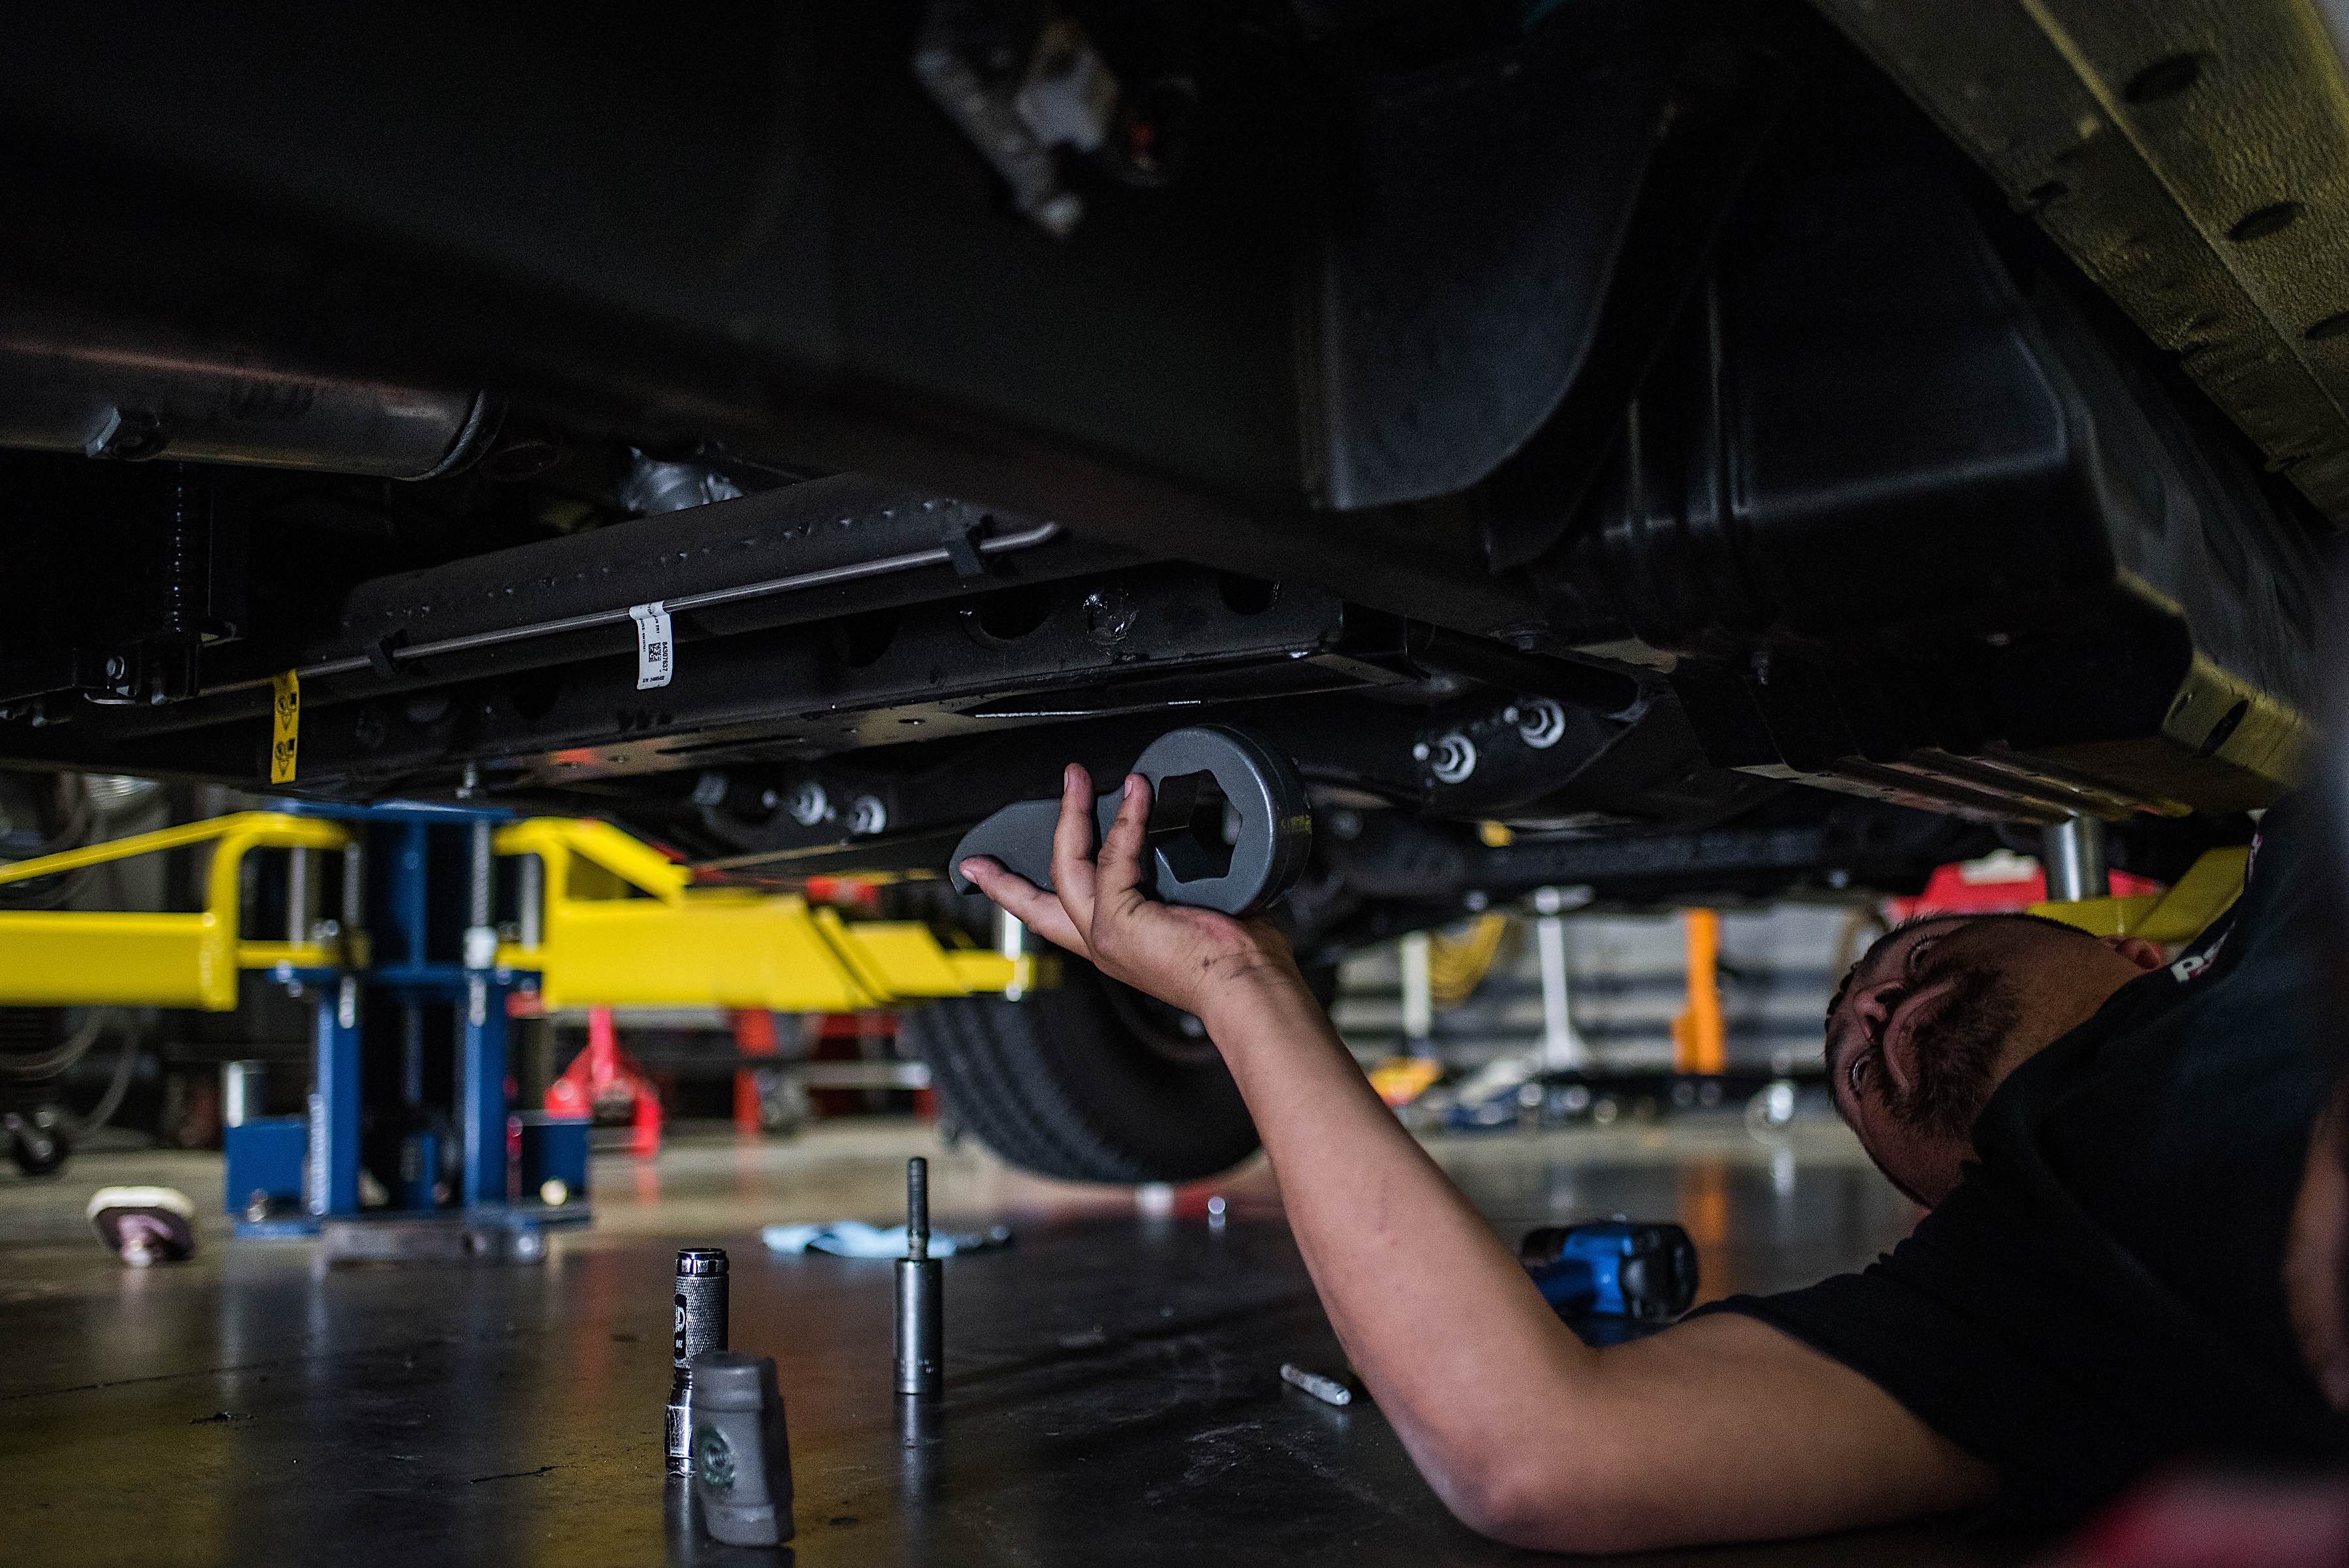
After comparing the old and new torsion keys, we installed the MaxTrac one and carried on.
Although the torsion bar was still new from the factory, we went ahead and slathered on anti-seize grease and let it hang for a bit. We took our new MaxTrac key and installed it into the housing, reinstalling the torsion bar, keeper, and adjustment bolt. We then got topside and did the measurement on the front and liked the rake we had it at now. That wrapped up the torsion key install.
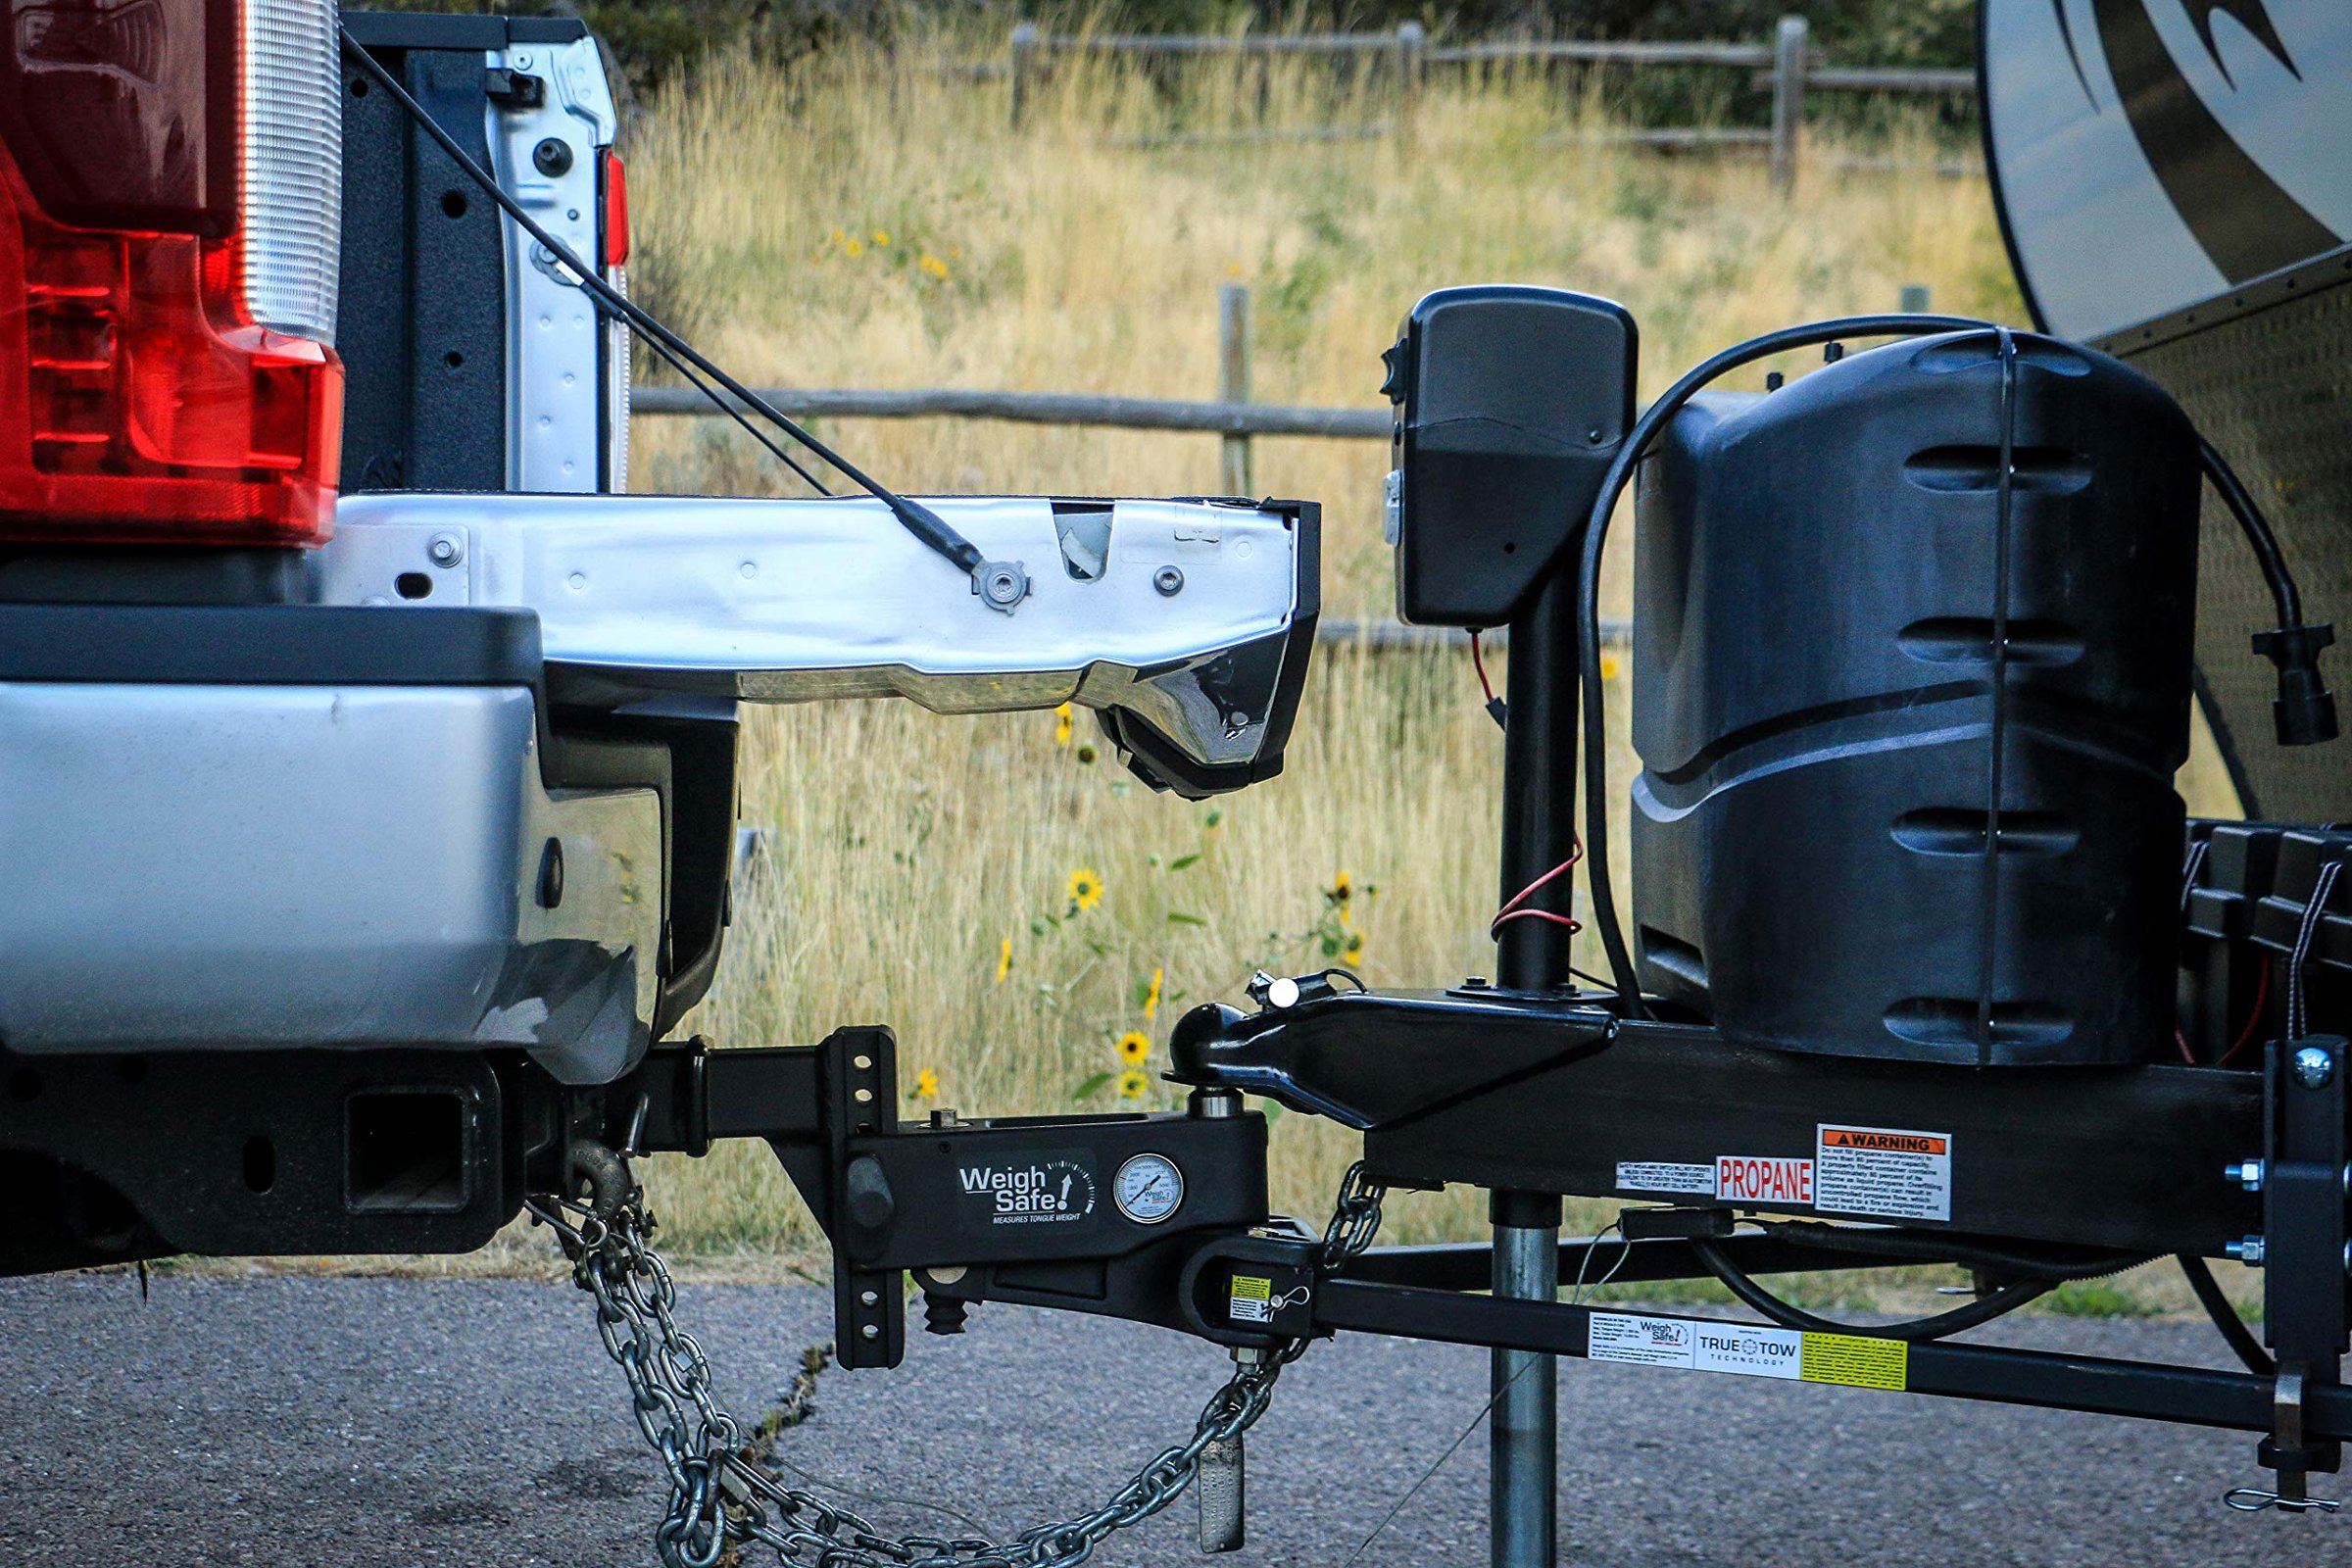
Now, we were onto the air springs. With the truck lifted, we removed the wheels and set them aside. The jounce bumper (aka bump stop) was removed, and in its place went the upper bracket. The U-bolt that held the upper bracket in place was checked against the leaf spring and, finding it cleared the path of the leaf spring, was tightened.
On the lower bracket, we installed the air spring. We left it finger-tight so we could adjust it later, and moved onto fitting it to the upper bracket. This was also where we installed an air fitting as well, securing it to the air combo stud on the spring and then aligning the spring with a hole on the upper bracket. After we had the spring situated, we took a permanent marker and made an alignment mark on the spring and lower bracket.
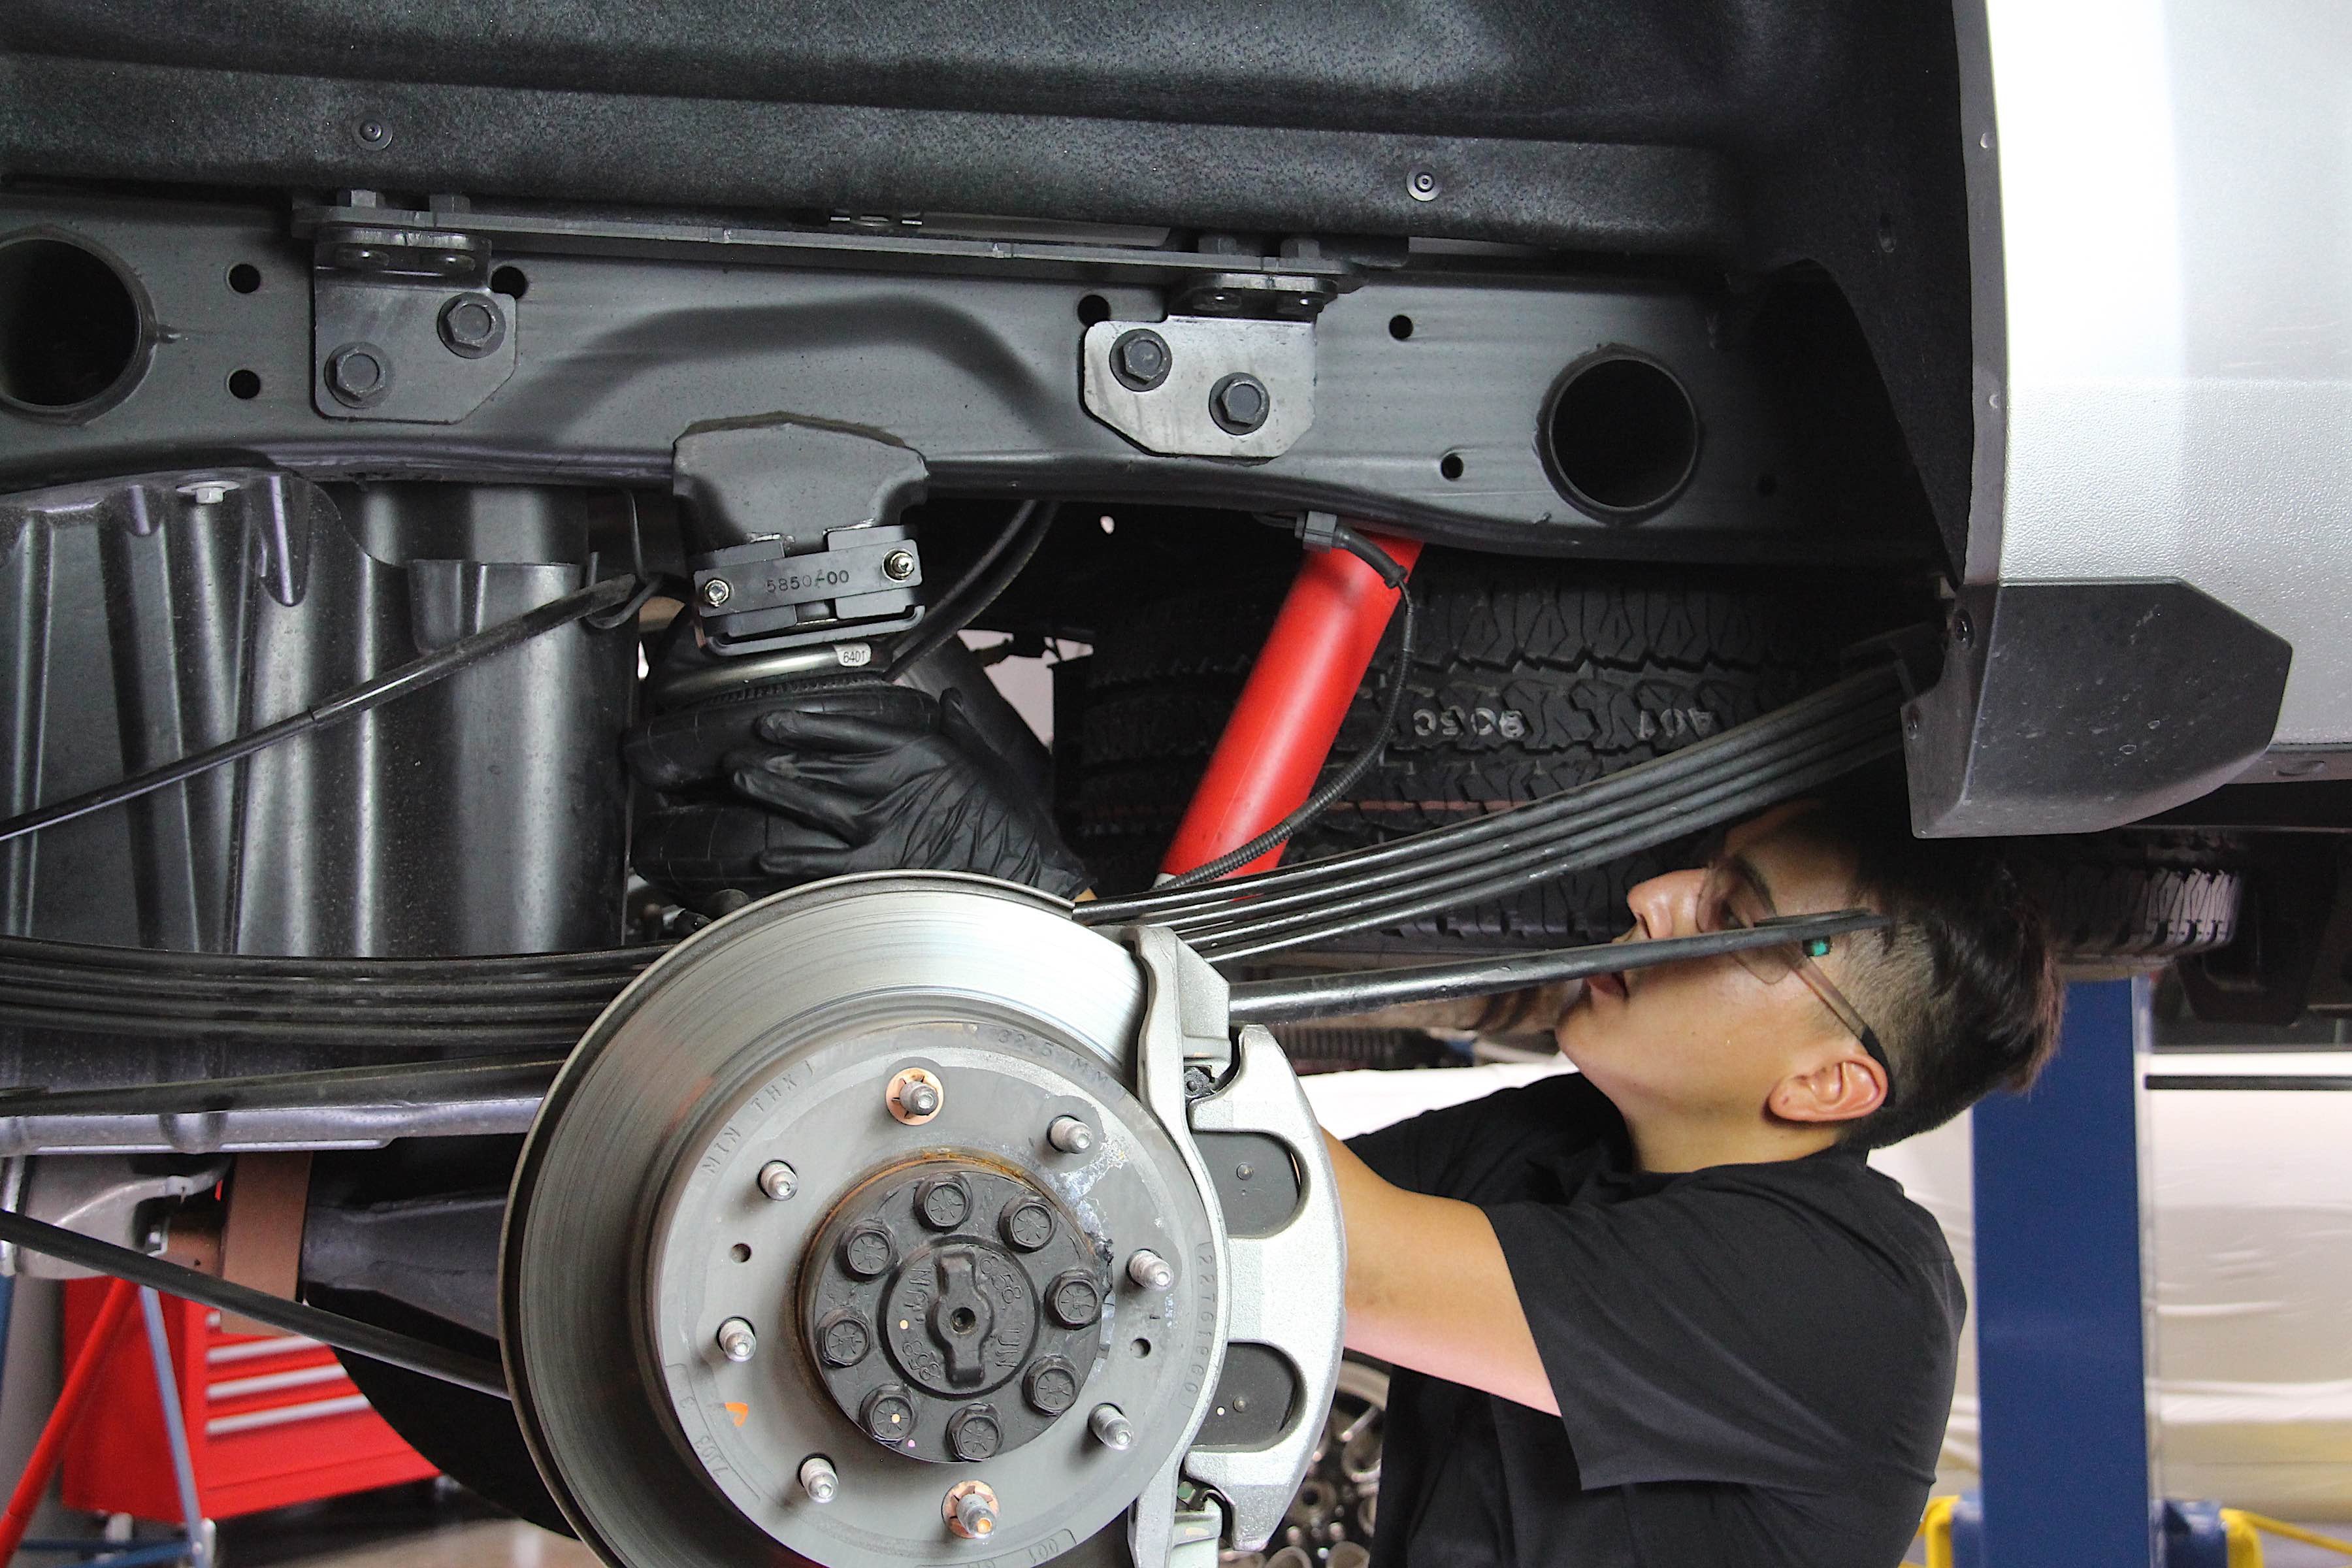
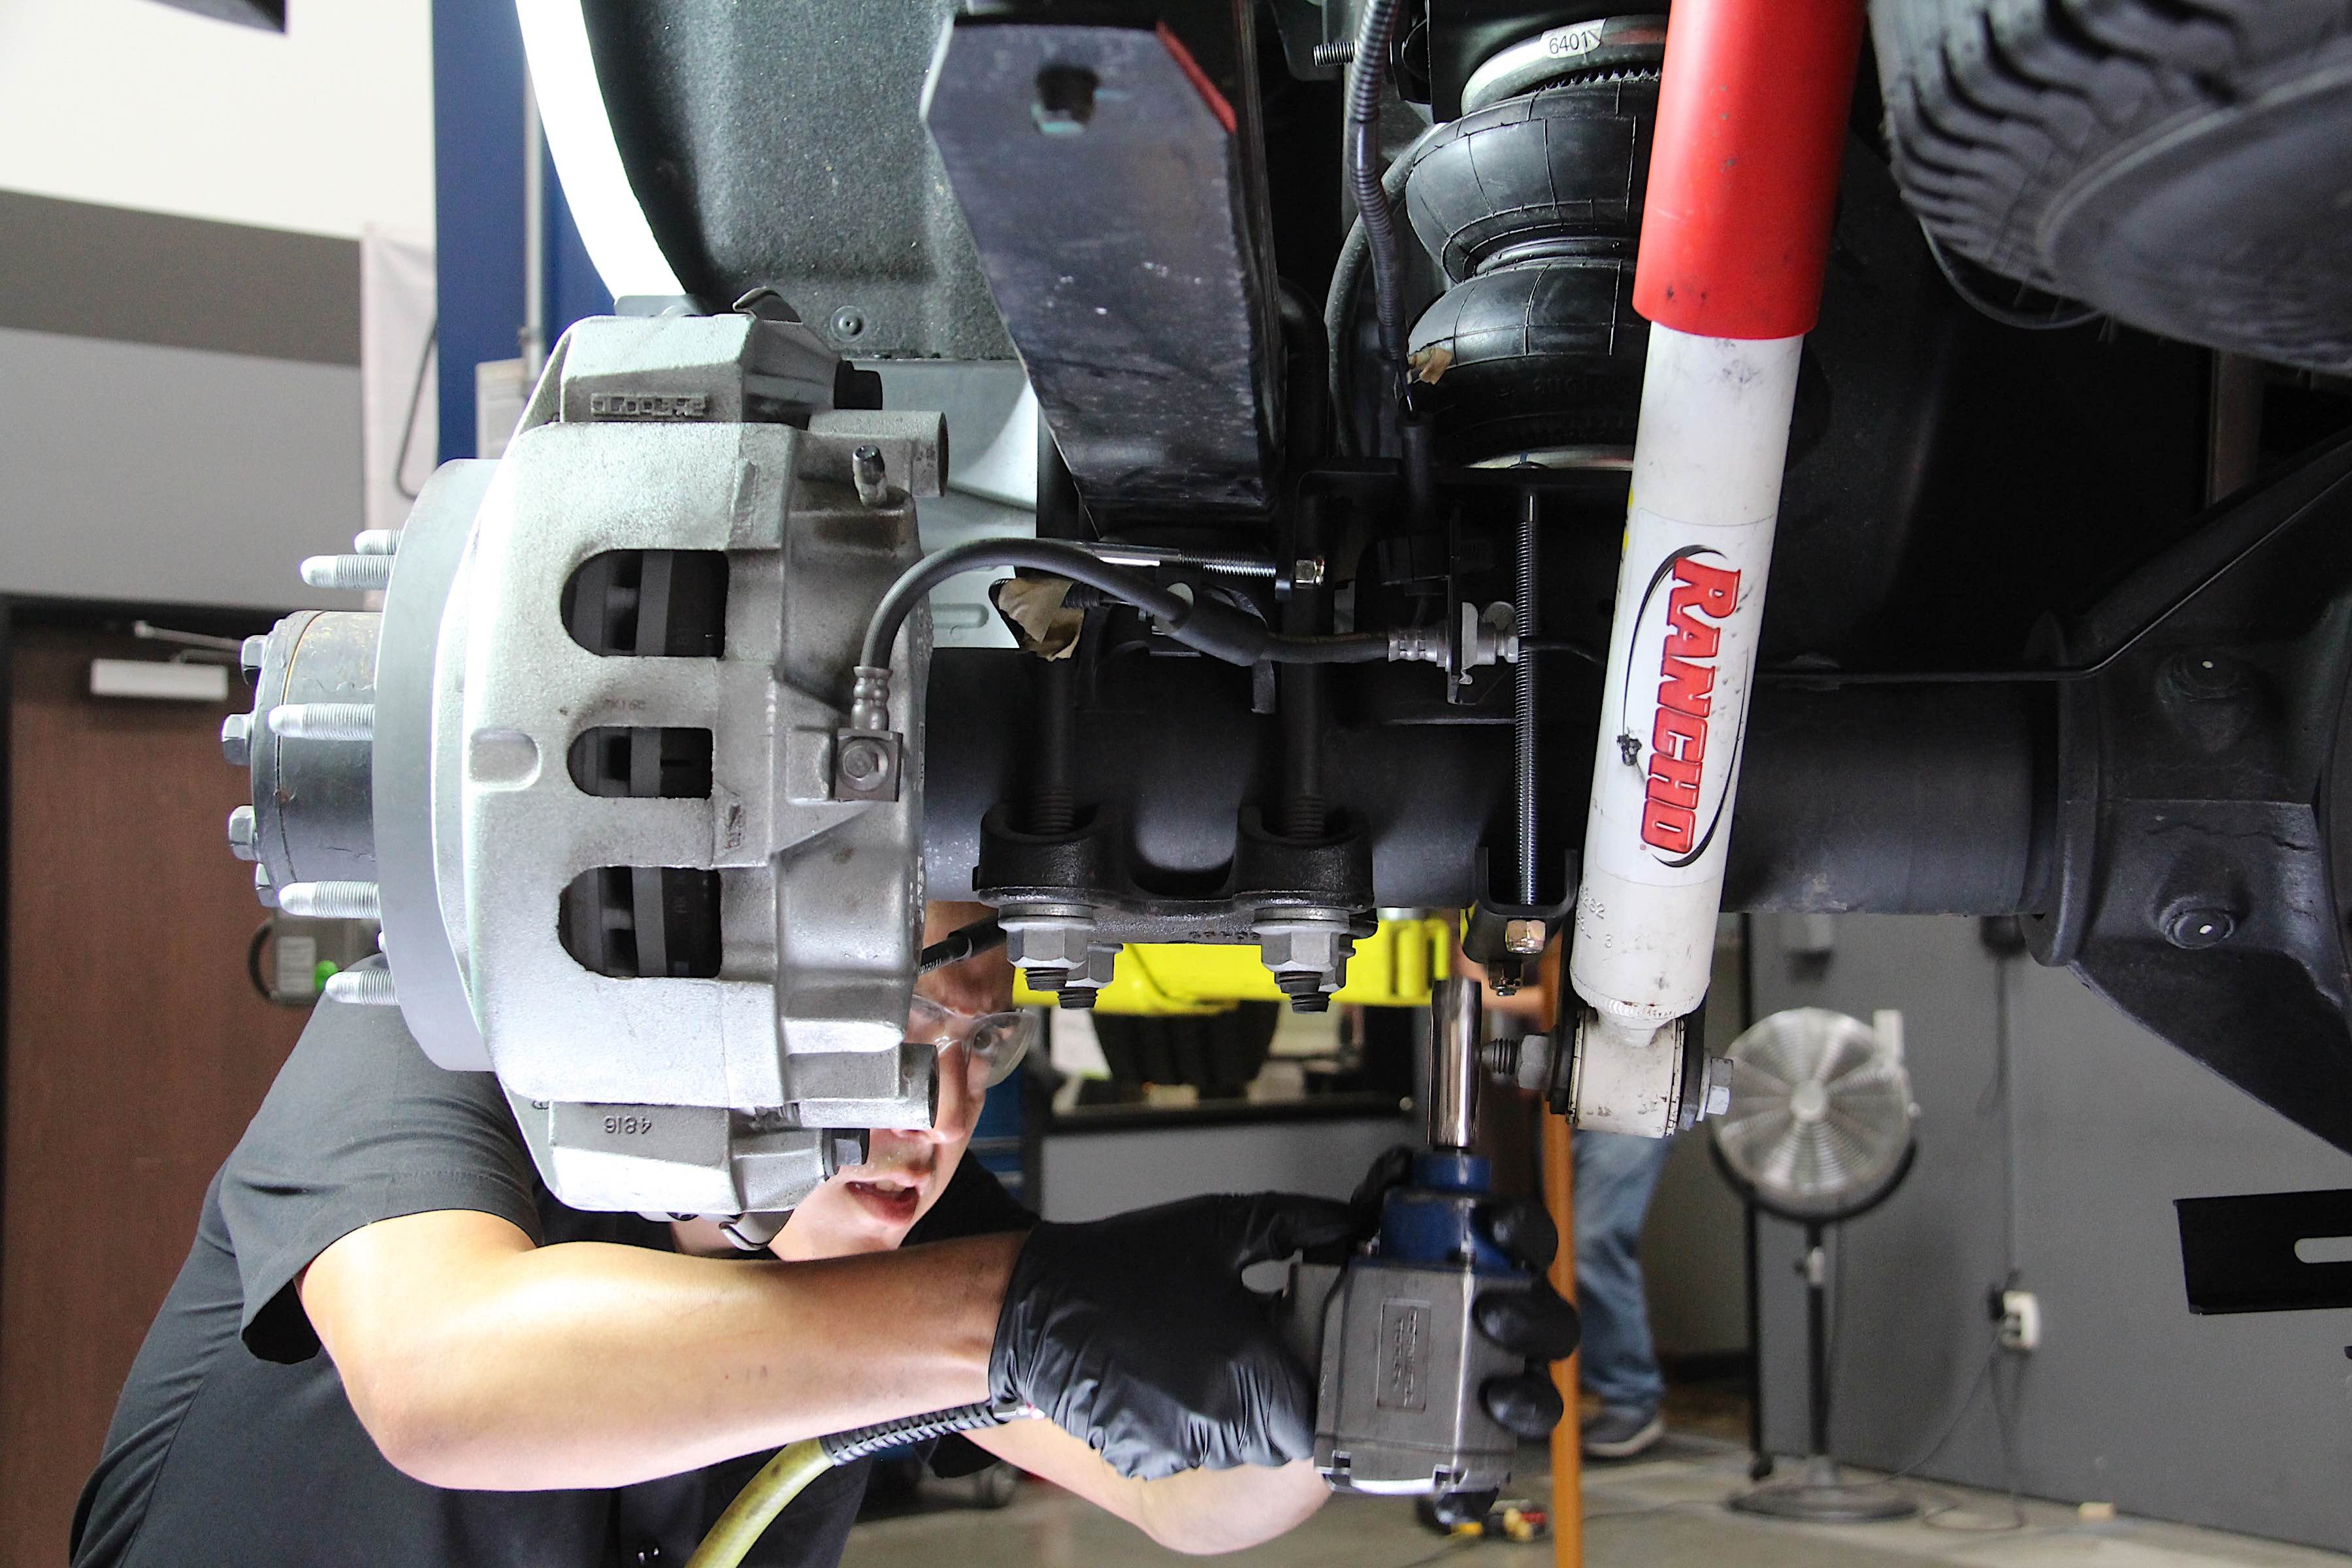
Bolting up the upper and lower brackets situated the air spring where it needed to be.
Next, we took to securing the lower bracket to the axle housing. Using a bail clamp and nylock nuts, we secured the bracket. We felt around the circumference of the spring to make sure there were no contact points that could possibly scar or puncture it. Then we took carriage bolts and an axle strap bracket, securing the assembly from below.
Now it was time to take care of the air line tube. We matched the ends to each other and made a perfect cut in the middle, and then mocked up both sides for the left and right-side air springs. We opted to have the tubing route to inflation valves poking out of the license plate mounts, as they would be easily accessible and right next to each other. The tubing was pressed into the fittings and inflation valves, and then given thermal shields and zip ties where necessary.

A heat shield on the passenger-side air spring prevents exhaust from cooking the air spring.
After double-checking everything, we were ready to test out the system. We took a shop air supply and inflated each bag to 70 psi. We then took a bottle of soapy water and sprayed it on the fittings and inflation valves, where leaks were most likely to occur. The bubbles calmly dissipated over time instead of growing and bursting, indicating that we had zero leaks. And just like that, the job was done.

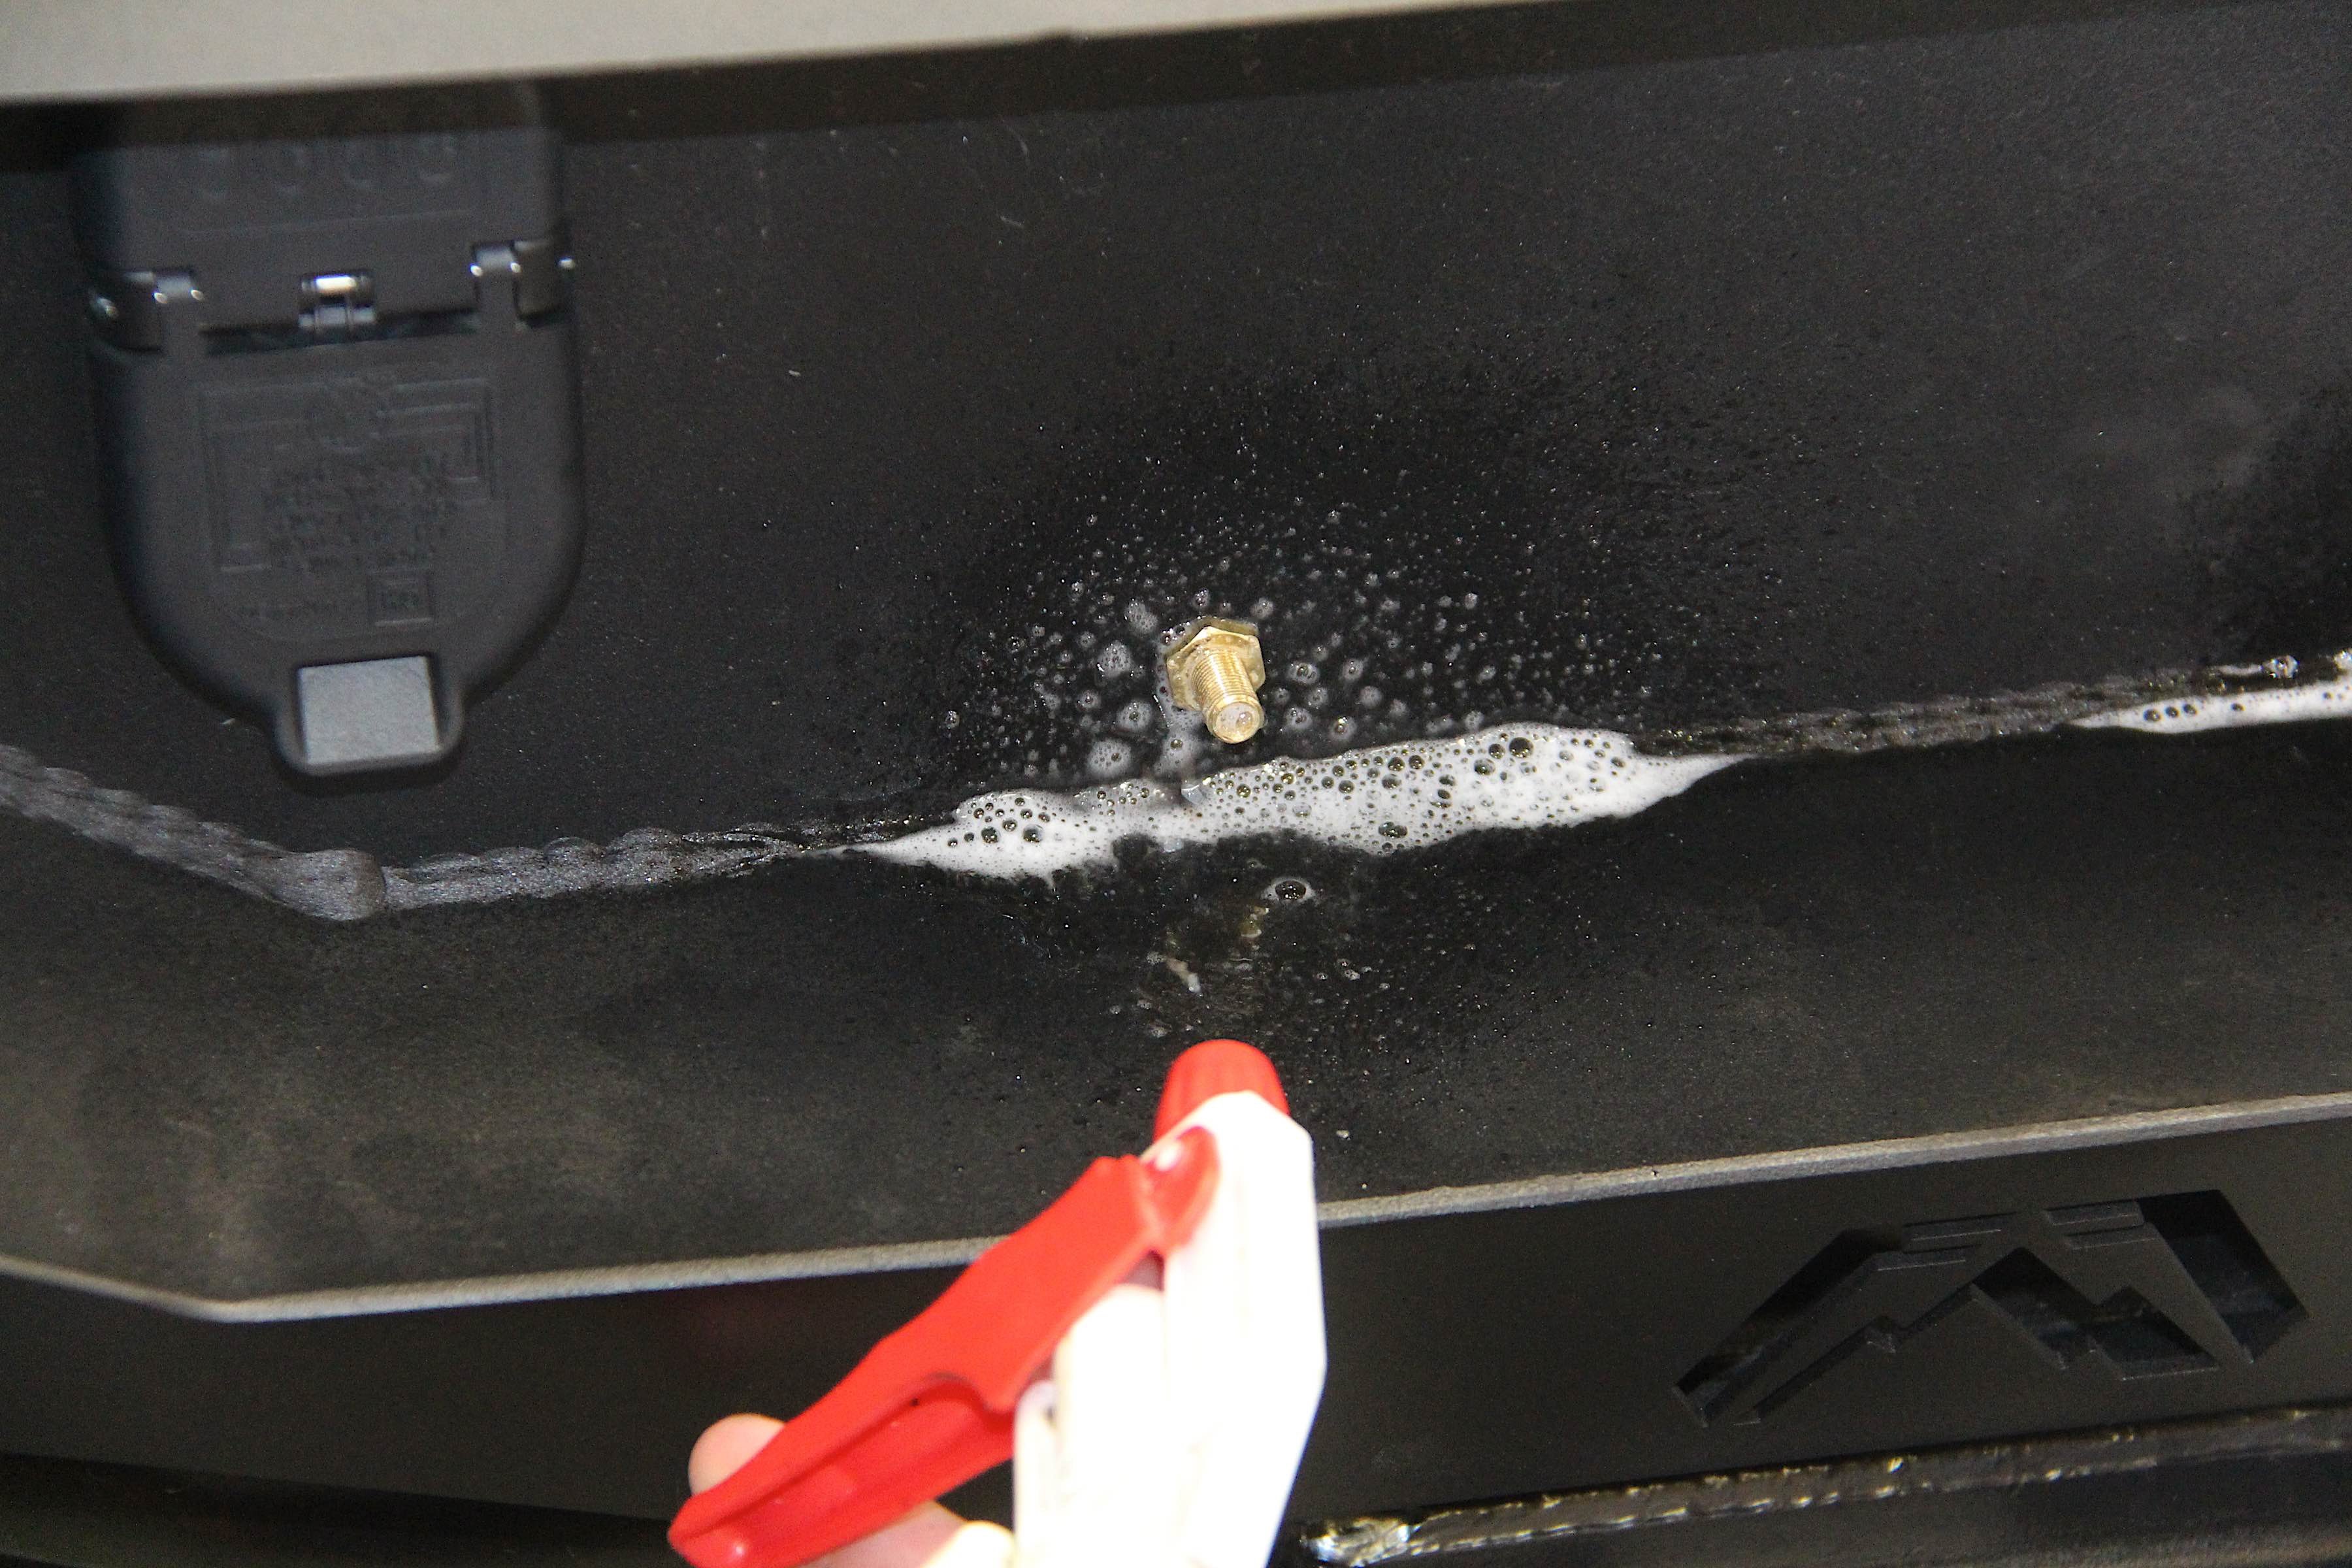
After the thermal sleeves went on and the air line tubes were fitted on, we inflated the springs to 70 psi and sprayed the valves and fittings with soapy water. The soapy water showed no sign of leaks, so we were good to go.
Phase 1 Complete
So concludes Phase 1. We’ve gotten the suspension system figured out, and made preparations for bigger wheels and tires. Those will be coming soon, and in the meantime, we have a slick truck that’s looking and feeling tougher than ever.
Fab Fours’ bumpers and side steps beefed up the exterior of the truck and made it stand out from the crowd. What’s more, it’s got secret weapons in the form of the MaxTrac torsion keys and Firestone air springs, and those will be very helpful for towing down the road.
We’re excited to see how this Duramax truck continues to evolve. Very soon, we’ll be installing more products from top-tier aftermarket companies, and seeing just how far we can get on the way to peak performance. In the meantime, be sure to check out Firestone Ride-Rite, MaxTrac Suspension, and Fab Fours online.
If you would like to read about the rest of our upgrades to this hauler, you can click here to see part 2.