

With a project name like Murderado, it is only fitting that you have a stance to match the aggressive name. Project Murderado is our 2013 Chevrolet Silverado that we are turning into the ultimate four-wheel drive overlanding rig.
To be prepared for the trail and all the obstacles that one may encounter, it only makes sense to lift the vehicle and give the truck new wheels and tires. We turned to our friends at Skyjacker, and went with their 6-inch lift kit for the 2007 to 2013 Silverado (PN C7661PK-M).

Tearing It Apart
The install cannot get started with the wheels on the ground, so we pulled the truck into our shop and got it on our Bendpak lift.

With the truck in the air, it was time to disassemble the front and rear suspension to make room for the new lift. On this install, we decided that it would be better to start on the rear of the truck and knock out the easy part of the installation. The lift kit that would be going on the truck was going to use lift blocks to space the factory springs from the rear axle.
The kit supplied new U-bolts and a bracket to relocate the rear brake lines since there was no extended brake line included. On our kit, we opted for the upgraded Skyjacker M95 rear shocks, which would give us extra dampening on the trail.


Above: The rear of the truck received lift blocks as well as new U-bolts. Below: New Skyjacker M95 shocks provide extra dampening both on and off-road.
With the shocks, blocks, and bracket installed, the rear of the truck was complete, and it was time to get more involved with the front suspension. Our truck has four-wheel-drive, so we would be lowering the front differential to keep CV angles correct.


Everything is stripped off both sides of the the front of the truck. Some of the factory parts would be reused along with most of the hardware.
To install the new lift spindles, everything had to be removed from the truck to provide access and make modifications — including upper control arms, factory spindle, lower control arms, axles, swaybar, and outer tie rods.

The front differential needs to be modified to clear when it is at its lower location.
With both sides of the truck looking naked, we moved to the front differential. We had to remove the factory rear crossmember to allow us to drop the case completely out of the truck. It was also necessary to modify the passenger side differential pad for clearance. To do this, we needed to measure from the backside of the differential mount bolt location toward the rear of the pad. Marking a line at 5/8-inch, it was time to cut the pad using a grinder and cutoff wheel.
Once that was cut and the grinder was out, more cutting had to be done. Cutting the driver side framerail where the OEM rear crossmember sat was required for clearancing since the differential would be at a lower location.

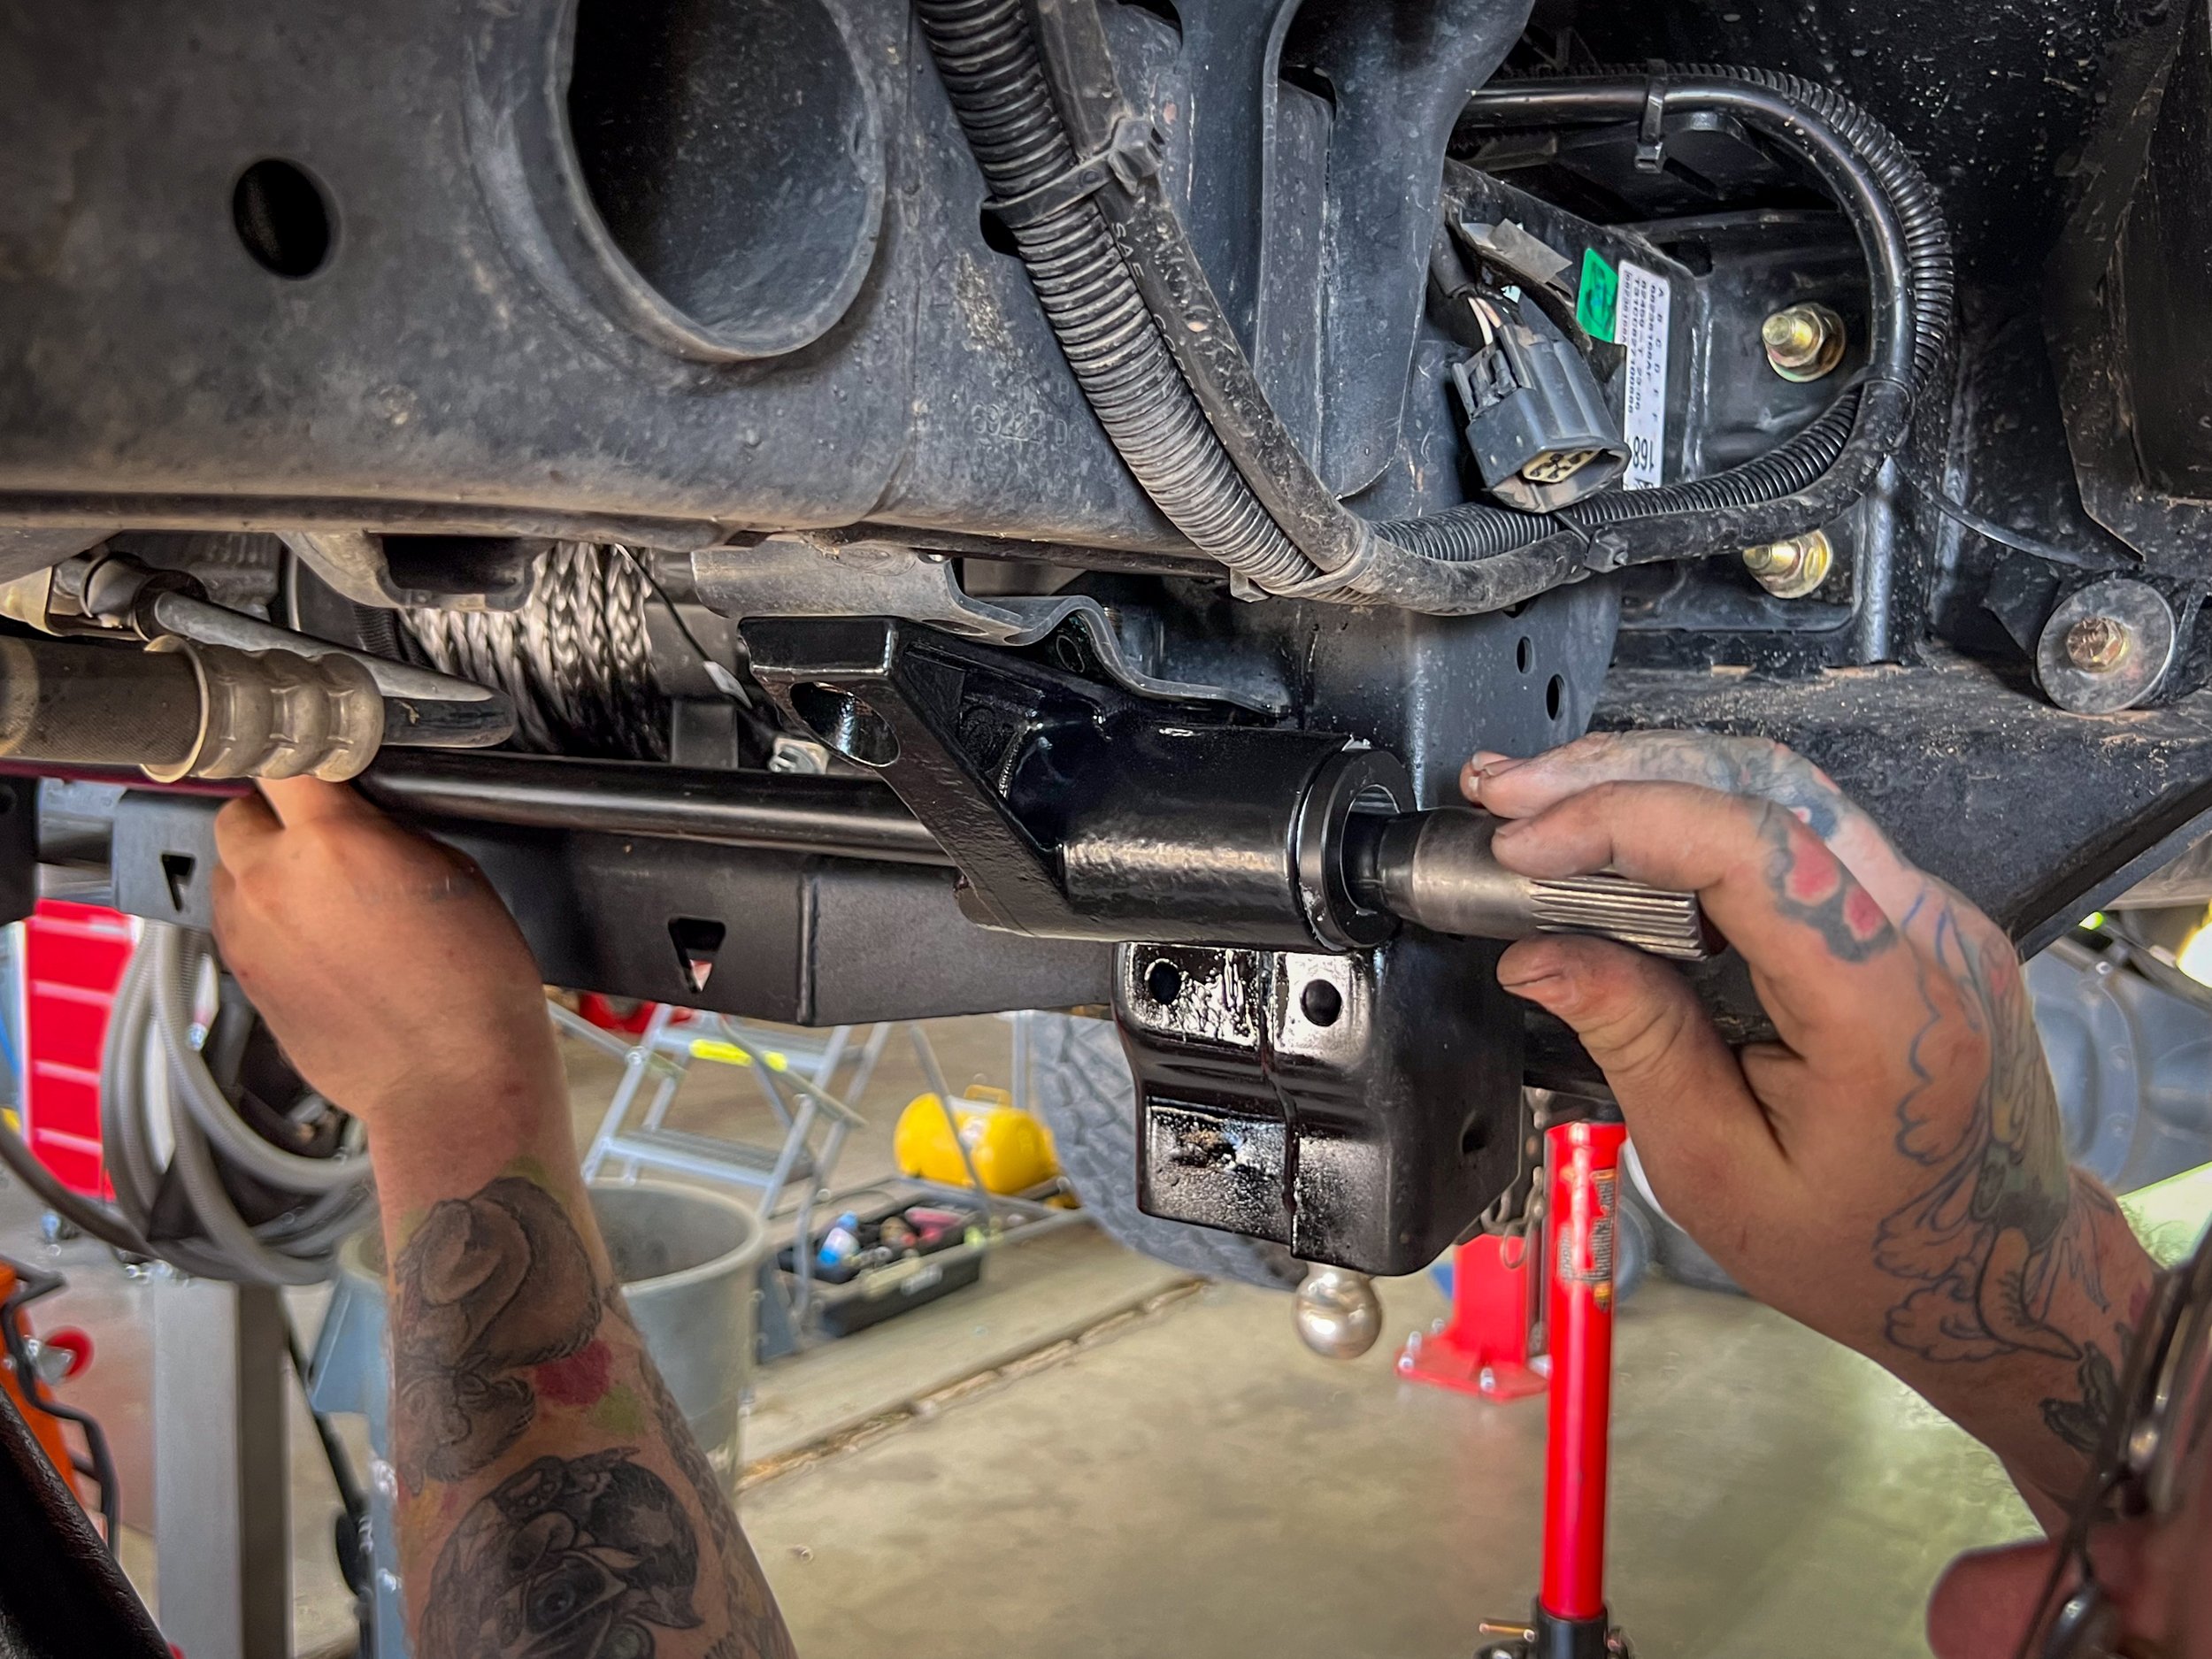
Before installing the new Skyjacker crossmembers, the front differential is placed back into the truck with new brackets. Once in, the new crossmembers can be installed with the anti-torque arm.

Trimming of the factory mounts needed to be done to clear the new crossmembers.
Protection of the underside of the truck is important, and to address this, Skyjacker includes a front differential skidplate. This part was a little tricky working in tight confines, but we used small O-rings to hold the bolts in place while lifting up the plate.
The next step included putting the factory control arms back in with the new taller spindle. Everything goes back in like it came out by reusing the factory hardware. The kit came with new struts that would reuse the factory spring and mounting plate.
There are three snap-ring grooves located on the new Skyjacker strut body. The ring is installed in the middle groove when shipped, which will yield 6 inches of lift. The upper groove is only to be used when more than 6 inches of lift is desired, but if aftermarket accessories have been added that weigh the front end down more than 6 inches of lift will not occur. The lower ring can be used if you would like to keep the OEM rake.


Above: The new struts have three groves that allow for different ride heights. Below: We swapped over the factory coils and used the groove that gave us the tallest amount of lift.
Before installing the factory hub and brakes, the dust shield required trimming for proper brake caliper fitment. But the cutting was not over yet, as we had to cut the OEM tie rods by a half-inch. The new spindle pushes the mounting location in, and without cutting the tie rods, the truck could not be properly aligned.


Both the inner and outer tie rods need to be cut for the truck to align correctly.
Skyjacker’s new ABS line bracket was installed along with the new longer brake lines to complete the install. With everything torqued to their specifications, it was time to install the wheels and tires.
In keeping with the blacked-out theme, we went with Dick Cepek Matrix 17-inch wheels and 35×12.5R17 Extreme Country mud terrain tires. We checked clearance on the tires and had to trim back the front bumper and fenderwell liner to clear them. With everything buttoned up, it was off to the alignment shop to get it straight before we hit the dirt to test the kit.

Technically Savvy
As passionate enthusiasts, we are always wondering what goes into the products we put on our vehicles. We had the chance to find out more about what makes this kit the right fit for our project when we spoke with Josh Cooper over at Skyjacker.

The whole kit and all of its components.
We needed to know how this kit would handle the abuse on the trail, and make sure that it would live up to the beating we would give it. Cooper told us, “The materials we used in this lift kit are powder coated 3/16- and 1/4-inch pickled and oiled steel plate. Grade 8 hardware is included with our kits to complete the installation. This kit allows for optional M95 monotube shocks with application-specific valving and three-stage wiper seal that work both on and off-road.”

A comparison between the factory spindle and the larger Skyjacker spindle.
Manufacturer testing is important, with today’s technology products can easily be drawn on the computer, but it is the testing in the field that allows them to know how the final product will handle.
This kit’s improved ground clearance helps out on the trail. – Josh Cooper

“The design of this kit kept comfort in mind for the daily driver and something that the weekend warrior can go out and have fun with,” Cooper explained.
We feel pretty confident that we have selected the right kit for our Silverado and its ultimate goal of being an overlanding weekend warrior. Our truck will utilize every feature this kit has to offer off the grid.

Final Thoughts
This kit gave us the look we were after when we started this project, and allowed us to clear our 35-inch Dick Cepek Extreme Country mud terrain tires. It did come with the lift blocks in the rear, but this is something we can look at upgrading down the road.


The truck out doing what it was made to do.
The added weight of the overlanding gear will need additional support in the rear of the truck. Either way, as the truck sits, it is ready to hit the trail and go over anything in its way, and the increased ground clearance allows us to easily climb on rocks without scraping the bottom of the truck.
The truck drives exceptionally well both on- and off-road. We picked up a friend, and well into our drive, he asked if we had lifted it. When he had found out we had just completed the modification, he was amazed at the ride quality.
We spoke with the Murderado’s owner, Sean Goude, to get his feedback on how the truck drives after the lift, “It is a night and day difference. I was most impressed with how the shocks handled the washboard roads. Those roads used to make your teeth rattle, but now they soak up every little bump.”


Before and after shots of the truck. It finally has a look to back up its name.
“The truck was very stiff before and feels a lot softer on road as well. The kit uses the factory front and rear springs so I know it is the shocks that are making the ride that much more comfortable,” Sean finished telling us with a smile.
Stay tuned for more updates as we continue with adding a bed cap, fenders, and more on Project Murderado. Have you made additions to your overlanding vehicle? Tell us in the comments below.

