 [1]
[1]
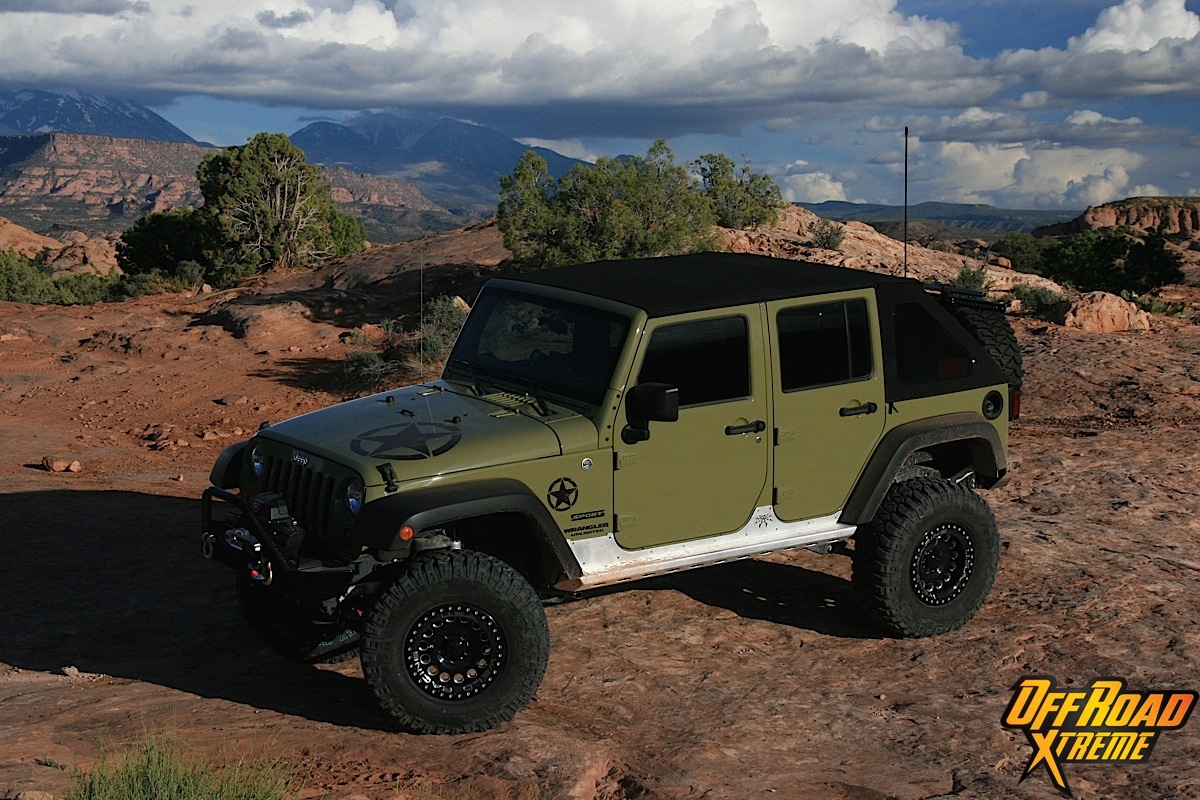
Project Sgt. Rocker [2], our favorite Commando Green Jeep [3] Wrangler JKU, has come a long way since it was first placed on assignment. Since then, it’s undergone changes, both overt and unseen. It received a sweet graphics makeover from Extreme Terrain [4], giving it a whole new look; a luxurious new soft top from Bestop [5] transforming it, keeping the harsh weather out and the measured cool or heat in; and an AIRAID [6] SynthaMax cold air intake system allowing its engine to breath easier and boost power output.
For this next phase of its build, Sarge is to receive a set of J.E. Reel Driveline [7] heavy duty front and rear driveshafts. Drivelines are the link between the powertrain and drivetrain of a four-wheel drive vehicle. They are an integral component that must be able to handle the stress and strain of the rugged duty placed upon a Jeep, pickup truck, or SUV in an off-road situation.
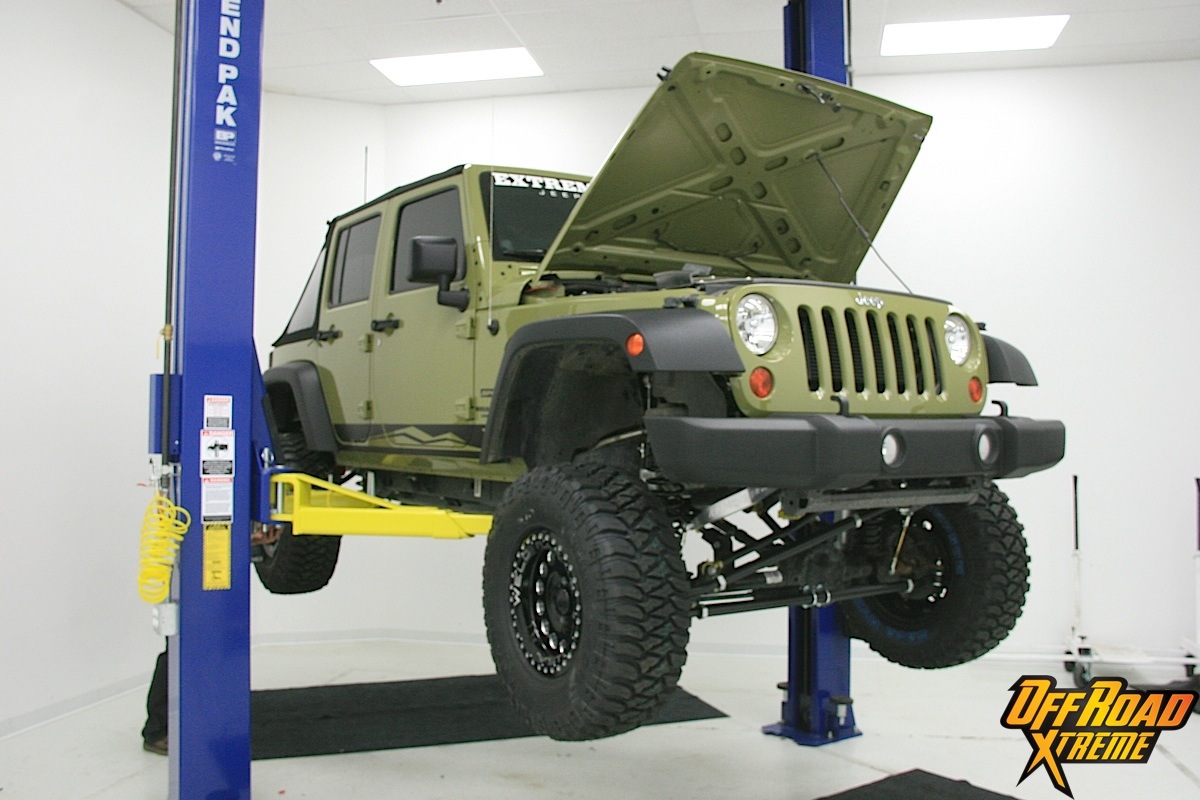 [8]
[8]Project Sgt. Rocker was placed on a lift for the J.E. Reel driveline installation.
During normal highway driving situations, under average loads and linear constant-velocity joint angles, stock (OE) drivelines will perform satisfactorily. Things change when those same OE drivelines are subjected to acute operating angles (such as when a vehicle is lifted with a suspension kit).
The pressures from modifications such as larger tires, increased power output, as well as the stop-and-go action encountered when tires get thrashed through harsh or rocky terrain also create a demand for stronger, more durable drivelines that can handle the abuse of off-road driving. A set of custom drivelines such as those available from J. E. Reel can also better handle the increase in wheel/axle travel and working angles brought on by a suspension lift.
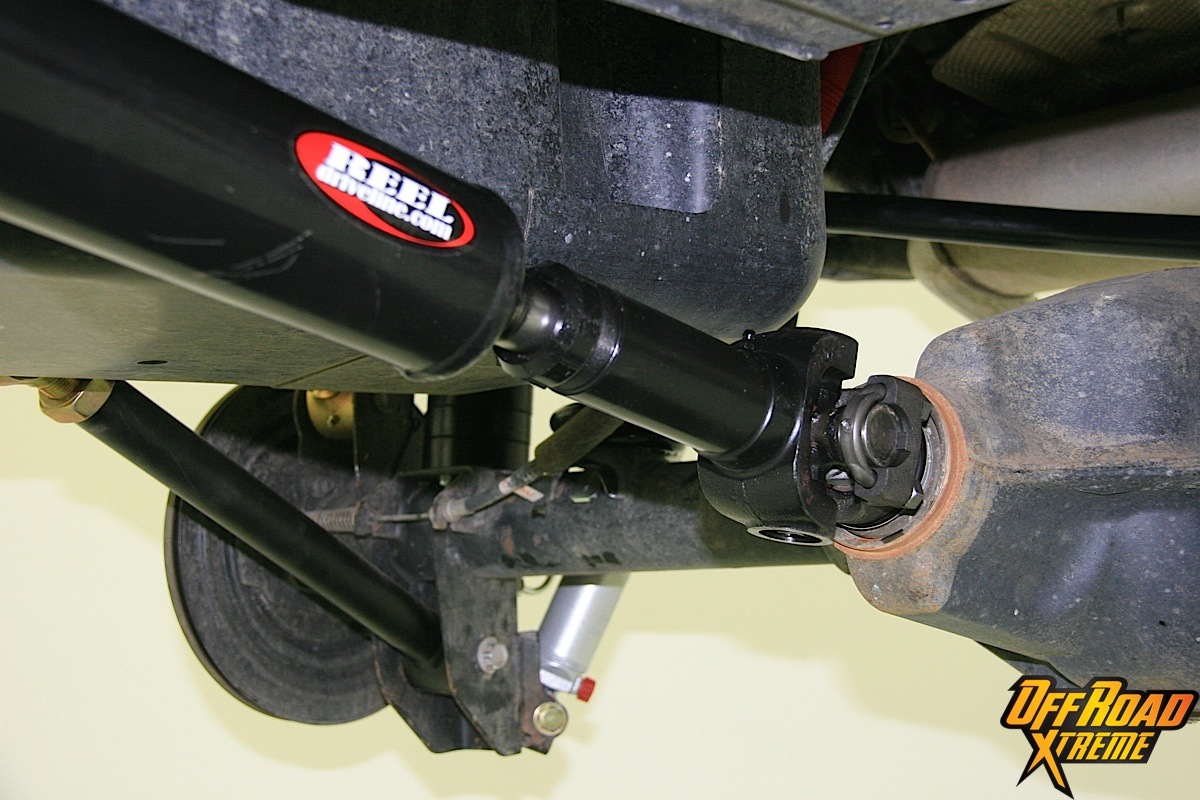
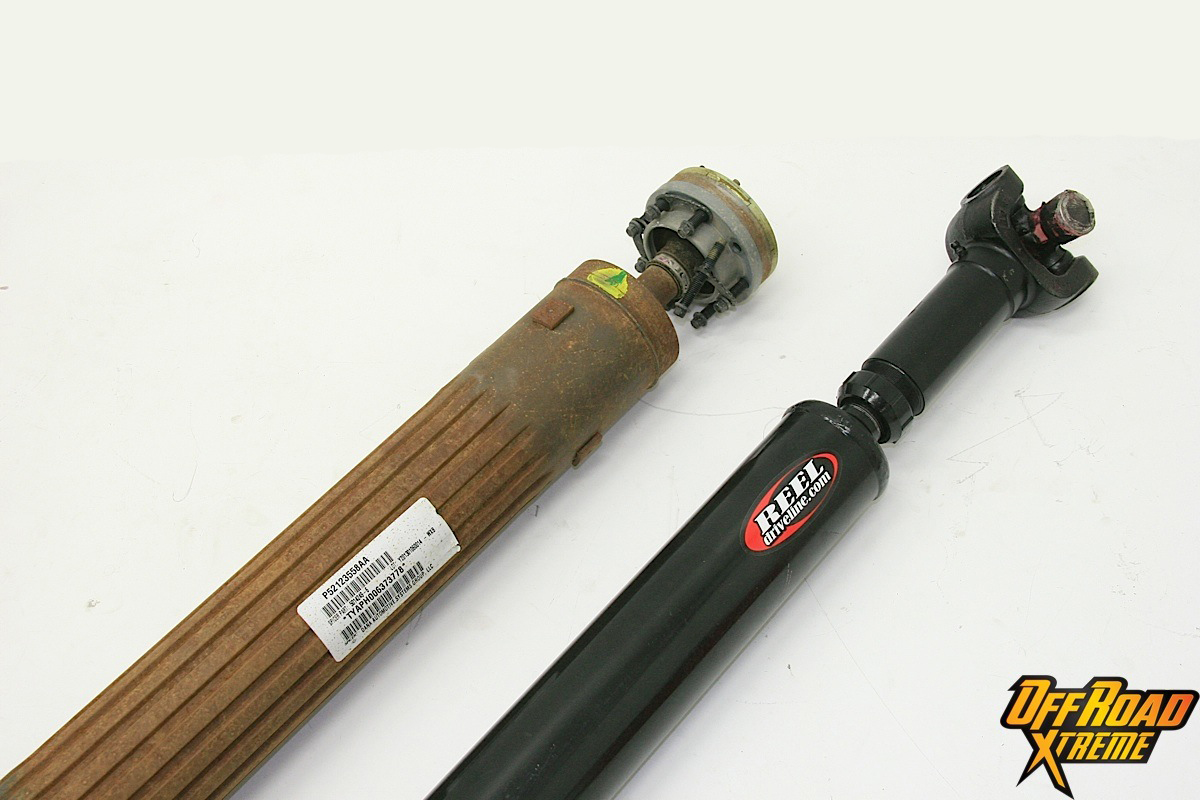 [9]
[9]The J.E. Reel driveshaft (right), while stronger, is noticeably smaller in overall diameter than the stock driveshaft (left). This permits the Reel driveshaft to be used on Jeeps with lifts between 2.5-4.5 inches, free and clear of the exhaust system and other components, and still have greater articulation.
The J.E. Reel Difference
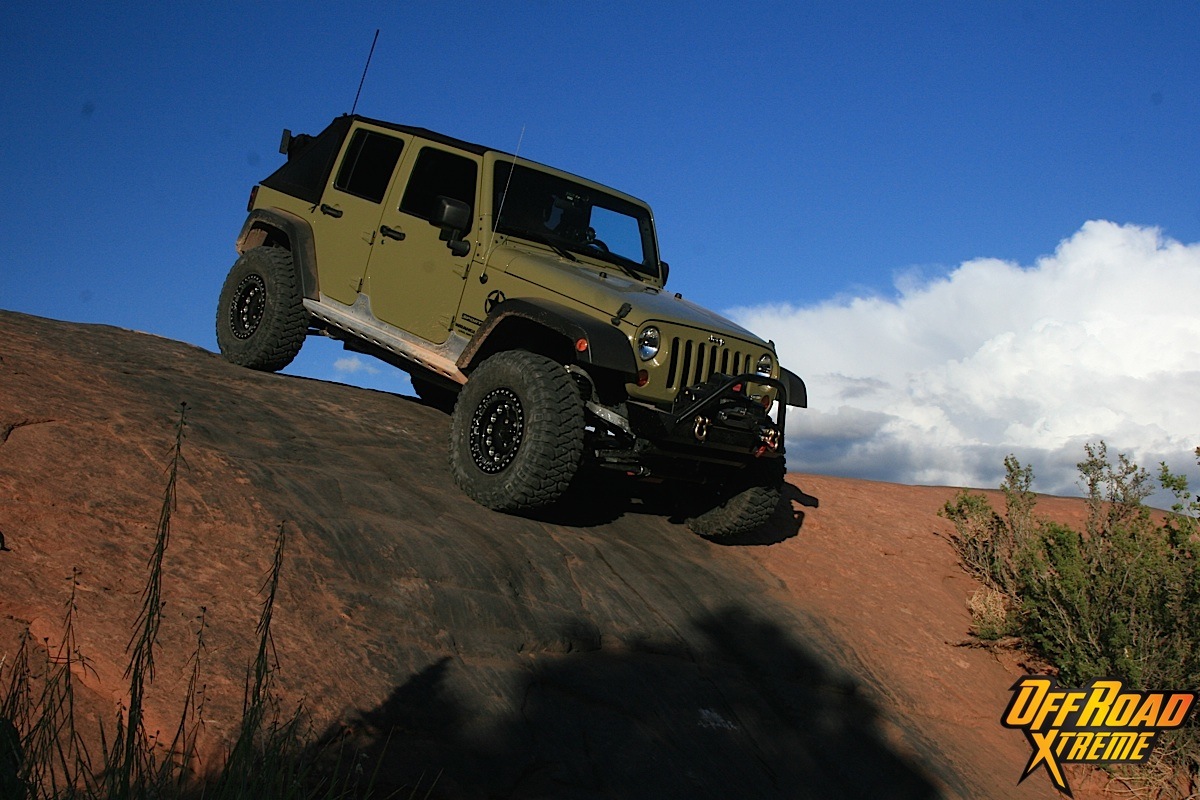
When it came to improving the performance of Sgt. Rocker, one of our targets for this project was to make it into a good solid rock crawler. Since rock crawling, at its core, is all about negotiating jagged earth at awkward angles on all four tires, it only made sense to find a testing ground such as Moab, Utah.
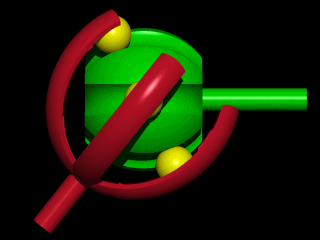 [10]
[10]The Rzeppa-type CV joint (illustrated above) is suitable for on-road use, but is prone to contamination and subsequent wear and tear, and can be unreliable for extreme off-roading.
It just so happened that the annual 2014 Easter Jeep Safari was taking place a couple of weeks after our planned installation of the upgraded J.E. Reel drivelines and the road trip was set.
The trails of Moab, rated from 1 to 10, offer drivers knowledge of what to expect before they reach the gate. Since Sgt. Rocker had to pull double-duty as a daily driver and rock crawler, we aimed to have the Jeep capable of handling Level Four trails. The Red Rock 4 Wheelers, the coordinating body behind the Easter Jeep Safari [11], describes these Level Four trails as follows:
“Road surface consisting of loose rock, dirt, and sand with some slickrock surfaces. Erosion, washes, gulches and rock steps no higher than 12 inches. 4WD is recommended with good ground clearance and driving skills. Aggressive tires and limited slip would be a plus. Water and mud is possible.”
Jim Reel, founder and owner of J.E. Reel Driveline, was on hand to explain why the stock driveline configuration would not pass muster, “On a [lifted] stock 2012-and-up driveline, the front driveshaft rubs the exhaust.”
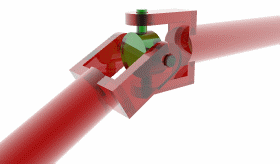 [12]
[12]A universal joint (illustrated above) is far more trustworthy in the off-roading world for its simplicity and inherent ruggedness.
Reel continued, “Our design, although stronger, is a smaller diameter that never touches the exhaust. We use a stronger tube that’s better constructed to deal with harsh terrain.”
We use a stronger tube that’s better constructed to deal with harsh terrain. – Jim Reel.

Rzeppa joints, as you may or may not know, are what many vehicles use on the road today. Invented by Alfred H. Rzeppa in 1926 for the Ford Motor Company, the design is essentially a semi-spherical roller bearing that can articulate up to 54 degrees.
What it does really well for on-road use does not directly translate to off-road use, as the rubber boot that protects the joint can crack and allow intrusion from contaminants such as water and dirt, which will eventually wear out the joint to the point of destruction.
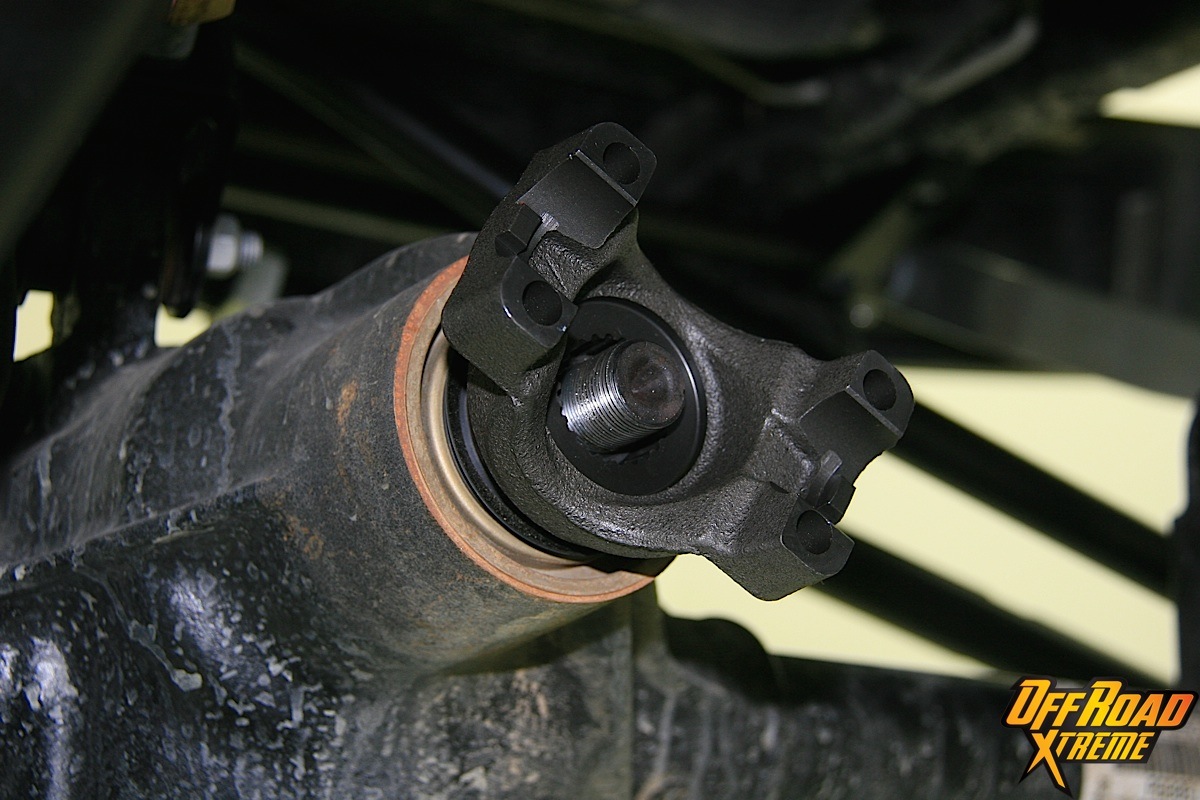 [13]
[13]Sturdy u-joint yokes such as this found in the J.E. Reel kit replace the stock differential flanges.
“Now, the Rzeppa joint is generally smoother, but it doesn’t live very long out on the trail when you factor in all the side-to-side, up-and-down, back-and-forth motion,” said Reel. “The U-joint system is a lot tougher and can tolerate a lot more angle and abuse than a Rzeppa joint.”
The tubing in J.E. Reel driveshafts utilizes 1020 DOM, which we had ordered with the Canyon Crawler upgrade. This option offers up a larger, stronger spline and slip, Performance Dynamics [14] U-joints, as well as a 0.134-inch wall tube, adding additional rigidity and resilience that we felt Moab would demand. Meanwhile, the signature forged U-joints lent the kind of confidence that would keep us at ease while we sojourned the rocky landscape.
 [15]
[15]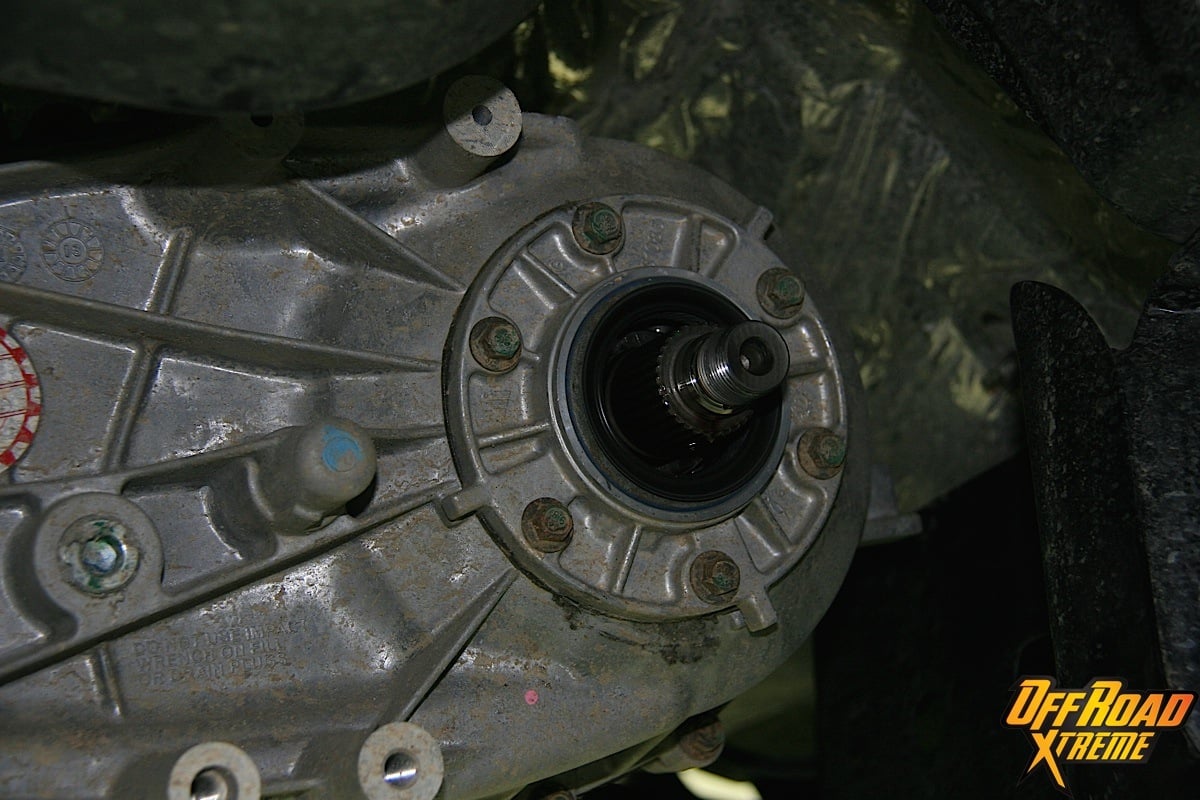 [16]
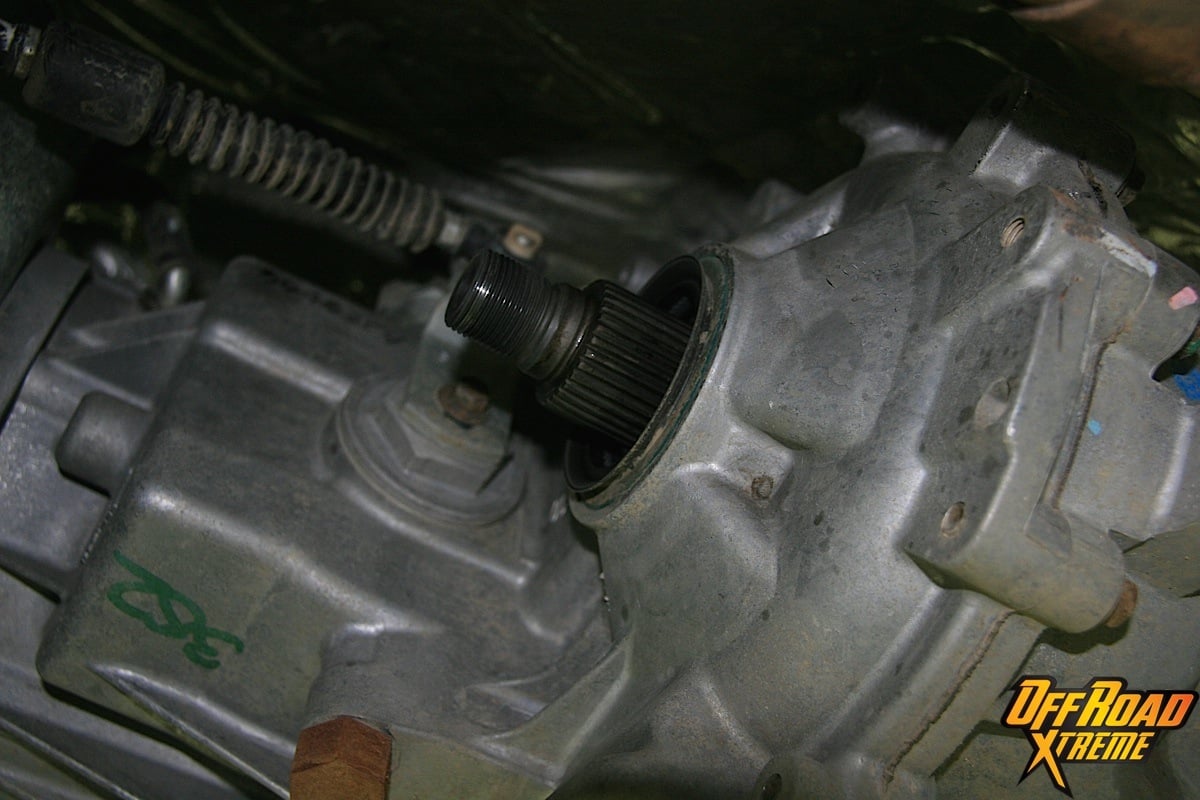
[16]
The stock yokes and yoke nuts of the transfer case have been removed.
The Installation
We started with situating the Wrangler on the two-post lift we would be using, and then went about removing all four wheels and tires, as well as any crossmembers blocking access to the driveshafts. Next, we had to remove the stock driveshafts, which unbolted easily, and then were pried out of their cages by way of a flathead screwdriver.
According to the instructions, our next step was to wedge the flathead between the inner brake pad and caliper piston of all four disc brakes, so as to allow free movement of the driveshafts and axles. We found this step to be unnecessary for our JKU, as everything was still in good shape.
 [17]
[17]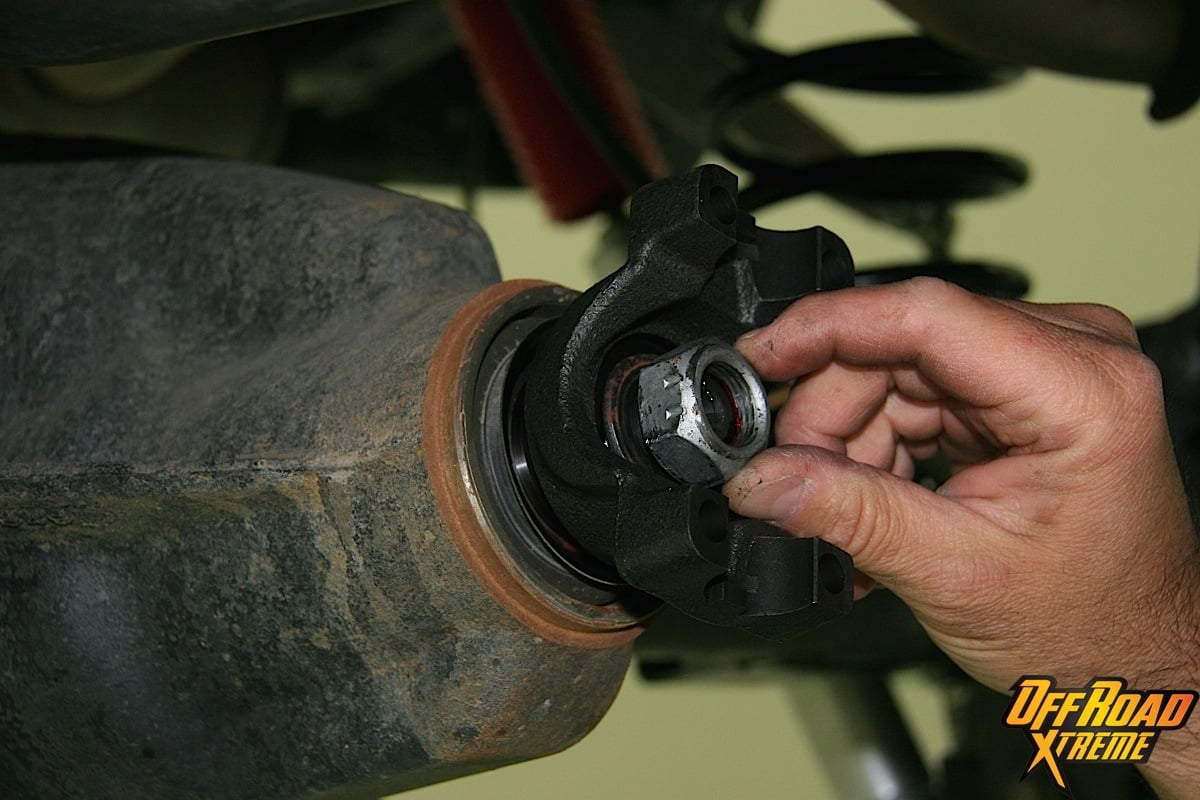 [18]
[18]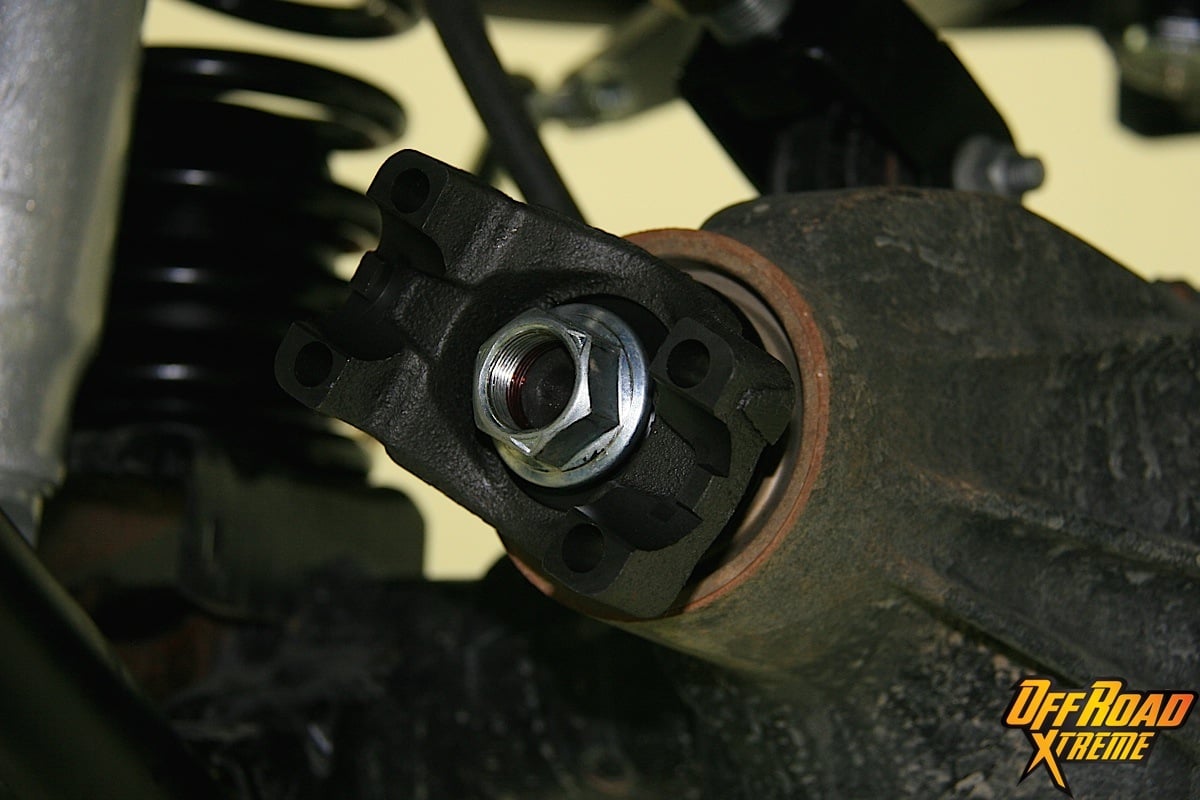 [19]
[19]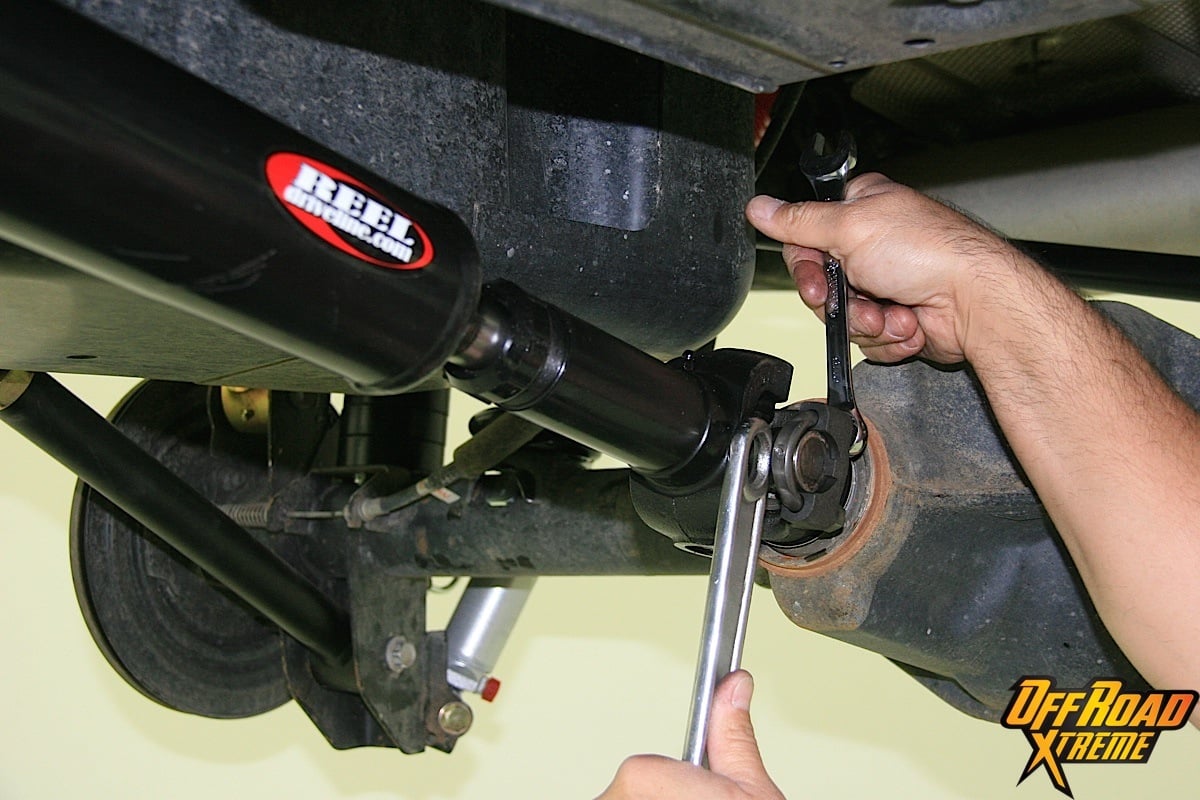 [20]
[20]
Clockwise from top left: The new rear output flange is installed on the transfer case; a new yoke nut is inserted onto the rear differential output flange and then tightened to its recommended torque rating; the front differential receives its new yoke and yoke nut; the handle of a tool is used to keep the driveline still while the hardware on the rear u-joints are tightened prior to final torquing.
Afterwards, we took off the transfer case’s front and rear yoke nuts and yokes, then replaced them with the new pinion yokes and nuts. We tossed the old dust shields into the trash and moved onto tightening the pinion nuts to torque specs; in this case, 160 f00t-pounds. The pinion rotating force was adjusted until it was five f00t-pounds more than it was originally.
We then uninstalled the transfer case yoke nuts and yokes, copying many of the same steps used in replacing the yokes on the front and rear differentials. We found the new yokes on the transfer case were properly machined to mate with the factory O-ring, taking care of that issue. Lastly, we tightened the yoke nut to 110 foot-pounds of torque.
 [21]
[21]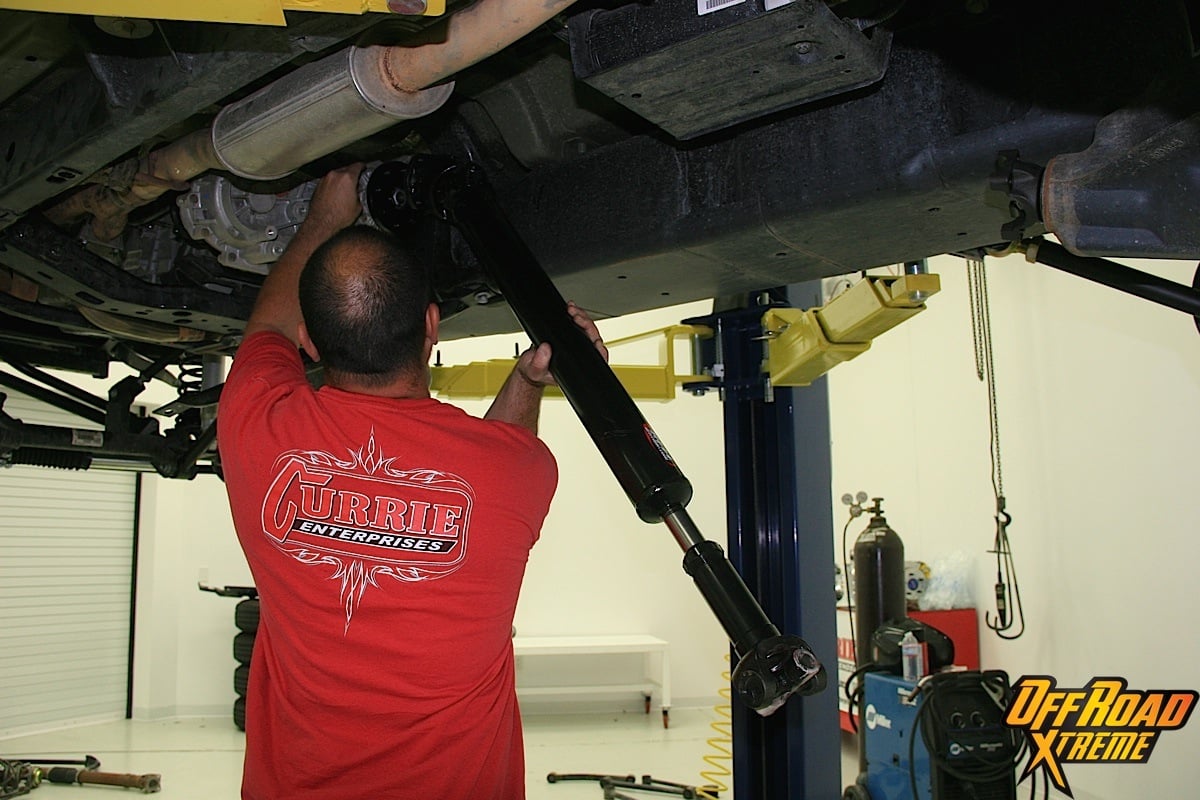 [22]
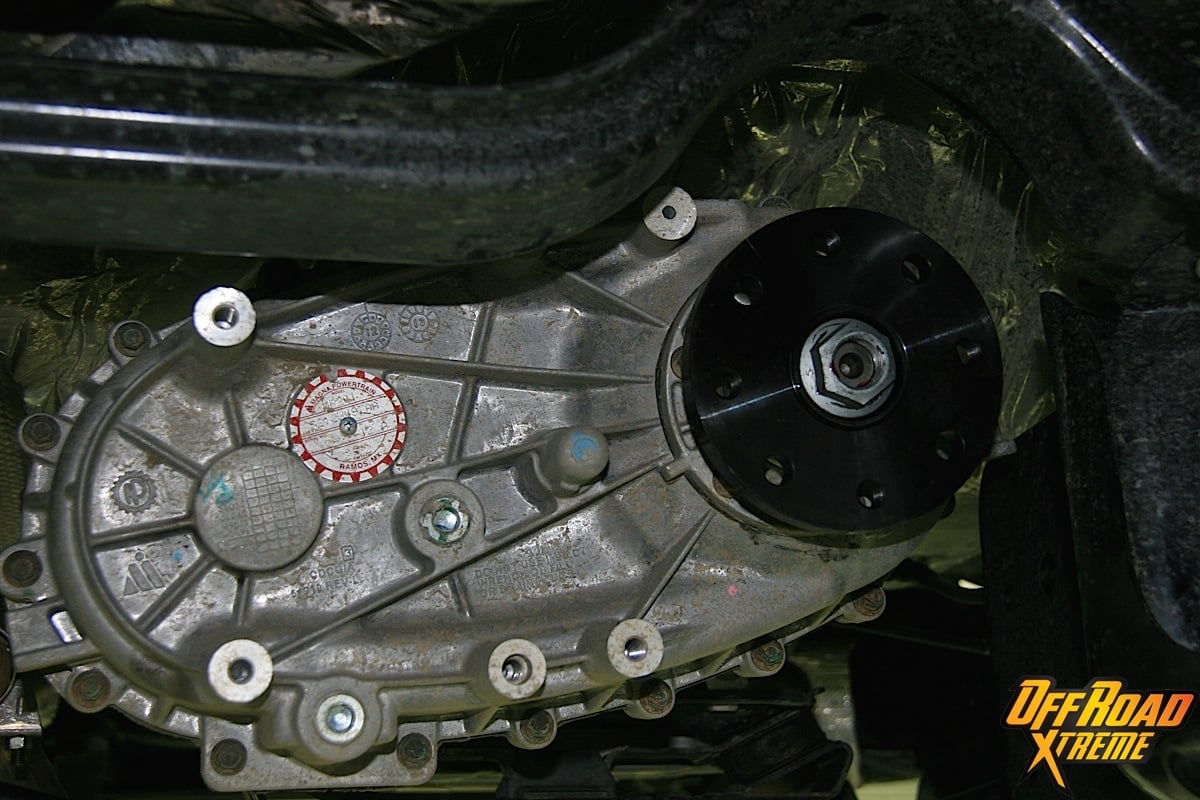
[22]
The front driveline was threaded over a pair of crossmembers (top right) to mate up to the transfer case. The CV-joint on the forward end of the rear driveline was hand tightened (top left) to its transfer case flange prior to final assembly with the rear differential.
With the differentials and transfer case sorted out, it was now time to address the new driveshafts. The built-in zerk fittings required a healthy dose of grease before we installed them in place using the supplied 12-point bolts.
Since these were the 1350 versions of the driveshafts, the torque specs were much higher than the stock replacement 1310 variety. The 12-point bolts were torqued to 50 foot-pounds, while the u-bolts were torqued to 12 foot-pounds. Just like that, we had our new driveshafts installed and ready to roll.
 [23]
[23]The rear driveline all buttoned up and ready to rock.
The Moab Trials
The final step was to get the crossmembers back in place, and it was case closed. Now it was off to Utah to see how well Sgt. Rocker would perform on the ruddy boulders of Moab. All this would have been for naught had we not gone to Moab and done some real-world testing of our own. We’re glad to report that not only did the driveshafts hold up, but they exceeded our expectations.
 [24]
[24]
 [25]With skills to match that of the quality put into these driveshafts, we were able to take Sgt. Rocker all over Moab with ease. On the rare occasions when we happened to strike a rock underneath, close inspection proved the driveline was intact and capable to continue on, keeping us mobile where others had fallen by the wayside.
The J.E. Reel Canyon Crawlers kept Sgt. Rocker “rock steady” on the trails during our Easter Jeep Safari adventures. If you would like to find out more about J.E. Reel and what it can do for your Jeep, go to the J.E. Reel website [26] or give the tech guys there a call at (909) 629-9002. Stay tuned to Off Road Xtreme [27] for more future updates of Project Sgt. Rocker!
 [28]
[28]